Swimming for Knee Pain

Knee pain is a common problem that can affect people of all ages and fitness levels. As it can significantly impact daily activities and general well-being, finding an effective solution is crucial. Swimming is an excellent low-impact exercise that can help manage and prevent knee pain. In this article, we will explore how understanding knee pain, learning swimming basics, practice water safety, and incorporating specific exercises for knee pain relief can help you get back on track and beat knee pain.

Understanding Knee Pain

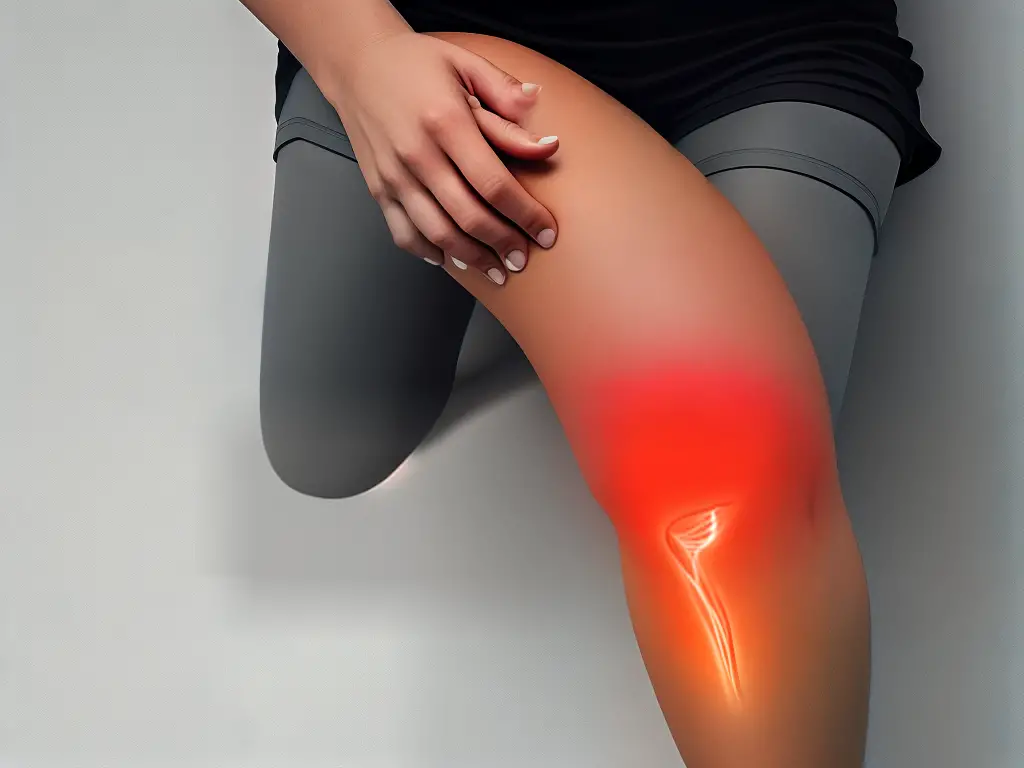
Knee pain is a common issue faced by adults, often impacting daily activities and overall health. It’s crucial to understand the causes and types of knee pain and learn how exercises like swimming can help manage and prevent it. In this guide, we’ll discuss the basics of knee pain and explore the benefits of swimming for alleviating discomfort and promoting overall health.

Understanding Knee Pain:

1. Causes of Knee Pain

Knee pain can result from various causes, including:

  • Injuries: Ligament sprains or tears, meniscus tears, or tendon injuries can all create knee pain.
  • Osteoarthritis: This degenerative condition results from wear-and-tear on the joint’s cartilage, causing pain and stiffness.
  • Rheumatoid arthritis: An autoimmune disease that causes inflammation in the joints, leading to pain and swelling.
  • Bursitis: Inflammation of the bursa, a fluid-filled sac that cushions the knee joint, can cause pain around the kneecap.

2. Types of Knee Pain

There are several types of knee pain, such as:

  • Sharp or stabbing pain: Usually caused by an injury or acute inflammation.
  • Dull, achy pain: Often a symptom of arthritis, bursitis or other chronic conditions.
  • Intermittent pain: Can be due to activity-related strain or injury, often worsening with activity and improving with rest.
  • Constant pain: May indicate a more serious underlying condition, such as severe arthritis or infection.

3. Impact on Daily Activities

Knee pain can significantly impact everyday life, limiting the ability to walk, climb stairs, sit, or stand comfortably. It may also hinder participation in sports and other recreational activities.

The Benefits of Exercise and Swimming for Knee Pain:

1. Exercise for Knee Pain Management

Regular exercise is essential for maintaining healthy joints and reducing knee pain. Exercise helps:

  • Strengthen the muscles around the knee: Stronger muscles provide better support to the knee joint and absorb shock.
  • Increase flexibility and range of motion: Improved flexibility helps prevent injuries and can reduce pain.
  • Maintain a healthy weight: Excess weight puts additional strain on joints, exacerbating knee pain.

2. Swimming as an Ideal Low-Impact Exercise

Swimming is a low-impact, full-body workout that offers several benefits for people with knee pain:

  • Buoyancy: Water supports body weight, reducing stress on the knees and other joints.
  • Resistance: Moving through water provides gentle resistance, helping to strengthen muscles without causing strain on the knee.
  • Flexibility: Swimming can help improve joint flexibility and range of motion, reducing the risk of injury.
  • Cardiovascular fitness: Swimming increases heart rate and promotes cardiovascular health, essential for overall health and well-being.

3. Swimming Techniques for Knee Pain Relief

It is critical to choose swimming techniques that minimize stress on the knees. Some suitable styles include:

  • Freestyle: Using a flutter kick while swimming freestyle can help reduce twisting and strain on the knees.
  • Backstroke: This stroke allows for a gentle flutter kick and minimizes rotation of the knee joint.
  • Kicking with a kickboard: Use a kickboard for support and practice flutter or dolphin kicks, which reduces stress on knees.

4. Precautions and Tips

Before starting any swimming program, consult a healthcare professional to ensure it is safe for your specific needs. Remember always to:

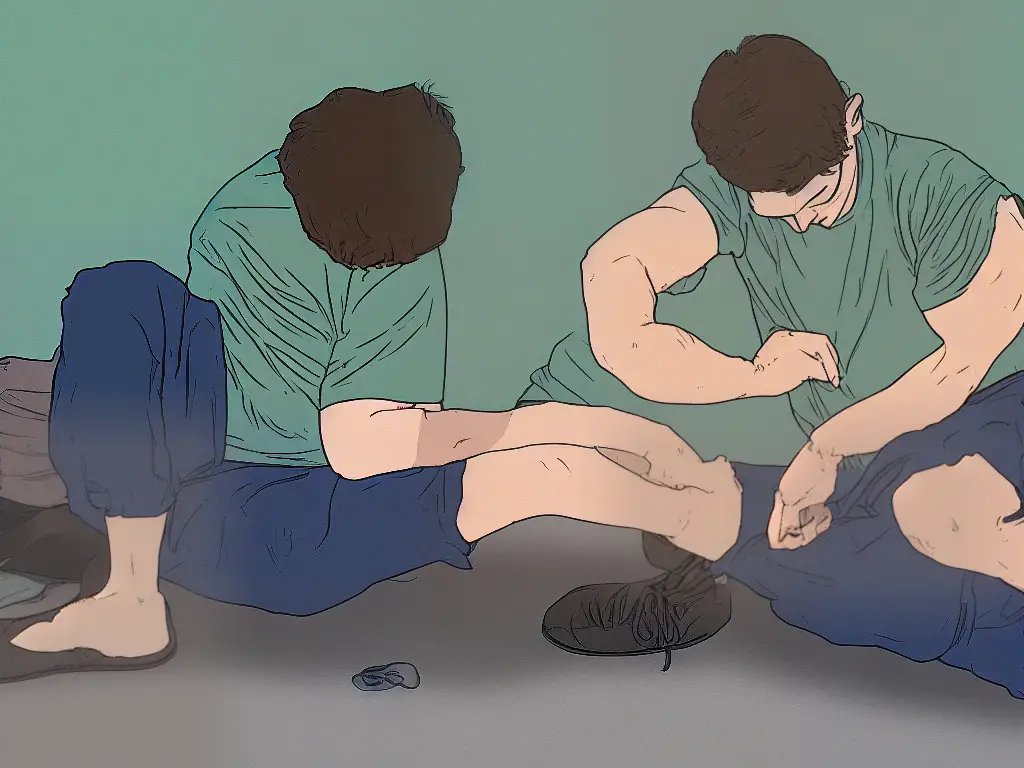
  • Warm up and stretch before entering the water: Engage in gentle stretching exercises for your legs and knees to help prevent injuries.
  • Begin slowly: Begin with short sessions of swimming and gradually increase duration and intensity as your strength and fitness improve.
  • Listen to your body: Stop any activity that increases knee pain or discomfort, and consult a healthcare professional if necessary.

Conclusion:

Understanding the causes and types of knee pain is the first step in managing and preventing discomfort. Incorporating low-impact exercises like swimming into your routine can help alleviate knee pain, increase strength and flexibility, and promote overall health. Always consult a healthcare professional before starting any exercise program and listen to your body to ensure the best results.
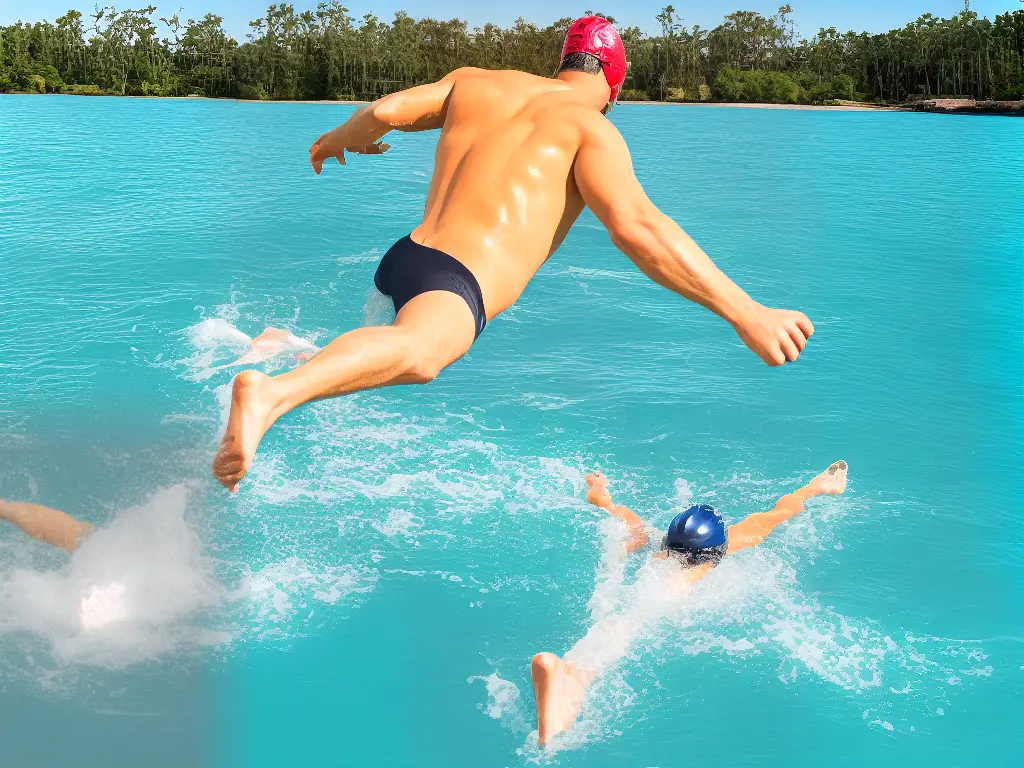
A cartoon illustration of a man swimming with the caption above saying 'Swimming for Knee Pain'

Swimming Basics

Swimming is an excellent low-impact activity for people with knee pain, as it allows you to exercise without putting additional pressure on your joints. Here are a few fundamental techniques for the freestyle, backstroke, breaststroke, and butterfly strokes, as well as breathing, body position, and overall support to help you feel more comfortable in the water.

1. Getting Comfortable in the Water:

  • Slowly enter the pool and get used to the water temperature.
  • Start by getting your face wet and blowing bubbles to get comfortable with breathing in and out while submerged.
  • Practice floating on your back and front with the help of a floatation device like a kickboard or pool noodle.

2. Breathing Techniques:

  • Inhale through your mouth before submerging your face in the water.
  • Exhale slowly through your nose or mouth while your face is under the water.
  • Only lift your head to inhale every few strokes or when you truly need a breath.
  • Practice bilateral breathing (breathing on both sides) to maintain proper balance while swimming.

3. Body Position:

  • Keep your body horizontal in the water with your head looking downwards.
  • Engage your core muscles to maintain a streamlined position.
  • Keep your legs close together and kick smoothly without bending your knees too much.

4. Freestyle (Front Crawl):

  • Kick your legs in a flutter kick while maintaining a streamlined position.
  • Use full arm strokes, reaching as far as you can in front of you and pulling the water back towards your hip.
  • Turn your head to the side to breathe as your arm recovers to its forward position.

5. Backstroke:

  • Float on your back with your arms resting at your sides, head looking upwards, and legs together.
  • Perform a flutter kick by moving your legs up and down, keeping your knees mostly straight.
  • Extend one arm straight back behind you, keeping your little finger entering the water first, then rotate your arm inward as you bring it back down towards your thigh.
  • Alternate arms, keeping a fluid motion and using the opposite arm to the kicking leg.

6. Breaststroke:

  • Keep your body horizontal with your arms and legs at your sides.
  • Perform a frog kick by bending your knees and bringing your feet toward your buttocks, then kick out and around in a circular motion to propel you forward.
  • Extend your arms forward, then pull your hands back towards your chest while keeping your head up to breathe.
  • Use your kick to help lift your head above the waterline, and then bring your head back down as you glide forward.

7. Butterfly:

  • Use a dolphin kick by moving your feet and legs together in an up-and-down undulating motion.
  • Perform a wing-shaped arm sweep by extending your arms forward, then pulling them down and back simultaneously in a sweeping motion.
  • As you pull your arms back, lift your head and torso above the waterline to take a breath, then return your face to the water as your arms extend forward.
  • Keep your body undulating in a smooth rhythm as you perform the butterfly stroke.

Remember to always practice these techniques with patience and consistency, as it will take time to become proficient in each stroke. Consider taking swimming lessons or working with a coach if you want further guidance and support. Most importantly, listen to your body and take breaks when needed, especially if you are experiencing knee pain.

Illustration of a person performing a freestyle stroke with proper body position and technique, using a kickboard for support in the water.

Water Safety and Etiquette

Swimming is an excellent low-impact exercise for individuals experiencing knee pain. Not only does it help in strengthening the muscles surrounding the knee joint, but it also provides a great cardiovascular workout. To ensure a safe and enjoyable experience when swimming for knee pain, it’s essential to practice water safety and etiquette. Here are some guidelines to follow:

  1. Choose the right swimming environment:
    • Select a swimming pool with lanes designated for different swimming speeds, or a calm lake with a roped-off swimming area. This will allow you to swim at your own pace without interfering with other swimmers. Avoid overcrowded pools and beaches, which can make it difficult to maintain a safe swimming space.
  2. Observe pool rules and regulations:
    • Familiarize yourself with the pool’s rules, which may include no diving, no running on the pool deck, and proper swimwear requirements. Rules are designed to keep everyone safe, so make sure to follow them.
  3. Learn basic swimming skills:
    • Before starting a swimming routine for knee pain, ensure that you have fundamental swimming skills such as floating, treading water, and basic strokes like the freestyle (front crawl) or breaststroke. These skills will help you feel more confident in the water and allow you to maintain a safe swimming environment.
  4. Warm-up and stretch before swimming:
    • Perform gentle stretching exercises and warm-up your muscles before getting into the water. This can help prevent injury and ensure that your body is prepared for swimming.
  5. Use appropriate swimming aids:
    • If you’re not a strong swimmer or are new to swimming, consider using a kickboard, foam flotation belt, or a life jacket to help you stay afloat. This can help you focus on your technique and reduce the risk of injury.
  6. Swim with a buddy:
    • Having a swim buddy or a lifeguard present is an essential safety measure. Not only will they keep an eye on you, but they can also provide assistance if needed. Inform your buddy of your knee pain, so they are aware of any limitations or potential complications.
  7. Respect other swimmers:
    • Maintain awareness of your surroundings and give other swimmers ample space. Avoid making sudden movements or turns that may cause collisions. Follow the pool’s designated swim patterns, such as swimming in a counterclockwise direction in a lane.
  8. Practice good hygiene:
    • Shower before and after swimming to help maintain proper water quality. Avoid swimming if you have any open wounds or if you’re experiencing any contagious illness.
  9. Listen to your body:
    • Pay attention to any discomfort or pain you may feel while swimming. If you experience increased knee pain, cramping, or fatigue, stop swimming and consult your doctor or physical therapist for guidance.
  10. Cool down and stretch after swimming:
    • Spend a few minutes cooling down and stretching your muscles after swimming. This can help prevent muscle soreness and improve flexibility.

By following these water safety and etiquette guidelines, you can create a safe and enjoyable swimming experience while effectively managing your knee pain. Remember to always consult with your doctor or physical therapist before beginning any new exercise program, especially if you have a preexisting condition or injury.

An illustration of a person swimming with proper safety measures like floaters and a life jacket on

Swimming Exercises for Knee Pain

Swimming is a fantastic low-impact exercise that can help alleviate knee pain while also improving your overall fitness. Here are some swimming exercises specifically designed for people with knee pain. Remember to consult your doctor before starting any new exercise program, especially if you have a history of knee problems.

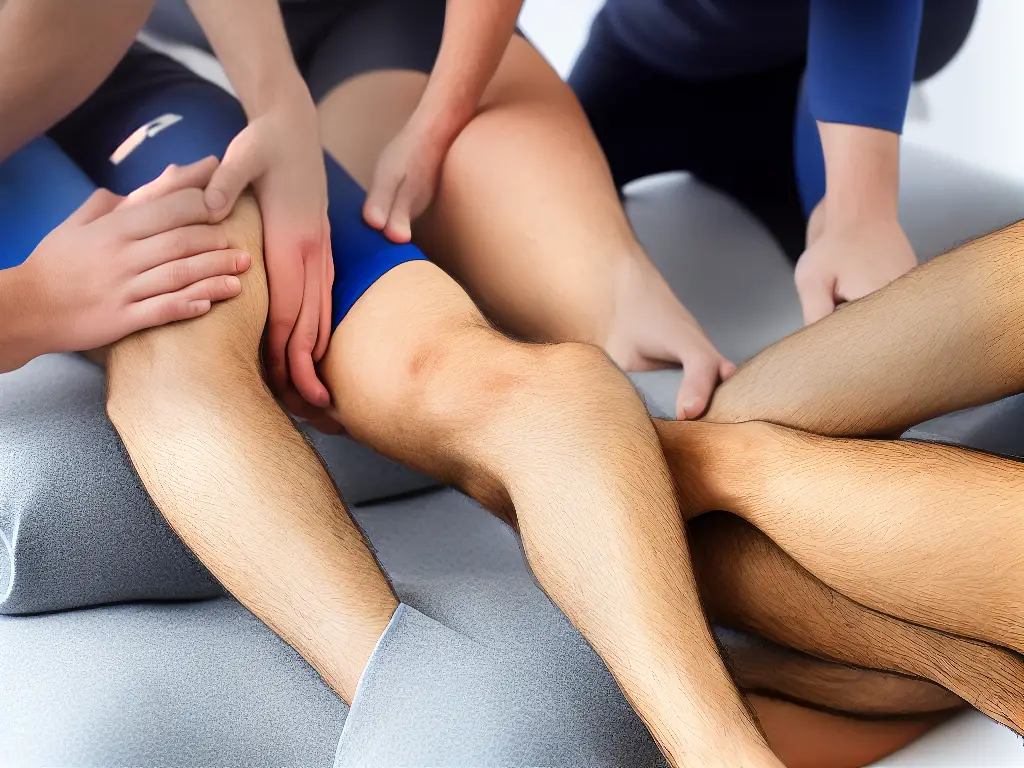
1. Warm-up Stretching

Before you begin any swimming exercises, it’s important to stretch and warm-up your muscles. Focus on stretching your calves, hamstrings, quadriceps, and hip flexors. Hold each stretch for around 20 seconds and repeat 2-3 times for each muscle group.

2. Water Walking

Water walking is an excellent exercise that uses the natural resistance of the water to strengthen and stretch your leg muscles without placing stress on your knees.

  • Begin by walking in chest-deep water, with your shoulders relaxed and your arms floating at your sides.
  • Start walking forward slowly, lifting each leg in a controlled manner and avoiding any jerky movements.
  • Focus on walking with proper posture, keeping your back straight and your core engaged.
  • Gradually increase your walking speed, eventually moving into a light jog if possible.
  • Walk or jog for around 10-15 minutes to begin with, then increase the duration as you feel comfortable.

3. Leg Lifts

Leg lifts can help strengthen the muscles surrounding your knees while also helping to improve your flexibility.

  • Stand in waist-deep water, with your back against the pool wall and holding onto the edge for support.
  • Slowly lift one leg to the side, keeping it straight and your toes pointed forward.
  • Hold the position for a few seconds before slowly lowering your leg back to its starting position.
  • Repeat 10-15 times on each side, then switch to the other leg.
  • To increase resistance, you can wear ankle weights or use a water noodle for added buoyancy.

4. Flutter Kicks

Flutter kicks are a great exercise to target your quadriceps, hamstrings, and hip flexors while also providing gentle resistance to your knee joints.

  • Hold onto the side of the pool, with your arms extended and your body in a horizontal position.
  • Keep your legs straight and begin kicking them up and down in a scissor-like motion, with one leg moving up as the other moves down.
  • Aim for small, controlled movements, and don’t force your range of motion beyond what feels comfortable.
  • Perform flutter kicks for around 1-2 minutes to begin with, then increase the duration as your knees become stronger.

5. Progressive Intensity

As you become more comfortable with these exercises and your knee pain begins to subside, you can gradually increase the intensity of your workouts. This may involve spending more time on each exercise, increasing the number of repetitions, or incorporating additional exercises, such as breaststroke or backstroke swimming.

Remember to listen to your body and back off if you experience any pain or discomfort. Consult a physiotherapist or swim instructor for more personalized advice on adapting your swimming workout to accommodate your knee pain.

Enjoy your time in the pool and keep working on these exercises consistently – before long, you may notice a significant decrease in your knee pain and an increase in your overall fitness levels.

An image of a person swimming in a pool with a kneebrace on

Stretching and Warm-up

Warming up before swimming and stretching afterward are crucial steps for anyone looking to relieve knee pain through swimming. These activities help minimize the risk of injury, maintain supple muscles, and promote joint mobility. Here is a guide to help you develop a consistent routine for stretching and warming up before swimming.

Step 1: Aerobic Warm-up

Start with a general aerobic warm-up to increase your heart rate and warm up your muscles. This can include:

  • Walking or jogging for 5-10 minutes
  • Light dynamic stretches (e.g., leg swings, hip circles)

Step 2: Shoulder and Upper Body Warm-up

Since swimming relies heavily on shoulder mobility and strength, it’s important to warm up and stretch the muscles in your upper body. Some exercises include:

  • Arm circles: Swing your arms in a circular motion, forwards and backwards, for 30 seconds each.
  • Cross-body arm swings: Swing your arms across your chest, alternating between your right and left arm on top. Continue for 30 seconds.

Step 3: Lower Body Warm-up

Preparing your lower body muscles helps reduce the chances of injuries and improves your swim performance. Here are some suitable exercises:

  • Hip circles: Stand with your feet shoulder-width apart, place your hands on your hips, and rotate your hips in a circular motion. Complete 10 circles in each direction.
  • Leg swings: Hold on to a wall or rail for support and swing your leg forwards and backwards. Complete 15 swings with each leg.

Step 4: Core Activation

A strong core is essential for a smooth and efficient swimming stroke. Here are two core activation exercises:

  • Plank: Hold a plank position for 30 seconds to a minute. Ensure your body remains straight from head to toe.
  • Side plank: Placing your weight on one forearm and the side of one foot, hold a side plank position for 30 seconds for each side.

Step 5: Enter the Pool

Start with easy, relaxed swimming to gradually increase the intensity until you reach your targeted workout level. This should take approximately 5-10 minutes.

Step 6: Post-swim Stretching

After completing your swim, remember to stretch your muscles to maintain flexibility and prevent soreness. Focus on the following muscle groups:

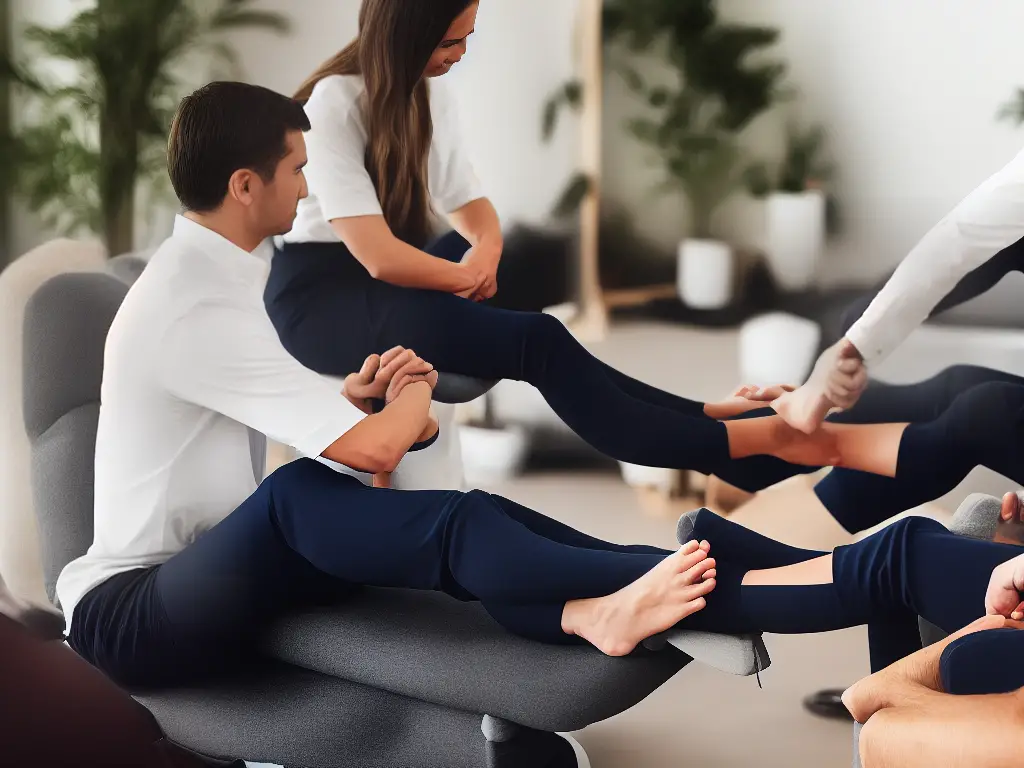
  • Shoulders and chest: With your arm extended, place it against a wall and gently turn your body away from the wall to stretch. Hold for 20-30 seconds on each side.
  • Lower back: While seated, extend one leg and cross the other over your knee. Gently twist your torso towards the bent knee, holding the stretch for 20-30 seconds. Repeat on the other side.
  • Hips: Perform a standing figure-four stretch by placing one ankle on the opposite knee and sitting back into a squat. Hold this stretch for 20-30 seconds and then switch legs.
  • Hamstrings and calves: Perform a seated hamstring stretch. Sit with your legs straight, reach for your toes, and hold the stretch for 20-30 seconds.

Consistently following this stretching and warm-up routine before swimming will help you maintain flexibility and joint mobility, ultimately reducing knee pain and minimizing the risk of injury while swimming.

An image of a person stretching their arms and shoulders before swimming in a pool, with a background of blue water and clear blue sky.

Monitoring Progress and Adjusting Goals

Start with setting specific goals: Before diving into swimming for knee pain, set specific goals such as distance, time, or frequency of swimming. An example could be swimming 1,000 meters in 30 minutes, 3 times a week. Having specific goals will help you measure your progress more accurately.

Journaling: Keep a daily or weekly journal where you record details of your swimming sessions, including the time, distance, and any pain or discomfort you experience during or after the training. This will help you identify patterns and understand how swimming is affecting your knee pain.

Pain assessment: Continuously assess the level of pain in your knees before and after each swimming session. Note down your pain level on a scale of 1-10, with 1 being no pain at all, and 10 being unbearable pain.

Use tracking apps: Consider using fitness tracking apps that cater specifically to swimmers, such as MySwimPro or Swim.com. These apps help monitor your swimming performance by tracking distance, time, and speed, allowing you to see the progress you’re making over time.

Work with a coach or physical therapist: If possible, consult with a swimming coach or physical therapist who can help you develop a personalized swimming program for your knee pain. They can also monitor your progress and make necessary adjustments to your training routine.

Adjusting Goals

Reassess your goals: Periodically review your progress and adjust your goals as needed. If you’ve met your initial goals, set new ones to continue challenging yourself and making progress.

Modify your routine: If you’re experiencing increased pain or discomfort, consider modifying your swimming routine. Try shorter or slower sessions, switch to a different swimming stroke (such as the breaststroke or backstroke, which are easier on the knees), or increase the time for rest and recovery between sessions.

Include strength training and stretching exercises: To support your knee and improve overall knee health, incorporate strength training exercises that target the muscles surrounding the joint (such as quadriceps, hamstrings, and calf muscles) and regular stretching exercises for flexibility.

Adapt to setbacks: If you’re experiencing setbacks or are not making the progress you’d hoped, be patient and remember that healing takes time. Continuously assess your pain levels and consult with a coach or physical therapist to make the necessary adjustments to your routine.

Celebrate progress: Acknowledge and celebrate your achievements, no matter how small they may seem. Pat yourself on the back when you hit a new personal record, overcome a plateau, or successfully manage your knee pain. This will help keep you motivated and focused on consistency and progression in your swimming journey.

An image of a person swimming in a pool with a caption describing how to monitor progress and adjust goals when swimming with knee pain

Swimming Gear and Equipment

Invest in a well-fitting, comfortable swimsuit made from a high-quality material that offers good coverage and support. Look for chlorine resistant fabrics for longer-lasting wear. If you’re a woman, consider a one-piece suit for more support and to minimize discomfort during swimming sessions. For men, look for swim trunks or jammers that have an adjustable waistband and are made from a stretchy fabric for ease of movement.

A good swim cap serves multiple purposes. It keeps your hair out of your face, minimizes chlorine and water damage to your hair, and helps reduce drag in the water. Choose a cap made from silicone or latex, as these materials create a good seal and last longer. Make sure the cap fits securely without being too tight.

Investing in good quality swimming goggles is essential for protecting your eyes from irritation caused by chlorine and other chemicals in the pool water, as well as providing clear vision underwater. Choose goggles with anti-fog and UV protection features, and ensure they are adjustable and fit well to prevent water from leaking inside.

A kickboard is a helpful tool for practicing leg kicks and building lower body strength while minimizing strain on your knees. Choose a kickboard made from durable foam that offers a comfortable grip and a design that accommodates your height and skill level. For added knee support, consider using a full-size kickboard that allows you to rest your arms and torso on the board, reducing pressure on your knees.

A pull buoy is a flotation device that you can place between your thighs to help you focus on your upper body technique and build strength while minimizing pressure on your knees. Look for a pull buoy made from durable foam that is comfortable against your skin and does not chafe during use.

Swimming fins can help to improve your kick technique, increase ankle flexibility, and boost propulsion in the water, making it easier to swim with knee pain. Choose fins that fit snugly around your ankles and offer both flexibility and support. Be mindful of the fin size and stiffness, as larger and stiffer fins may increase stress on your knees.

Proper maintenance of your swimming gear will not only ensure its longevity but also improve your overall swim experience. Rinse your swimwear, cap, and goggles with fresh water after each use to remove any residual chlorine and chemicals. Allow all gear to air dry away from direct sunlight to prevent damage caused by UV rays. Store your equipment in a well-ventilated mesh bag to prevent mildew and bacteria growth.

By investing in appropriate swimming gear and equipment and maintaining them properly, you’ll be better prepared for your swimming sessions and be able to effectively use swimming as a low-impact exercise to alleviate knee pain.

Illustration of a person wearing a swimsuit, swim cap, goggles, kickboard, pull buoy, and fins while swimming.

Nutrition and Hydration

Swimming is a fantastic exercise for individuals with knee pain as it is low-impact and can help improve strength and flexibility. To ensure you get the most out of your swimming sessions and promote recovery, it’s crucial to pay attention to your nutrition and hydration. This guide will provide you with information on the importance of maintaining proper nutrition and hydration during your swimming program, as well as the best foods and drink options before, during, and after swimming.

I. Importance of Nutrition and Hydration in Swimming

  • Your body requires the appropriate nutrients and fluid levels to perform optimally during swimming.

  • Consuming a balanced diet supplies your muscles with essential nutrients, allowing you to swim longer and more efficiently.

  • Proper nutrition and hydration support muscle repair, reduce inflammation, and promote overall recovery after swimming sessions.

  • Consuming the right foods and drinks helps to soothe sore muscles and speed up the healing process, which is crucial for individuals with knee pain.

II. Pre-swimming Nutrition

  • Aim to eat a small meal or snack 1-2 hours before your swim session to provide your body with the necessary energy.

  • Choose complex carbohydrates like whole grains, fruits, and vegetables that release energy slowly during your swim.

  • Examples:

    • Whole grain toast with almond butter and sliced banana

    • Greek yogurt topped with berries and granola

    • A fruit smoothie made with rolled oats, spinach, and almond milk

III. Hydration during Swimming

  • It’s essential to stay well-hydrated while swimming, as dehydration can impair your performance and even worsen knee pain.

  • Make sure to drink water regularly during your swim session.

  • Consider consuming a sports drink containing electrolytes if you’re swimming for an extended period or in a warm pool, as electrolytes help maintain fluid balance.

  • IV. Post-swimming Nutrition and Hydration

    • Refuel within the first 30-45 minutes after your swimming session, when your body is most receptive to nutrients.

    • Consume a meal or snack containing a balance of protein and carbohydrates to kickstart muscle repair and replenish energy stores.

    • Examples:

      • Grilled chicken or tofu with a side of brown rice and steamed vegetables

      • A protein shake blended with fruits, spinach, and almond milk

      • Turkey and avocado wrap with a side of mixed fruit salad

    • Continue to drink water and potentially electrolytes post-swim to replenish any lost fluids and aid in muscle recovery.

    By following these guidelines on nutrition and hydration, you’ll provide your body with the fuel it needs to maintain optimal performance during your swimming sessions and support proper recovery. Paying close attention to what you eat and drink before, during, and after swimming can help improve your overall experience and lead to faster healing for your knee pain.

    A person swimming in a pool with knee pain described in the guide with food and drink options surrounding them

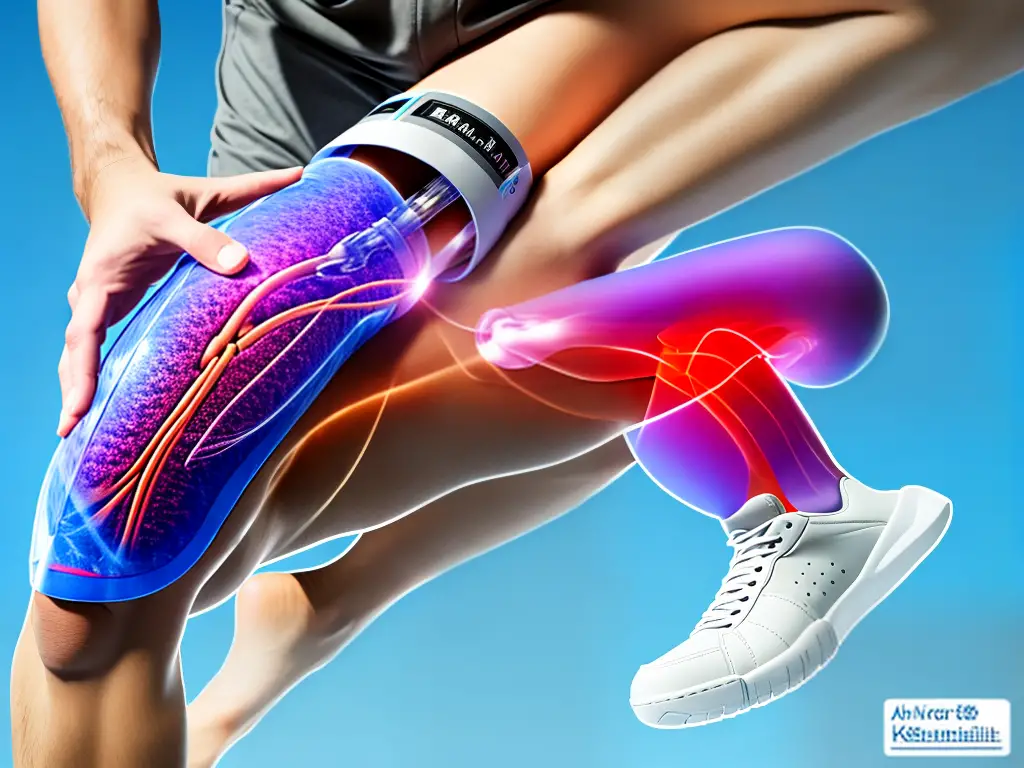
    Injury Prevention and Recovery

    Swimming is an excellent low-impact workout that can help alleviate knee pain while also providing a full-body exercise. However, injuries can still occur, so it’s important to know how to prevent and recover from common swimming-related injuries. Here are some instructions on injury prevention and recovery for swimmers who want to protect their knees and overall health.

    1. Warm-up properly before swimming:

    Warming up before hitting the pool is essential to avoid injuries. Start with 5-10 minutes of light cardiovascular exercise such as walking, jumping jacks, or dynamic stretching. This will increase your heart rate and prepare your muscles for swimming.

    2. Choose the right swimming stroke:

    Certain swimming strokes can be more beneficial for people with knee pain. The breaststroke and backstroke are typically lower-impact options that are easier on the knees. However, each person is different, so it’s essential to experiment with various strokes and find what best suits your body and comfort level.

    3. Focus on technique:

    Poor swimming technique can place undue stress on your joints and lead to injuries. Consult with a swimming instructor or watch online tutorials to ensure you’re using proper form for each stroke. Make adjustments to your technique based on feedback from experts, and aim for smooth, efficient movements in the water.

    4. Strengthen your muscles:

    Incorporate strength training into your exercise routine to strengthen the muscles that support your knee joint. Focus on exercises for the quadriceps, hamstrings, calves, and glutes. This will not only protect your knees but also improve your swimming performance.

    5. Incorporate active recovery:

    Active recovery days that involve light aerobic exercise can help reduce soreness and increase blood flow to your muscles, promoting healing. Activities such as cycling, yoga, or elliptical training are excellent options for active recovery.

    6. Listen to your body:

    While it’s important to challenge yourself, you should never push through pain or discomfort. If you experience any knee pain while swimming or notice any swelling, stop and allow your body to recover. Consult with a healthcare professional if the pain persists.

    7. Rest and recover:

    Ensure that you are allowing your body ample time to recover between swimming sessions. Proper rest is crucial for injury prevention, as continuous stress on the muscles, joints, and tendons can result in injuries.

    8. Consider medical intervention when required:

    If you’ve sustained an injury or are experiencing ongoing pain that negatively affects your swimming performance, consult with a medical professional for evaluation and treatment options. They may recommend physical therapy, medication, or in some cases, surgery to address the problem.

    In conclusion, swimming can be an excellent form of exercise for people with knee pain if the necessary precautions are taken. By warming up, focusing on technique, choosing the right stroke, and incorporating active recovery, rest, and medical intervention when needed, you can help prevent and recover from common swimming injuries. Always listen to your body and don’t hesitate to seek professional guidance if you experience any pain or discomfort.

    A man swims in a pool with his head out of water, holding onto the edge with one hand while the other is stretching towards the bottom of the pool. The man has a form that suggests he's performing a warm-up exercise, and the water around him is clear.

    Practice and Consistency

    Choose a suitable swimming pool: Find a swimming pool that is easily accessible and has a comfortable environment. Ideally, the pool should have a shallow end for practicing and flexible hours for regular practice sessions.

    Know your skill level: Assess your current swimming skill level before getting into the pool. If you are a beginner, consider taking swimming lessons or guidance from a qualified instructor to ensure you are practicing the correct techniques.

    Warm-up and stretching: Always begin with a warm-up session before entering the pool. Perform light exercises such as jogging in place, jumping jacks, or dynamic stretches to get your body ready for swimming. Stretch your muscles, paying special attention to your calves, quads, and hamstrings.

    Choose swimming strokes: To alleviate knee pain, choose swimming strokes that promote flexibility and do not strain the knee joints. Breaststroke and freestyle (front crawl) are ideal for beginners as they provide moderate knee movement and help strengthen the muscles.

    Practice swimming technique: Break down the chosen stroke into small parts and practice each part separately. Ensure you are kicking correctly, without locking your knees or overextending them. Focus on maintaining proper body alignment and using your core muscles to generate propulsion.

    Gradual progression: Start with short swimming sessions, around 20-30 minutes, and gradually increase the duration and intensity of your practice over time. Aim for a minimum of 2-3 times a week to maintain consistency.

    Include kickboard exercises: Using a kickboard can help target specific muscle groups in your legs, while providing extra support for your upper body. Practice various kicking exercises, ensuring you are stretching and flexing your knees correctly.

    Monitor your knee pain: Keep track of any changes in your knee pain as you progress through your swimming practice. If you notice increased discomfort or pain, consult a medical professional or adjust your training plan accordingly.

    Cross-training: To improve your overall swimming skills and support knee rehabilitation, include additional exercises such as water aerobics, yoga, or strength training in your fitness routine.

    Rest and recovery: Allow your body time to recover by taking rest days between swimming sessions and making sure you are getting enough sleep. This will help prevent overworking your muscles and joints, promoting a safe and effective progression in your swimming practice.

    Continue learning: Stay knowledgeable about swimming techniques and exercises to further improve your skills and support your knee rehabilitation. Consider joining a local swimming club or seeking guidance from a qualified instructor.

    Remember, consistency is key! Dedicate time to regularly practice your swimming skills and exercises to improve knee pain and overall swimming abilities over time.

    A person in a swimming pool with their legs stretched out and using a kickboard for exercise.

    Through consistent practice, dedication, and proper technique, swimming can significantly impact knee pain improvement and overall well-being. It’s crucial to remain patient, track your progress, and adjust your goals as needed. By combining knowledge about knee pain, swimming techniques, water safety, and specific exercises, you will ultimately develop a personalized swimming routine that assists in alleviating knee pain and helps you enjoy a more active and pain-free life.

Physical Therapy for Knee Pain

If you are experiencing knee pain, finding relief and improving functionality can be crucial to your daily life. This article will help guide you through an in-depth understanding of the anatomy of the knee, the common causes of knee pain, and the different techniques and exercises available in physical therapy to manage and prevent knee pain. From assessment and diagnosis to strengthening exercises and prevention strategies, we will provide you with comprehensive knowledge and practical tips to help you on your journey to a healthier and pain-free knee.

Anatomy of the knee

Knee pain can be caused by various factors such as injuries, degenerative conditions, and overuse. In order to effectively address knee pain, it’s essential to have a basic understanding of the anatomy of the knee. This knowledge will help you perform physical therapy exercises and take care of your knee better.

Bones of the knee:

The knee joint is formed by three bones – the femur (thighbone), the tibia (shinbone), and the patella (kneecap). The ends of these bones are covered in a thin layer of cartilage, which helps to cushion the joint, allowing for smooth movement.

Ligaments:

Ligaments are strong, fibrous tissues that connect bones to each other, providing stability to the joint. There are four primary ligaments in the knee:

  • Anterior cruciate ligament (ACL): The ACL connects the femur to the tibia and helps prevent the tibia from sliding forward too far and rotating.
  • Posterior cruciate ligament (PCL): The PCL connects the femur to the tibia and helps prevent the tibia from sliding backward too far.
  • Medial collateral ligament (MCL): The MCL connects the femur to the tibia on the inner side of the knee and resists forces pushing the knee inward.
  • Lateral collateral ligament (LCL): The LCL connects the femur to the fibula (a smaller bone next to the tibia) on the outer side of the knee and resists forces pushing the knee outward.

Tendons:

Tendons are tough cords of tissue that connect muscles to bones. Two important tendons in the knee are:

  • Quadriceps tendon: This tendon connects the quadriceps muscles (the large muscles in the front of the thigh) to the patella (kneecap).
  • Patellar tendon: This tendon connects the patella to the tibia, completing the extension mechanism of the knee.

Menisci:

The knee joint has two crescent-shaped pieces of cartilage called the medial and lateral menisci. These act as shock absorbers between the femur and tibia, helping to distribute weight and reduce friction during movement.

Bursae:

Bursae are small, fluid-filled sacs that help to reduce friction between structures in the knee. They are located near tendons and ligaments and help to cushion these structures as they move around the joint.

Muscles:

The primary muscle groups responsible for movement and stability in the knee are the quadriceps (front of the thigh), the hamstrings (back of the thigh), and the calf muscles.

Understanding the anatomy of the knee is crucial for implementing effective physical therapy exercises to reduce knee pain. By familiarizing yourself with the various parts of the knee, you can work towards maintaining its healthy function and preventing further injury. Be sure to consult a qualified healthcare professional for tailored advice on physical therapy exercises based on your specific knee pain condition.

An image of the knee joint, showing the bones, ligaments, tendons, menisci, and surrounding muscles for a better understanding of the anatomy of the knee.

Causes of knee pain

Knee pain is a common issue experienced by many adults, which can significantly impact your daily life and overall well-being. Physical therapy is an effective way to manage and alleviate knee pain, as well as prevent further injury. Before beginning any physical therapy program, it is important to understand the common causes of knee pain and seek professional advice to tailor an individualized treatment plan.

I. Causes of Knee Pain

  1. Injuries

    Some of the most common knee injuries that can cause pain include:

    • Ligament injuries: These can result from sudden twisting movements or impacts, such as a sports injury or an accident. Examples include tears in the anterior cruciate ligament (ACL), posterior cruciate ligament (PCL), or medial/lateral collateral ligaments (MCL/LCL).

    • Meniscal injuries: These occur when the cartilage in the knee joint sustains damage, either due to aging or direct injury. Meniscal tears can be caused by sudden twisting movements, resulting in pain, swelling, and stiffness.

    • Tendinitis: This is caused by the inflammation of tendons surrounding the knee joint, which can happen due to repetitive movements or overuse. The most common example is Patellar tendinitis, or “jumper’s knee.”

    • Fractures: Fractures around the knee can occur from falls or high-impact collisions, resulting in severe pain and instability.

  2. Arthritis

    Different types of arthritis can cause knee pain:

    • Osteoarthritis: The most common form of arthritis, occurring due to wear and tear of the knee joint. It causes pain, stiffness, and reduced mobility in affected individuals.

    • Rheumatoid arthritis: An autoimmune condition that affects the lining of the knee joints, resulting in pain, swelling, and stiffness.

    • Gout: Caused by the accumulation of uric acid crystals within the knee joint, leading to severe pain and inflammation.

  3. Other Conditions

    Additional causes of knee pain may include:

    • Bursitis: Inflammation of the bursa (fluid-filled sacs that reduce friction around the joint) located near the knee joint.

    • Iliotibial band syndrome: Inflammation of the iliotibial band, a thick band of tissue running along the outer thigh from the hip to the knee, often seen in runners.

    • Patellofemoral pain syndrome: Pain localized around the front of the knee and often related to joint stress or misalignment.

II. Solutions: Physical Therapy for Knee Pain

  1. Consult a physical therapist: It is crucial to consult with a healthcare professional, such as a physical therapist, to have a thorough assessment of your knee pain and receive appropriate recommendations for your specific condition.

  2. Perform strengthening exercises: Properly prescribed exercises by a physical therapist can help to strengthen the muscles surrounding the knee joint, providing better support and reducing pain.

  3. Stretching exercises: Regular stretching can help improve flexibility, decrease tightness, and alleviate knee pain.

  4. Balance and stability exercises: Improving balance and stability can help prevent falls or re-injuries to the knee joint, reducing pain and promoting long-term recovery.

  5. Manual therapy: In addition to providing appropriate advice and guidance, a physical therapist may perform hands-on techniques, such as joint manipulation or massage to help alleviate knee pain and improve joint mobility.

  6. Apply ice or heat: Depending on the cause of your knee pain, applying ice or heat may be recommended by your physical therapist to help control pain, inflammation, and promote healing.

  7. Incorporate low-impact activities: Participating in low-impact exercises, such as swimming or cycling, can help maintain fitness and mobility without putting excessive strain on the knee joint.

Understanding the common causes of knee pain is an essential step toward addressing the issue and finding relief through physical therapy. By working with a healthcare professional and incorporating tailored exercises, stretches, and treatments, you can effectively manage knee pain and improve your overall quality of life.

An image of a person wearing running shoes doing knee exercises on a yoga mat.

Assessment and diagnosis

Knee pain is a common issue faced by adults and can arise from several factors such as injury, arthritis, or other medical conditions. Conducting a thorough assessment and diagnosis is essential to determine the root cause and prescribe a tailored treatment plan for the individual.

Step 1: Gather medical history

  1. Begin by asking the patient about the onset, duration, location, and intensity of their knee pain.
  2. Take note of any history of knee injuries, surgeries, or previous episodes of knee pain.
  3. Ask the patient about any existing medical conditions, such as diabetes, arthritis, or obesity, that may affect knee function.
  4. Inquire about the patient’s occupation, physical activities, and sports participation to understand the possible contributing factors.

Step 2: Conduct a physical examination

  1. Inspect the knee for any visible swelling, redness, deformity, or bruising.
  2. Palpate the knee joint and surrounding structures (e.g., ligaments, tendons, and bursae) to identify any areas of tenderness or abnormality.
  3. Assess the patient’s range of motion by having them perform passive and active movements (e.g., flexion, extension, and rotation) in the knee joint.
  4. Perform special tests, such as McMurray’s test for meniscal injury, Lachman’s test for anterior cruciate ligament injury, and valgus/varus stress tests for collateral ligament assessment.
  5. Examine the hip and ankle joints, as well as the alignment of the lower limb to identify any issues that may contribute to knee pain.

Step 3: Perform imaging tests (if necessary)

  1. X-rays: Request an X-ray if a fracture, degenerative changes, or other bony abnormalities are suspected. Standard views include anterior-posterior, lateral, and merchant views of the knee.
  2. MRI: An MRI may be necessary to evaluate soft tissue structures (e.g., ligaments, tendons, and cartilage) in detail, particularly for sports injuries or persistent pain not responding to conservative treatment.

Step 4: Formulate a diagnosis and treatment plan

  1. Analyze the data gathered from the medical history, physical examination, and imaging tests to identify the cause of the knee pain.
  2. Determine the severity of the condition and consider any contraindications to physical therapy.
  3. Develop a treatment plan, which may include exercises, manual therapy, modalities (e.g., ice, heat, or ultrasound), and/or assistive devices.
  4. Educate the patient on their condition, prognosis, and proposed treatment plan and involve them in shared decision-making.

Proper assessment and diagnosis of knee pain is crucial in guiding the physical therapy treatment plan and achieving optimal outcomes for the patient.

Diagram showing a medical practitioner examining a patient's knee with a stethoscope. The doctor is taking the patient's pulse to measure their blood pressure.

Stretching exercises

1. Hamstring stretch:

  • Sit on the floor with your legs stretched out in front of you.
  • Bend one knee and place the sole of your foot against the opposite inner thigh.
  • Slowly lean forward from your hips, reaching towards the foot of your straight leg.
  • Hold the stretch for 20 to 30 seconds, feeling the stretch in the back of your thigh.
  • Repeat on the other leg and perform this exercise 3 to 5 times per leg.

2. Calf stretch:

  • Stand facing a wall, placing your hands on the wall for support.
  • Move one foot back, keeping the leg straight with the heel firmly on the ground.
  • Bend your front knee and lean towards the wall, feeling the stretch in the calf of your back leg.
  • Hold the stretch for 20 to 30 seconds, then switch legs.
  • Repeat this exercise 3 to 5 times per leg.

3. Quadriceps stretch:

  • Stand next to a wall or hold on to a stable object for balance.
  • Bend one knee and bring your heel towards your buttocks, grabbing your ankle with the same side hand.
  • Gently pull your foot towards your buttocks, feeling the stretch in the front of your thigh.
  • Hold the stretch for 20 to 30 seconds, then switch legs.
  • Repeat this exercise 3 to 5 times per leg.

4. Hip flexor stretch:

  • Begin in a kneeling position. Place one foot forward with the knee bent and the other leg down.
  • Keeping your back straight, gently push your hips forward until you feel a stretch in the front of your hip and thigh.
  • Hold the stretch for 20 to 30 seconds, then switch legs.
  • Repeat this exercise 3 to 5 times per leg.

5. Seated IT band stretch:

  • Sit on the floor with your legs stretched out in front of you.
  • Cross one ankle over the opposite knee.
  • Place one hand on the raised knee and gently press it downwards, feeling the stretch along the outer side of your thigh and hip.
  • Hold the stretch for 20 to 30 seconds, then switch legs.
  • Repeat this exercise 3 to 5 times per leg.

6. Butterfly stretch:

  • Sit on the floor with the soles of your feet pressed together, knees outward.
  • Grasp your feet or ankles and gently pull them towards your body.
  • Lean forward from your hips, keeping your back straight, and bring your chest towards your feet.
  • Hold the stretch for 20 to 30 seconds, then release.
  • Repeat this exercise 2 to 3 times.

Remember to breathe deeply and consistently throughout each stretch. Stop the stretch if you feel sharp pain and consult a physical therapist or healthcare provider for guidance. It’s essential to do these exercises regularly to maintain and improve flexibility and reduce knee pain effectively.

A person sitting on the floor with their legs stretched out in front of them stretching their hamstring with one leg bent and the sole of their foot against the opposite inner thigh.

Strengthening exercises

Strengthening exercises for knee pain aim to build and support the muscles surrounding the knee joint, increasing stability and reducing stress on the knee itself. By doing these exercises regularly, you can alleviate knee pain and prevent further injury.

Here are some simple strengthening exercises you can do at home:

  1. Straight Leg Raise:

    • Lie flat on your back with one leg bent at a 90-degree angle, foot flat on the floor, and the other leg straight.

    • Tighten the quadriceps (muscles on the front of your thigh) of the straight leg and slowly raise it about 6-12 inches off the ground.

    • Hold this position for 3-5 seconds, then slowly lower the leg back down.

    • Repeat 10-15 times on each leg for 2-3 sets.

  2. Wall Sit:

    • Stand with your back against a wall and your feet shoulder-width apart, about 2 feet away from the wall.

    • Slowly bend your knees and slide down the wall until your thighs are parallel to the floor, forming a 90-degree angle at the knees.

    • Hold this position for 10-30 seconds, keeping your core engaged and your back flat against the wall.

    • Straighten your legs and return to the starting position.

    • Repeat 5-10 times for 2-3 sets.

  3. Clamshell:

    • Lie on your side with your legs bent at a 90-degree angle, and your feet and knees together.

    • Keeping your feet touching, slowly lift the top knee as high as you can without moving your hips or lower back. You should feel the muscles on the outer side of your hip working.

    • Hold this position for 2-3 seconds, then slowly lower the knee back down.

    • Repeat 10-15 times on each leg for 2-3 sets.

  4. Bridge:

    • Lie on your back with your knees bent, feet flat on the floor, and shoulder-width apart.

    • Engage your core and squeeze your glutes (muscles in your buttocks) to lift your hips off the ground until your body forms a straight line from your shoulders to your knees.

    • Hold this position for 5-10 seconds, then lower your hips back to the starting position.

    • Repeat 10-15 times for 2-3 sets.

  5. Hamstring Curl:

    • Stand behind a sturdy chair or countertop for support, with your feet hip-distance apart.

    • Slowly bend one knee, raising your heel towards your buttock, keeping your thighs parallel.

    • Hold this position for a few seconds, then lower your foot back down to the ground.

    • Repeat 10-15 times on each leg for 2-3 sets.

Remember to perform these exercises in a slow and controlled manner and to maintain proper form. Ensure you breathe steadily throughout the exercises, and stop if you feel any pain or discomfort. As your strength improves, you can gradually increase the amount of repetitions or resistance (by using resistance bands or ankle weights) to continue progressing.

Be sure to consult your doctor or physical therapist before starting any new exercise program, especially if you have pre-existing knee issues or concerns.

Image of a person performing a straight leg raise on a mat with their arms extended along their sides. The person is wearing light blue workout clothes and there is a white foam roller next to them on the mat.

Balance and proprioception

Balance and proprioception are crucial for knee alignment, joint stability, and injury prevention. Developing these skills can also promote better movement patterns, reduce joint stress, and improve overall motor control.

Balance and Proprioception Exercises

Before performing these exercises, seek advice from a professional to ensure proper form and technique.

  • Single-leg stance: Stand with feet hip-width apart. Raise one foot, keeping your knee bent at a 90-degree angle. Hold for 10-15 seconds and switch legs. Perform 2-3 sets of 10 reps on each leg.
  • Heel-to-toe walking: Take a step forward with your right foot. Place your heel directly in front of your left toes. Alternate feet for several steps. Practice for 5-10 minutes.
  • Single-leg mini squats: Stand on one leg, with your other foot resting on the opposite ankle. Slowly bend your standing knee into a mini squat. Complete 10-15 reps on each leg for 2-3 sets.
  • Hip abduction with resistance band: Secure a resistance band around ankles, shift your weight onto one foot. Slowly lift the other foot out to the side and hold for 1-2 seconds before lowering. Complete 10-15 reps on each leg for 2-3 sets.

Progressing Your Exercises

As you improve your balance and proprioception, consider more challenging exercises that involve unstable surfaces like a BOSU ball or foam pad. Always work within your comfort level and seek help when necessary.

In conclusion, including balance and proprioception exercises into your daily routine can reduce knee pain, enhance stability, and prevent injury, thus improving your overall knee health and well-being.

Image of a person performing the single-leg stance exercise for knee health

Manual therapy techniques

Manual therapy is a specialized form of physical therapy that involves hands-on techniques to reduce pain, increase joint mobility, and promote overall function. The following manual therapy techniques can be effective in easing knee pain and enhancing joint flexibility. Before attempting any of these techniques, consult with a qualified physical therapist.

1. Soft Tissue Mobilization:

This technique aims to release tension and improve blood flow in the muscles surrounding the knee joint.

  • Gently grasp the soft tissue around the knee using both hands, with fingers positioned on one side of the knee joint and the thumb on the other.
  • Gently apply pressure by squeezing and releasing the soft tissue between your fingers and thumb, then move around the knee to target different areas.
  • Perform this technique for 5-10 minutes, ensuring not to cause any discomfort or pain.

2. Patellar Mobilization:

Patellar mobilization aims to improve the mobility of the kneecap (patella) and reduce pain associated with knee joint stiffness.

  • Sit or lie down with the affected knee in a relaxed and slightly bent position.
  • Place your fingers on either side of the kneecap, applying gentle pressure to prevent it from moving.
  • Gently glide the kneecap up and down, side to side, and diagonal in a controlled manner, ensuring not to cause pain.
  • Repeat this technique for 3-5 minutes, focusing on increasing the range of motion over time.

3. Joint Mobilization:

Joint mobilization aims to improve knee joint mobility and reduce stiffness by carefully moving the joint through its natural range of motion.

  • Sit or lie down with the affected leg in a relaxed, slightly bent position.
  • Use one hand to support the lower leg at the ankle, and the other to grasp the back of the thigh, just above the knee joint.
  • Gently guide the knee through its natural range of motion by moving it towards the chest and then away.
  • Perform slow and controlled movements, holding each position for a few seconds before moving again.
  • Repeat this technique for 5-10 minutes, gradually increasing the range of motion as tolerated.

4. Trigger Point Release:

This technique helps alleviate muscle knots or trigger points that contribute to knee pain.

  • Identify the tender spot or trigger point in the muscle around the knee by gently palpating the area.
  • Apply gentle, sustained pressure on the trigger point using your fingers, a foam roller, or a massage ball.
  • Maintain pressure on the trigger point for 20-30 seconds, or until you feel the tenderness and tightness reduce.
  • Repeat this process for 3-4 times per trigger point, or as needed.

5. Myofascial Release:

Myofascial release aims to address tightness in the fascia, a connective tissue that surrounds the muscles and joints.

  • Use a foam roller or massage ball to apply gentle pressure to the soft tissue around the knee.
  • Slowly roll the foam roller or ball along the targeted muscle, pausing on any tight spots or knots.
  • Hold pressure for 20-30 seconds, or until the tightness and pain reduce.
  • Repeat this technique for 5-10 minutes, targeting different areas around the knee as needed.

These manual therapy techniques can provide significant relief from knee pain and improve joint mobility. However, it’s crucial to consult with a qualified physical therapist to develop an individualized treatment plan based on your specific needs and circumstances.

An image of a person holding a knee joint and pointing to the muscles and tendons around the knee.

Electrotherapy and other modalities

As an adult seeking physical therapy for knee pain, it’s crucial to explore various treatments and modalities that can help manage discomfort and improve function. This guide will cover electrotherapy, as well as other popular modalities, such as electrical stimulation, ultrasound, ice, and heat therapy. Always consult a healthcare professional before starting any new therapy.

1. Electrotherapy

Electrotherapy utilizes electrical currents to help reduce knee pain, prevent muscle atrophy, and promote tissue healing. There are different types of electrotherapy that can be used to manage knee pain.

  • Transcutaneous Electrical Nerve Stimulation (TENS): A TENS unit delivers a continuous electrical current to the surface of the skin, stimulating nerves and helping to block pain signals to the brain. To use a TENS unit, place electrodes around the knee and set the intensity and frequency according to professional recommendations.
  • Interferential Current (IFC): IFC works by delivering two alternating electrical currents into the tissue, which interferes to produce a low-frequency current that can help with pain relief and muscle relaxation. A healthcare professional will place electrodes on the knee and adjust the settings to customize the treatment for the patient’s needs.

2. Electrical Muscle Stimulation (EMS)

EMS can help prevent muscle atrophy, reduce swelling, and increase circulation by delivering a low-voltage electrical current to the muscles surrounding the knee. To use EMS, a healthcare professional will strategically place electrodes around the knee and adjust the settings based on the individual’s needs.

3. Ultrasound

An ultrasound machine emits sound waves that penetrate deep into the soft tissues, creating vibrations that can help promote tissue healing, increase circulation, and reduce pain. During an ultrasound treatment, a healthcare professional will apply a conductive gel to the skin around the knee and gently move the ultrasound head in a circular motion for the prescribed duration.

4. Ice Therapy

Ice can help reduce inflammation and numb pain by constricting blood vessels and slowing nerve impulses. For knee pain, apply a cold pack or ice in a towel to the painful area for 15-20 minutes, several times a day, especially after physical activity. Never apply ice directly to the skin, as it can cause frostbite.

5. Heat Therapy

Heat can help relax muscles, increase circulation, and promote healing. Use a heating pad, warm towel, or hot water bottle to apply heat to the affected area for 15-20 minutes, several times a day. Avoid using heat immediately after an injury or if there is swelling; instead, opt for ice therapy first.

Conclusion

Physical therapy for knee pain can often include a combination of these treatments and modalities based on the individual’s condition and needs. Consult with a healthcare professional for appropriate recommendations and guidance when incorporating electrotherapy or other modalities into your physical therapy routine. Regularly performing prescribed exercises and stretches, maintaining a healthy weight, and using proper footwear can also aid in knee pain management and prevention.

An image of a person with their knee elevated with an ice pack on their knee with a healthcare professional applying electrotherapy.

Home exercise program

Stretching and Strengthening Exercises for Knee Pain Relief

Please note: It’s essential to consult with a healthcare professional, such as a physical therapist, before beginning any exercise program, especially if you have existing knee pain.

Warm-Up:

Before beginning your home exercise program, make sure to spend 5-10 minutes warming up with some light cardio, such as walking or cycling, to get your muscles warm and joints moving.

Stretching Exercises:

  1. Hamstring Stretch

    • Sit on the floor with your legs extended straight in front of you.
    • Reach forward towards your toes, keeping your back straight and your knees slightly bent.
    • Hold the stretch for 20-30 seconds, then release.
    • Repeat 2-3 times.
  2. Quadriceps Stretch

    • Stand and hold onto a wall or sturdy surface for balance.
    • Bend your right knee and grab your right foot or ankle with your right hand, pulling your foot towards your buttocks.
    • Make sure your knee is pointed straight down, and not out to the side.
    • Hold the stretch for 20-30 seconds, then release.
    • Repeat on the left side and perform 2-3 sets for each leg.
  3. Calf Stretch

    • Stand facing a wall and place your hands on the wall for support.
    • Step back with your right leg, keeping your right heel on the ground, and press your right hip forward.
    • Hold the stretch for 20-30 seconds, then release.
    • Repeat on the left side and perform 2-3 sets for each leg.

Strengthening Exercises:

  1. Straight Leg Raise

    • Lie on your back with one leg bent and one leg straight.
    • Tighten the muscles in your straight leg, then lift it about 6 inches off the ground.
    • Keep your knee straight and hold the position for 5 seconds, then slowly lower your leg to the ground.
    • Repeat 10-15 times on each leg for 2-3 sets.
  2. Wall Sit

    • Stand with your back against a wall and your feet shoulder-width apart.
    • Slowly slide your back down the wall, bending your knees and lowering your body until your knees are bent at a 90-degree angle.
    • Hold the position for 30 seconds to 1 minute, then slowly slide back up the wall.
    • Repeat 3-5 times.
  3. Clamshells

    • Lie on your side with your knees bent at a 90-degree angle and your feet together.
    • Keeping your feet together, slowly lift your top knee as high as you can without moving your pelvis.
    • Hold the position for 5 seconds, then slowly lower your knee back down.
    • Repeat 10-15 times on each leg for 2-3 sets.
  4. Bridge

    • Lie on your back with your knees bent and your feet flat on the ground.
    • Tighten your buttocks and lift your hips off the ground, forming a straight line from your shoulders to your knees.
    • Hold the position for 5 seconds, then slowly lower your hips back to the ground.
    • Repeat 10-15 times for 2-3 sets.

Cooldown:

Finish your home exercise program by spending 5-10 minutes cooling down with some light stretching or walking.

Schedule:

Aim to perform your home exercise program for knee pain relief 3-4 times per week, gradually increasing the intensity and duration of the exercises as you build strength and flexibility. Remember, always consult with a healthcare professional before beginning any exercise program, especially if you have existing knee pain.

A cartoon of a person stretching their knee as they sit on the floor with one leg extended and sole of other foot touching the inner thigh of the extended leg.

Prevention strategies

Knee pain is a common issue that can affect people of all ages. While you cannot fully avoid the natural wear and tear on your joints, there are certain prevention strategies that you can adopt to manage knee pain and minimize the risk of injury.

Step 1: Maintain a healthy body weight

  • Excess body weight puts additional stress on your knee joints, leading to more wear and tear. Shedding extra pounds can help reduce knee pain and minimize the risk of injury.

  • Adopt a balanced diet rich in fruits, vegetables, lean proteins, and whole grains. Limit processed foods and sugar intake.

  • Incorporate regular physical activity into your routine to help control your weight and strengthen your muscles.

Step 2: Choose the right footwear

  • Wearing supportive shoes with proper arch support and cushioning can help maintain proper alignment and reduce strain on your knees.

  • Avoid high heels, as they can put extra stress on your knees.

  • Replace running shoes every 300-500 miles, as worn-out shoes can lead to improper gait and increased pressure on your knee joints.

Step 3: Strengthen your muscles

  • Strong leg muscles help protect and stabilize your knee joints. Regular strength training can improve muscle support around your knees and reduce pain.

  • Focus on exercises that target your quadriceps, hamstrings, and calf muscles. Examples include squats, lunges, and leg presses.

  • Consult with a physical therapist or trainer to ensure you are using proper form and technique to avoid injury.

Step 4: Stretch regularly

  • Maintaining flexibility in your leg muscles can help prevent knee pain by reducing muscle tightness and imbalances.

  • Incorporate stretching exercises for your quadriceps, hamstrings, and calf muscles into your daily routine.

  • Hold each stretch for 15-30 seconds and avoid bouncing during the stretch, as this can lead to injury.

Step 5: Practice proper exercise techniques

  • Use correct form and technique when exercising to avoid strain or injury to your knee joints.

  • Warm up before exercising with 5-10 minutes of light cardio, such as walking or cycling, to increase blood flow to your muscles.

  • Include low-impact cardiovascular exercises (e.g., swimming, cycling, or elliptical training) to minimize stress on your knees.

Step 6: Listen to your body

  • Pay attention to any pain or discomfort you might feel during activities. If you continue to experience knee pain, consult with a healthcare professional to determine the underlying cause and appropriate treatment options.

By adopting these prevention strategies and making changes to your lifestyle, you can help manage knee pain and reduce the risk of injury. Remember to consult with a healthcare professional before embarking on any new exercise program, especially if you have existing knee issues or concerns.

An image of various exercises that can help prevent knee pain, including stretching, squatting, and lunging.

By gaining a deeper understanding of the complex structure and functions of the knee joint, you can empower yourself in managing your knee pain and improving your overall quality of life. Physical therapy techniques and exercises are essential tools in treating and preventing knee pain while encouraging faster recovery and long-term benefits. Practice these exercises and strategies consistently, and over time, you will likely see your knee pain diminish and your daily life improve. Remember, always consult with a healthcare professional before starting a new exercise program or modifying your current treatment plan.

Essential Oils for Knee Pain

As we navigate through life, dealing with various discomforts and physical challenges is inevitable. One common ailment that affects many adults is knee pain, which can be debilitating and impact our daily activities. This calls for natural and effective solutions focused on alleviating this discomfort. Essential oils, known for their therapeutic properties, have shown to be beneficial in managing knee pain by targeting pain, inflammation, and promoting overall well-being. In this exploration, we’ll dive into the world of essential oils and understand their effectiveness in relieving knee pain, along with practical tips to optimize their use and potential synergies with complementary therapies.

Introduction to Essential Oils

Essential oils have been used for centuries in various traditional medicine practices to improve overall well-being, as well as aid in pain relief, particularly knee pain. These natural substances come from plants and possess numerous therapeutic properties, among which are analgesic, anti-inflammatory, and soothing effects. Knowing the basics of essential oils, their origin, and different extraction methods, can be useful in understanding how to incorporate them into your daily life.

The origin of essential oils can be traced back to ancient civilizations such as Egypt, China, and India, where they were used in different forms of medicine and healing practices. These oils are created by extracting the concentrated essences of the plants from various parts, such as flowers, leaves, roots, and bark. The rich, potent substances derived from these extractions often contain the plant’s aroma compounds and beneficial properties, which can provide relief from pain and inflammation.

There are different extraction methods to obtain essential oils, including steam distillation, cold pressing, and solvent extraction. Steam distillation is the most common method, where steam is passed through the plant material, releasing the essential oil in vapor form. The steam and oil vapor are then collected and condensed back into a liquid form, which contains both essential oil and water. Cold pressing is often used for obtaining essential oils from citrus fruits, such as oranges and lemons. This method involves mechanically pressing the fruit to release the oil. Lastly, solvent extraction uses chemical solvents to extract the essential oils, which is most suitable for delicate and heat-sensitive plant materials like jasmine and rose.

General applications of essential oils in daily life can be categorized into three main methods: aromatic, topical, and internal. Aromatic use involves inhaling the aroma of the essential oil through a diffuser or directly from the bottle to experience their therapeutic benefits. Topical applications involve applying the essential oil directly onto the skin, often mixed with a carrier oil to dilute it, or in products like salves and lotions. This method can be particularly helpful in managing knee pain, as the oils can be massaged directly onto the affected area for targeted relief. Internal use, which should only be practiced with oils labeled for such purposes and under the guidance of a qualified professional, involves ingesting the essential oil in capsule form or diluted in beverages.

For knee pain relief, several essential oils possess potent analgesic and anti-inflammatory properties that may provide natural and effective relief. Oils like lavender, peppermint, eucalyptus, and frankincense are particularly renowned for their pain-relief properties. Comprehending the origin, extraction methods, and application techniques of essential oils allows you to confidently explore their therapeutic benefits and safely integrate them into your daily life to support overall well-being and alleviate physical discomfort, such as knee pain.

An image of various essential oils in bottles and a diffuser. The bottles are in different colors and shapes indicating the different types of essential oils.

Essential Oils for Pain Relief

An excellent example of an essential oil known for its effectiveness in pain relief is eucalyptus oil, particularly helpful in cases of knee pain caused by inflammation. Rich in anti-inflammatory and analgesic properties, eucalyptus oil helps to soothe swollen joints and muscles, ultimately alleviating pain. When massaged into the skin, the oil penetrates deep into the tissue, promoting blood circulation and reducing stiffness around the affected area. Additionally, eucalyptus offers antibacterial and antiviral properties, potentially comforting those suffering from knee pain due to infections. Utilizing essential oils like eucalyptus can provide diverse knowledge and an alternative approach to managing knee pain and promoting overall well-being.

Lavender oil is another popular essential oil used for pain relief, as it possesses anti-inflammatory, analgesic, and calming properties. By easing swelling and inflammation that may contribute to knee pain, lavender provides a soothing and relaxing effect when applied topically. Moreover, lavender is known to promote sleep and reduce stress and anxiety, which can further benefit those experiencing discomfort and restlessness due to knee pain. To use lavender oil for pain relief, consider adding a few drops to a warm bath, applying it directly to the affected area in a carrier oil, or diffusing it into the air for inhalation.

Ginger essential oil is another powerful ally in the fight against knee pain. With its strong anti-inflammatory properties, ginger oil can help reduce swelling and inflammation around the joints, thereby minimizing pain. Additionally, ginger has been found to have analgesic properties, which helps alleviate pain by blocking the body’s production of prostaglandins – chemical compounds responsible for pain and inflammation. Applying ginger oil topically with a carrier oil or inhaling its aroma can both offer pain relief and soothing effects.

Frankincense oil is another essential oil that boasts pain-relieving properties especially beneficial for knee pain. Derived from the resin of the Boswellia tree, frankincense oil has a long history of traditional use in treating various forms of pain and inflammation. Thanks to its anti-inflammatory and analgesic properties, frankincense can effectively relieve knee pain by reducing inflammation and swelling around the joints. To harness the benefits of this ancient oil, incorporate it into a relaxing massage or add a few drops to a warm bath to experience its soothing nature.

Essential oils have been gaining attention in recent years due to their potential to reduce pain, swelling, and inflammation, particularly in the context of knee pain and arthritis. One such essential oil is peppermint oil, which is recognized for its potent cooling and pain-relieving effects.

Illustration of various essential oils with their plant sources, including eucalyptus, lavender, ginger, frankincense, and peppermint leaves.

Essential Oils for Inflammation

The primary active component of peppermint oil, menthol, is known for its analgesic and anti-inflammatory properties, making it an effective treatment for knee pain. When applied topically, peppermint oil can temporarily numb the affected area, providing quick and lasting relief from pain and discomfort. Furthermore, its cooling sensation helps alleviate inflammation and promotes relaxation. To experience the benefits of peppermint oil, mix it with a carrier oil and massage onto the painful area, or diffuse the oil for inhalation.

One essential oil that may offer relief for knee pain is eucalyptus oil, which has anti-inflammatory and analgesic properties. Research has shown that inhaling eucalyptus oil can help reduce pain and inflammation, and it is commonly used topically as a massage oil to alleviate joint and muscle pain.

Another essential oil that may help alleviate knee pain due to inflammation is frankincense oil. This oil, derived from the resin of the Boswellia tree, has been used for centuries for its potential pain-relieving and anti-inflammatory properties. Research has shown that the boswellic acids found in frankincense oil inhibit enzymes that contribute to inflammation in the body. Applying diluted frankincense oil to the affected area may help to reduce pain and inflammation caused by arthritis or injury.

Lavender oil is another essential oil that may offer benefits for knee pain and inflammation. Lavender has long been recognized for its soothing and calming effects, and it is widely used for pain relief in aromatherapy. A study published in the journal Pain Research and Treatment found that the topical application of lavender essential oil reduced inflammation and swelling in a rodent model of arthritis. In addition, lavender oil has analgesic properties that may help to alleviate pain when applied topically to the affected area.

Ginger essential oil may also play a role in reducing inflammation and providing relief from knee pain. This oil contains a number of active compounds, including gingerols and zingerone, which have been shown to have strong anti-inflammatory and analgesic effects. A study published in the Journal of Pain found that topical application of ginger oil significantly reduced joint swelling and pain in a rodent model of arthritis. These results suggest that ginger essential oil may offer similar benefits for individuals suffering from knee pain related to inflammation or arthritis.

Peppermint oil, with its anti-inflammatory and analgesic properties, may help reduce knee pain. Its active ingredient, menthol, has a cooling effect on the skin, which can alleviate pain and discomfort. A study published in the European Journal of Medical Research showed that peppermint oil reduced pain and inflammation associated with arthritis when applied topically. This suggests that peppermint oil, along with other essential oils, may offer a promising alternative or complementary approach to conventional pain management methods for knee pain and inflammation.

An image depicting a person applying essential oils to their knees as a natural remedy for knee pain and inflammation.

Methods of Application

To effectively utilize essential oils like peppermint oil for knee pain relief, consider incorporating them into massages. When massaging the affected area, always dilute the essential oil with a carrier oil, such as almond oil, coconut oil, or jojoba oil, to prevent skin irritation while still maintaining the oil’s benefits. Gently massaging the knee with essential oils such as lavender, frankincense, or eucalyptus can help alleviate pain, reduce inflammation, and promote relaxation. Frequent massages can provide continued knee pain relief, increase joint functionality, and improve overall well-being, making essential oils a valuable addition to pain management routines.

Compresses are another useful method for applying essential oils to help with knee pain. To create a warm compress, combine a few drops of the chosen essential oil (peppermint, rosemary, or ginger can be great options) with a tablespoon of carrier oil, then mix it with warm water. Soak a clean cloth into the solution, wring out excess water, and place the compress over the painful knee area. The heat facilitates essential oil absorption into the skin while improving blood circulation, leading to decreased pain and inflammation. For a cold compress, simply add a few ice cubes to the solution or use chilled water instead of warm water. Cold compresses can help numb the pain and reduce swelling in the knee.

Topical essential oil blends can also provide relief for knee pain. These blends, often pre-mixed and available for purchase, combine multiple essential oils and carrier oils to create a powerful and synergistic combination that targets pain and inflammation. Some blends may include oils such as marjoram, pines, copaiba, or chamomile that have analgesic, anti-inflammatory, or soothing properties. Apply the topical blend directly to the affected knee, massaging it gently in a circular motion to ensure penetration through the skin. Be sure to follow the instructions on the label and only use the blend as frequently as recommended.

A lesser-known application method for essential oils in knee pain relief is through soaking. Adding essential oils to bathwater or foot baths can provide soothing relief and relaxation, allowing the essential oils to take effect without direct skin contact. Try combining a few drops of lavender, eucalyptus, or even ready-made blends into a warm bath and soak for at least 20 minutes. The combination of warm water, the relaxing scent of essential oils, and the overall atmosphere of a bath will work together to ease knee pain and help you unwind.

Essential oil-infused creams can be an effective treatment for knee pain, combining the benefits of essential oils with the ease of application and absorption provided by a lotion base. These creams often contain additional ingredients such as arnica, aloe vera, or menthol, which can enhance the pain-relieving effects. To use an essential oil cream for knee pain, simply apply a small amount to the affected area, massaging in a circular motion and allowing the skin to fully absorb it. It’s important to initially test for any signs of an allergic reaction before applying the cream to a larger area and to follow the manufacturer’s recommendations for usage frequency.

Illustration of a person holding their knee with a red and yellow background

Carrier Oils and Dilution

The use of carrier oils is crucial in ensuring the safe and effective application of essential oil-infused creams for knee pain. Derived from the fatty parts of certain plants, like seeds, nuts, or kernels, carrier oils serve as a base for diluting concentrated essential oils, thus preventing skin irritation, sensitivity, and other potential adverse reactions from direct application. By incorporating carrier oils into essential oil creams, you can enjoy the benefits of essential oils in a safe, soothing, and easy-to-apply format, suitable for treating knee pain.

There are various carrier oil options available, each with its unique properties, benefits, and absorption rates. Some popular carrier oils for knee pain include coconut oil, sweet almond oil, avocado oil, jojoba oil, grapeseed oil, and olive oil. For instance, coconut oil is known for its anti-inflammatory and pain-relieving properties, making it an excellent choice for diluting essential oils that target knee pain. Similarly, sweet almond oil and avocado oil are rich in vitamins, antioxidants, and fatty acids that nourish and moisturize the skin, enhancing the overall effectiveness and absorption of essential oils.

Dilution ratios are another essential aspect to consider when using carrier oils with essential oils for knee pain relief. A commonly recommended dilution ratio is 2-3% for adults, which equates to approximately 12-18 drops of essential oil per ounce of carrier oil. However, it’s crucial to consult individual essential oil guidelines and perform a patch test for allergies and sensitivities before applying the mixture to a larger area.

Blending multiple essential oils with carrier oils may also provide a synergistic effect, enhancing the overall pain-relieving and anti-inflammatory benefits for knee pain. For example, combining essential oils like lavender, eucalyptus, and frankincense with a suitable carrier oil may offer a more potent remedy for knee pain. While lavender provides a calming effect, eucalyptus and frankincense have anti-inflammatory properties that help reduce swelling and discomfort.

In conclusion, carrier oils are indispensable when working with essential oils for knee pain relief, providing both safety and enhanced therapeutic benefits. By carefully selecting the appropriate carrier oil and dilution ratio, you can create a customized and effective solution to alleviate knee pain, optimize absorption, and protect your skin from potential irritation. As with any new treatment, it’s essential to consult a healthcare professional before incorporating essential oils into your knee pain management regimen.

Image of different types of carrier oils for knee pain relief: coconut oil, sweet almond oil, avocado oil, jojoba oil, grapeseed oil, and olive oil.

Safety Precautions and Side Effects

Moving forward, it is important to remember that essential oils are popular natural remedies due to their therapeutic properties and have been successfully used to alleviate various health issues, including knee pain. However, to ensure their safe and effective use, it’s crucial to be aware of the possible side effects, as well as proper storage, handling, and safety precautions. By staying informed and following guidelines, you can minimize any risks associated with essential oils and get the maximum benefit from their therapeutic properties in addressing knee pain.

For instance, essential oils are highly concentrated and potent, thus should not be directly applied to the skin without dilution. This can lead to skin irritation, itching, redness, or even burns. Always mix essential oils with carrier oils such as coconut, almond, or jojoba oil before applying them to the skin, and perform a patch test to ensure there is no reaction before using it on a larger area.

Some essential oils have the potential to interact with medications and might not be suitable for individuals with certain health conditions or allergies. If you are pregnant, nursing, or have a chronic health condition like asthma, epilepsy, or high blood pressure, it is crucial to consult with a healthcare professional before using essential oils for knee pain. Furthermore, essential oils like wintergreen and sweet birch should be used with caution since they contain methyl salicylate, a compound similar to aspirin and might negatively interact with blood thinners, or pose a risk for those with aspirin sensitivities.

Storage of essential oils is an essential aspect to consider, as improper storage might lead to spoilage, loss of potency, or accidental ingestion. Ensure that essential oils are stored in dark, airtight, and glass containers, away from sunlight or extreme temperatures. They should be kept in a secure location away from the reach of children and pets, as their concentrated nature can be toxic and hazardous if ingested.

Inhalation of essential oils might also pose safety concerns, as overexposure can lead to headaches, dizziness, or respiratory irritation. When using essential oils for knee pain via aromatherapy or an oil diffuser, ensure proper ventilation and avoid inhaling concentrated vapors directly from the bottle. It’s also advisable to limit the exposure duration and vary the oils in use to prevent overexposure.

Overall, essential oils can be a useful tool to help alleviate knee pain, provided their potential risks and side effects are taken into consideration. By educating yourself about the specific properties and contraindications for the essential oils chosen for pain relief, you can optimize their benefits while ensuring proper storage, handling, and safety precautions are followed. In this way, you can unlock the therapeutic potential of essential oils while reducing the risk of unwanted side effects or complications.

An illustration of a person holding their knee in pain.

Best Practices for Effective Results

One of the best practices for effective results when using essential oils for knee pain relief is to choose the right oils with anti-inflammatory and analgesic properties. Some of the most effective essential oils for knee pain include lavender, eucalyptus, rosemary, chamomile, and peppermint oil. By incorporating these oils, which are known to reduce inflammation, provide a soothing effect, and increase blood circulation to the affected area, you can promote quicker healing and relief from pain while making the most of the therapeutic potential they offer.

Another key aspect to consider is the dilution of essential oils before applying them to the skin. Essential oils are highly concentrated substances that can cause irritation or allergic reactions if applied directly to the skin. To avoid this, it’s paramount to dilute the chosen essential oil with a suitable carrier oil, such as coconut, jojoba, or almond oil, in a ratio of approximately 2-3 drops of essential oil per teaspoon of carrier oil. Properly diluting the essential oil ensures that the oil is safe to apply on the skin.

Using appropriate techniques for applying essential oils to the affected area can also help maximize their pain-relieving benefits. One recommended method is to gently massage the diluted essential oil in a circular motion around the knee area, which can help the oil absorb into the skin and stimulate blood flow to help alleviate pain. Using kneading and stroking methods during the massage will work the oil into the muscles and soft tissues to provide deeper relief.

Heat therapy can also be combined with essential oils for enhanced relief of knee pain. After applying the diluted essential oil, cover the knee with a warm towel or heating pad, as the heat will help increase blood circulation, reduce stiffness and allow the oils to penetrate more deeply into the skin. This combination of essential oils and heat therapy is particularly effective for relieving pain caused by rheumatoid arthritis, osteoarthritis, and muscle strains.

Using essential oils can provide relief for knee pain, but it is essential to remember that they should not replace professional medical treatment. If you experience severe or chronic knee pain, or if you have adverse reactions to essential oil use, it is important to consult a healthcare professional for advice and appropriate treatment. Being aware of the potential risks and contraindications of essential oil use is fundamental for achieving optimal results and ensuring the safe usage of these natural remedies for knee pain relief.

An image showing different bottles of essential oils like lavender, eucalyptus, rosemary, chamomile, and peppermint with a jar of coconut oil and a spoon to represent diluting the oils.

Case Studies and Testimonials

A case study that highlights the effectiveness of essential oils for knee pain-relief is that of Sarah, who suffered from chronic knee pain due to osteoarthritis. Upon her friend’s recommendation, she tried applying a blend of lavender, eucalyptus, and ginger essential oils to her knees twice daily. After just three weeks, Sarah noticed a significant reduction in her knee pain, to the extent that she could resume her daily exercise routine. Consequently, she continues to use the essential oils to manage her pain and has shared her positive experience with others suffering from knee pain.

Another case study involves Michael, a 45-year-old former athlete who primarily relied on pain medication to deal with his knee pain. Michael suffered an injury during his career, which led to chronic knee pain and limited mobility. He decided to try essential oils as a holistic alternative to over-the-counter medications. By combining rosemary, peppermint, and marjoram essential oils, he created a blend that enabled him to feel relief and increased mobility after a few weeks of use. Michael now diligently incorporates essential oils into his pain management plan, helping him reduce his dependency on pain medication.

Testimonials from individuals who have found relief in using essential oils for knee pain can be found across various online forums and communities. One such testimonial comes from Jane, who noticed the effects of essential oils on her knee pain after undergoing surgery. Jane used a blend of lavender, chamomile, and frankincense essential oils to massage her knee during her recovery, resulting in a noticeable decrease in swelling, inflammation, and pain. Her healing process greatly benefited from the incorporation of essential oils into her daily routine.

In another testimonial, a man named James described the progress he experienced using essential oils for knee pain relief. James had been dealing with knee pain despite taking NSAIDs and anti-inflammatory drugs. After researching alternative methods, he decided to try using essential oils. A combination of lavender, ginger, and wintergreen essential oils was applied to his knee each night after his workouts, resulting in reduced pain and increased mobility. James emphasizes that essential oils have been a useful option for managing his pain when conventional methods had failed.

Essential oils have gained popularity as an affordable and natural means to manage knee pain, with many individuals incorporating them into their daily routines for effective pain relief. Ashley shared her success story of using a combination of eucalyptus, lemongrass, and a carrier oil to combat runner’s knee pain. By massaging her affected knee daily, she experienced a significant decline in pain levels, showcasing the potential of essential oils for pain management alongside other holistic practices.

An image of five different essential oil symbols, including a lavender flower, eucalyptus leaf, rosemary sprig, peppermint plant, and ginger root, representing the essential oils used in the case studies and testimonials above.

Complementary Therapies

One complementary therapy to enhance the effectiveness of essential oils for knee pain relief is acupuncture. This ancient Chinese medicine technique involves inserting thin needles at specific points in the body to stimulate blood flow, promote natural self-healing, and release natural pain-relieving endorphins. Acupuncture has been extensively studied for its potential to alleviate various types of pain, including knee pain. Combining this therapy with essential oils like lavender or eucalyptus, through massages or by applying them directly to the skin after proper dilution, can create a synergistic effect that leads to more effective knee pain relief.

Massage therapy is another complementary treatment that can be combined with essential oils to manage knee pain. Gentle massage can help stimulate blood flow, relax tense muscles, and release endorphins, which can naturally alleviate pain. Using essential oils like chamomile and peppermint during a massage can help decrease inflammation and increase relaxation. The combination of massage and aromatherapy using essential oils may provide a more holistic approach to managing knee pain.

Physical therapy can also be an integral part of a comprehensive knee pain management plan. Knee pain is often caused by muscle imbalances, structural issues, or lack of flexibility. A physical therapist can help design an exercise regimen tailored to your individual needs that can help strengthen impacted muscles, improve alignment, and increase flexibility. Incorporating essential oils like ginger, rosemary, or frankincense into your physical therapy routine may provide additional pain relief through their analgesic and anti-inflammatory properties.

Heat and cold therapy are also useful complementary treatments for knee pain. Applying heat, such as a warm compress or heating pad, can help relax muscles, increase circulation, and alleviate joint stiffness. Cold therapy, such as a cold compress or ice pack, can help numb the area, reducing pain and inflammation. Essential oils, such as lavender for relaxation during heat therapy or peppermint for cooling during cold therapy, can be combined with these treatments to maximize their effects in managing knee pain.

Lastly, practicing mindfulness and relaxation techniques can contribute to managing knee pain holistically. Deep breathing exercises, progressive muscle relaxation, and meditation can help reduce stress, which can exacerbate pain. Incorporating essential oils with calming properties, such as lavender or ylang ylang, during these relaxation practices can enhance their effectiveness. By using a multipronged approach of complementary therapies and essential oils, you may find a more effective and holistic way to manage your knee pain.

Illustration of a person holding their knee in pain with a red circle around the knee joint area and arrows pointing to common areas of knee pain.

As we have seen, essential oils possess remarkable properties that can aid in managing knee pain and enhancing our quality of life. By understanding the various oils, their benefits, application methods, and safety measures, we can effectively incorporate them into our daily routines to address pain and inflammation. Furthermore, combining essential oils with complementary therapies allows for a holistic approach to treatment, maximizing pain relief and promoting overall wellness. Ultimately, a deeper understanding of essential oils and their applications empowers us to take control of our health and make better decisions for a happier and more pain-free future.

Massage for Knee Pain

Knee pain is a common issue that can be caused by various factors such as injuries, overuse, arthritis, or inflammation. Learning how to perform a massage to alleviate knee pain can provide significant relief and improve overall wellbeing. This guide will help you understand the anatomy of the knee, principles of massage,and specific massage techniques for knee pain relief. Additionally, you will explore safety precautions, complementary therapies, and how to develop a massage routine.

Anatomy of the Knee

The knee is a complex and crucial joint in the human body that bears our weight and allows for mobility. It is important to understand the structures of the knee to effectively massage and alleviate knee pain. In this guide, we will discuss the various anatomical components of the knee and their function, followed by instructions on how to perform a massage for knee pain relief.

I. Anatomy of the Knee:

  • A. Bones
    1. Femur (thighbone) – the bone extending from the hip to the knee
    2. Tibia (shinbone) – the larger and stronger of the two bones in the lower leg, located beneath the femur
    3. Fibula – the smaller, thinner bone in the lower leg, located next to the tibia
    4. Patella (kneecap) – a triangular-shaped bone that protects the front of the knee joint
  • B. Muscles
    1. Quadriceps – a group of four muscles at the front of the thigh that extend the leg
    2. Hamstrings – three muscles at the back of the thigh that help bend the knee
    3. Popliteus – a small muscles at the back of the knee, assisting in knee flexion
    4. Gastrocnemius – a big muscle at the back of the lower leg, crossing the knee and ankle joints
  • C. Ligaments
    1. Anterior cruciate ligament (ACL) – prevents the tibia from sliding forward on the femur
    2. Posterior cruciate ligament (PCL) – prevents the tibia from sliding backward on the femur
    3. Medial collateral ligament (MCL) – provides stability to the inner part of the knee
    4. Lateral collateral ligament (LCL) – provides stability to the outer part of the knee
  • D. Tendons
    1. Quadriceps tendon – connects the quadriceps muscles to the patella
    2. Patellar tendon – connects the patella to the tibia
    3. Hamstring tendons – connect the hamstring muscles to the tibia and fibula

II. Massage Techniques for Knee Pain Relief:

  1. A. Preparation
    • Clean your hands and the knee area with soap and water.
    • Sit or lie down comfortably with the knee exposed and slightly bent.
  2. B. Warming Up the Area
    • Place your hands on the thigh above the knee and gently rub to generate heat.
    • Apply a small amount of massage oil or lotion to your hands for smoother movements.
  3. C. Massaging Techniques
    • Kneading (Quadriceps and Hamstrings) – Gently squeeze and release the muscles, working your way from the top of the thigh to the bottom.
    • Cross-Fiber Friction (Tendons and Ligaments) – Apply pressure with your fingertips and use short back-and-forth motions, making perpendicular movements to the direction of the fibers.
    • Circular Friction (Patella) – Use your fingertips to make small circles around the kneecap, gradually increasing pressure.
  4. D. Stretching
    • Gently stretch the muscles surrounding the knee to improve flexibility and reduce muscle tension.
    • Perform stretches that target the quadriceps, hamstrings, and calf muscles.
  5. E. Finishing Up
    • Gently stroke the knee and surrounding area to relax the muscles and improve circulation.
    • Apply a cold pack or ice to help reduce inflammation.

Understanding the anatomy of the knee is essential for targeting specific structures during a massage for knee pain relief. By using a combination of massage techniques and stretching, one can effectively alleviate knee pain and promote overall joint health. Remember to always consult with a healthcare professional before beginning any new treatment or if the pain persists.

A person applying massage techniques to the knee area using their hands.

Causes of Knee Pain

Knee pain is a common problem that affects people of all ages. It can be caused by various factors, such as injuries, overuse, arthritis, or inflammation. Understanding the different causes of knee pain can help you determine the best massage techniques to alleviate the discomfort. In this guide, we will look at the common causes of knee pain and provide some guidance on massage techniques that can help address the issue.

Causes of Knee Pain:

  1. Injuries: One of the most common reasons for knee pain is an injury. Injuries can happen suddenly due to a fall, collision, or wrong movement. Common knee injuries include:
    • Ligament tears (such as ACL, MCL, or PCL)
    • Meniscus tears
    • Patellar tendonitis (jumper’s knee)
    • Dislocated kneecap
  2. Overuse: Knee pain can also be caused by overuse due to repetitive movements or excessive strain. This may include activities like running, jumping, or squatting, putting the knee under constant pressure. Overuse injuries often lead to the development of patellofemoral pain syndrome (PFPS) or iliotibial band syndrome (ITBS).
  3. Arthritis: Arthritis is a joint disorder that causes inflammation and pain in the knee. The most common form of arthritis affecting the knee is osteoarthritis, where the cartilage in the joint wears away over time, causing bone to rub against bone and resulting in knee pain.
  4. Inflammation: Knee pain may be caused by inflammation in the tissues surrounding the joint. This can include conditions like bursitis and tendonitis, which usually result from excessive strain, injury, or repetitive motions.

Massage Techniques for Knee Pain Relief:

Before attempting any massage techniques, make sure to consult with a medical professional to rule out any serious injuries, and always proceed with caution.

  1. For overuse or inflammatory-related knee pain, begin by gently warming up the area with a heating pad or by gently rubbing the knee in a circular motion. This will help increase blood flow to the area and prepare it for further massage.
  2. Use your fingers or a massage tool to apply gentle pressure around the kneecap, moving in circular motions. This can help loosen up any tight muscles that may be contributing to the pain.
  3. Massage the muscles surrounding the knee joint, including the quadriceps, hamstrings, and calves. Apply long, deep strokes to these muscles to help release tension and improve circulation.
  4. For arthritis-related pain, focus on gently massaging the knee joint itself, using circular motions and gentle pressure. This can help stimulate blood flow and reduce inflammation.
  5. If your knee pain is caused by iliotibial band syndrome, use deep, firm strokes to massage the IT band, which runs along the outside of the thigh from the hip down to the knee. This can help release tension and improve flexibility.

Remember that massage should never cause pain. If you experience any discomfort or sharp pain during your massage session, stop immediately and consult with a medical professional.

Image Description:

An image showing a person massaging their knees with their fingers could be used to complement the text. The image could showcase the quadriceps, hamstrings, and calves surrounding the knee joint. The filename for this PNG image would be ‘knee-massage-detail.png‘.

An image showing a person massaging their knees with their fingers showcasing the quadriceps, hamstrings, and calves surrounding the knee joint.

Principles of Massage

Knee pain is a common issue faced by many adults, and massage therapy can be an effective way to relieve pain and promote healing. This guide will walk you through the fundamentals of massage therapy, including pressure, kneading, stroking, and friction. Learn how these techniques can be employed to alleviate knee pain and improve your overall well-being.

Principles of Massage:

  1. Pressure: The amount of force applied to the body’s tissues during a massage. Pressure can help to release tension, stimulate blood flow, and break down adhesions within the muscles and connective tissues.
  2. Kneading: A massage technique in which the therapist applies pressure to the muscles and soft tissues using a squeezing, rolling, or pinching motion. Kneading can help to reduce muscle stiffness and improve circulation.
  3. Stroking: A gentler technique in which the therapist uses their hands to glide over the surface of the skin, creating relaxation and promoting a sense of well-being.
  4. Friction: A technique where the therapist applies pressure and uses a rubbing or circular motion to create heat and break down adhesions within the tissue. Friction can help to reduce pain and inflammation.

Massage Techniques for Knee Pain Relief:

  1. Warm-up: Begin by applying some massage oil or lotion to your hands and gently apply it to the knee area. Start with light strokes to warm up the tissues surrounding the knee.
  2. Circular friction: With your fingertips or the palm of your hand, create small circles around the knee cap, applying moderate pressure. This helps to improve circulation and reduce inflammation.
  3. Kneading the thigh muscles: Move upwards to the muscles of the thigh, using the kneading technique to work through any areas of tension. Work your way from the knee up towards the hip, focusing on the quadriceps at the front and the hamstrings at the back of the thigh.
  4. Calf muscle massage: Move down to the calf muscles and use the kneading technique to work through any areas of tension or tightness.
  5. Supporting structures: Gently massage the tendons and ligaments surrounding the knee, using friction and light pressure. Pay particular attention to the iliotibial (IT) band, a thick band of tissue that runs from the hip to the knee along the outer side of the leg, and the patellar tendon, which connects the kneecap to the shinbone.
  6. Stretching: After completing the massage, gently stretch the muscles surrounding the knee. This could include a seated hamstring stretch, quadricep stretch, or calf stretch.
  7. Cool-down: Finish the massage by using light strokes to promote relaxation and soothe the area.

Remember to always check with a healthcare professional before beginning any massage therapy, particularly if you have existing medical conditions or concerns. It’s essential to approach massage for knee pain with care and to listen to your body’s signals to ensure you’re not causing further harm.

Practice these massage techniques consistently and adapt them as needed to help relieve your knee pain and support your journey towards improved health and comfort.

An image that shows a person with their knee up and a person massaging the area around the knee to relieve pain.

Specific Massage Techniques for Knee Pain

Before proceeding with the massage, always consult a healthcare professional to ensure that it is safe and appropriate for your specific situation.

Effleurage:

This massage technique involves light and gentle stroking motions, which helps to warm up the area and promote relaxation.

  • Start by resting the knee in a comfortable and supported position.
  • Apply a small amount of massage oil or lotion to your hands and rub them together to warm it up.
  • Place your hands on either side of the knee and use light, long, gliding strokes to massage the area, moving from the knee joint up towards the thigh and back down to the lower leg. Perform this technique for a few minutes.

Petrissage:

This technique involves kneading and lifting the muscles and soft tissues to help release tension.

  • With your fingers and thumbs, gently knead and lift the muscle around the knee joint, working up and down the thigh and lower leg.
  • Focus on areas where you feel tightness or tension and vary the pressure based on comfort. Spend around 5 minutes on this technique.

Friction:

Friction helps to break up adhesions and scar tissue around the knee joint, reducing pain and stiffness.

  • Using your fingertips or knuckles, apply more focused pressure to the area around the knee, working on any tight spots.
  • Use small, circular or back and forth motions with moderate pressure to target each area.
  • Spend 3-5 minutes on this technique.

Trigger Point Therapy:

Trigger points are tight knots in the muscle that can cause localized and referred pain. By applying targeted pressure to these points, you can help release the muscle tension.

  • Identify any trigger points or tight areas around the knee by gently pressing with your fingers.
  • Once you have located a trigger point, apply steady pressure using your fingertips or a massage tool for 30-60 seconds. The pressure should be firm but not painful.
  • After releasing the pressure, stretch the area gently to help the muscle relax.
  • Move on to the next trigger point and repeat the process. Spend around 5-10 minutes on this technique.

Stretch and Mobilize:

After massaging the knee, it is important to stretch and mobilize the area to prevent stiffness and support the healing process.

  • Perform gentle stretches for the hamstrings, quadriceps, and calf muscles, holding each stretch for 30 seconds.
  • Additionally, gently bend and straighten the knee joint to encourage mobility.

Remember to practice each technique regularly to become proficient and adjust the pressure according to your comfort level. Always listen to your body and discontinue any technique that causes pain or discomfort. While these massage techniques can help alleviate knee pain, it is important to consult with a healthcare professional to address the root cause of the pain and receive appropriate treatment.

An illustration showing four different massage techniques for knee pain relief highlighted with arrows and labels. The techniques are Effleurage, Petrissage, Friction and Trigger Point Therapy.

Safety and Precautions

Massage can be a helpful technique to alleviate knee pain and discomfort, but it is essential to follow proper safety measures and precautions to avoid injury or worsening the condition. This guide will help you understand the necessary steps to take when giving a massage for knee pain.

Step 1: Assess the pain and understand the cause

  • If the individual has recently suffered an injury or has inflammation in the knee, it is best to consult with a healthcare professional before proceeding with a massage.
  • Ensure that the individual does not have any contraindications for massage, such as a recent fracture, open wounds, skin infections, or deep vein thrombosis.

Step 2: Set up a comfortable and clean environment

  • Choose a quiet and relaxing environment to perform the massage. Ensure that the space is clean and free from any potential hazards. Use a comfortable massage table or chair that provides proper support for the person’s body.
  • Ensure that the massage area has adequate lighting, is free from distractions, and maintains a comfortable room temperature.
  • Utilize clean linens and sanitize your hands before beginning the massage.

Step 3: Begin with light pressure and follow the individual’s comfort level

  • Start the massage by applying gentle pressure on the muscles surrounding the knee. Communicate with the person frequently to ensure their comfort and adjust your pressure accordingly.
  • Avoid abrupt movements or excessive pressure, which could cause discomfort or worsen the knee pain.
  • It is essential to be attentive to the individual’s verbal and non-verbal cues and adjust your touch accordingly to ensure a safe and comfortable experience.

Step 4: Avoid specific knee areas and positions

  • There are certain areas around the knee that you should avoid while massaging, as applying pressure on these areas can cause pain or aggravate an existing condition.
  • Do not apply direct pressure to the kneecap or the popliteal region (the area behind the knee).
  • Avoid forcing the knee into extreme positions, such as excessive bending or twisting, which could cause discomfort or injury.

Step 5: Monitor for side effects or adverse reactions

  • While massages are generally safe, they can sometimes cause side effects or adverse reactions. It is important to be mindful of any changes or exacerbation of pain during and after the massage session.
  • If the individual experiences increased pain, swelling, or redness after the massage, encourage them to consult with their healthcare provider.
  • Should the person feel light-headed, dizzy, or experience any discomfort during the massage, stop the session immediately and ensure that they are in a comfortable and safe position.

In conclusion, providing a massage for knee pain can be a helpful tool when performed correctly and safely. It is essential to take the proper precautions, such as assessing the person’s knee pain, understanding any contraindications, and communicating with them throughout the process to ensure their comfort and safety.

An image of a person sitting in a chair with their foot resting on a cushion while another person massages their knee with gentle pressure.

Complementary Therapies

Massage therapy can help alleviate knee pain, but incorporating complementary therapies can enhance the benefits and provide lasting relief. In this guide, you will learn how to incorporate stretching, strengthening exercises, and heat/cold therapy into your routine safely and effectively. Remember to consult your healthcare provider before starting any new exercise or therapy regimen.

1. Stretching

Stretching improves flexibility and range of motion, which can help relieve knee pain. Here are a few simple stretches you can do:

  • Hamstring Stretch: a. Sit on the ground with legs extended b. Hinge forward at the hips and reach for your toes c. Hold the stretch for 15-30 seconds; repeat 2-3 times on each leg
  • Quadricep Stretch: a. Stand tall, holding on to a wall or chair for support if needed b. Bend your knee and bring your heel toward your buttocks c. Grasp your ankle and gently pull it towards your buttocks until you feel a stretch in the front of your thigh d. Hold the stretch for 15-30 seconds; repeat 2-3 times on each leg
  • Calf Stretch: a. Stand facing a wall at arm’s length; place hands on the wall for support b. Step one foot back keeping it flat on the ground c. Bend your front knee until you feel a stretch in the calf of your back leg d. Hold the stretch for 15-30 seconds; repeat 2-3 times on each leg

2. Strengthening Exercises

Strengthening the muscles surrounding the knee can help alleviate pain. Here are some exercises to try:

  • Straight Leg Raises: a. Lie down with one leg bent and the other straight b. Tighten the thigh muscle of your straight leg and lift it about 6-12 inches off the ground c. Hold for 3-5 seconds, then slowly lower it back to the ground d. Repeat 10-15 times on each leg; perform 2-3 sets
  • Glute Bridges: a. Lie down on your back with knees bent and feet flat on the ground b. Squeeze your glutes and lift your hips off the ground, creating a straight line from your knees to your shoulders c. Hold for 3-5 seconds; lower back down d. Repeat 10-15 times; perform 2-3 sets
  • Clamshells: a. Lie on your side with legs bent at a 90-degree angle; one leg on top of the other b. Keeping your feet together, lift your top knee as high as possible without shifting your hips c. Slowly lower back down to starting position d. Repeat 10-15 times on each side; perform 2-3 sets

3. Heat/Cold Therapy

Applying heat or cold can provide relief for knee pain. Always use a barrier (such as a towel) between the heat or cold source and your skin to avoid burns or frostbite.

  • Heat Therapy: Apply a warm compress or heating pad to the affected area for 15-20 minutes. This can promote blood flow and help relax muscles. Use heat before stretching or exercising to warm up the area.
  • Cold Therapy: Apply an ice pack or cold compress to the affected area for 15-20 minutes. This can reduce inflammation and numb pain. Use ice after exercising or when experiencing acute pain to help minimize swelling and discomfort.

Incorporating stretching, strengthening exercises, and heat/cold therapy into your routine can enhance the benefits of massage therapy in reducing knee pain. Always consult your healthcare provider before starting any new exercise or therapy regimen. Use these complementary therapies to help alleviate knee pain and improve overall mobility and function.

A person doing a quadricep stretch, grasping their ankle and gently pulling it towards their buttocks with their heel touching their buttocks.

Developing a Massage Routine

Knee pain is a common issue that can arise from various factors such as overuse, injuries, or degenerative changes. Incorporating massage therapy into your routine can help alleviate knee pain, increase mobility, and enhance overall wellbeing. This massage routine combines suitable techniques and supplementary therapies to provide optimal relief to your knee pain.

Preparations:

  • Find a quiet and comfortable space.
  • Wear loose and comfortable clothing.
  • Make sure your hands, the knee receiving the massage, and all tools (massage oils or lotions) are clean.

Warm-up the knee:

  • Gently rub a warming massage oil or lotion on your hands to warm them up.
  • Begin with effleurage movements (long, gliding strokes) around the knee joint to stimulate blood circulation and warm the tissues. Repeat this ten times.

Relax the muscles surrounding the knee:

  • Apply a moderate pressure and use your fingers to perform petrissage (kneading) techniques on the calf, thigh, and hamstring muscles. This will help increase joint flexibility and relieve muscle tension.
  • Spend 3-5 minutes on each muscle group.

Cross-fiber friction:

  • Focus on the tendons and ligaments surrounding the knee joint.
  • Use your thumb or fingers to perform cross-fiber friction (back and forth movements) on these areas. This technique aims to break adhesions and increase the range of motion.
  • Spend 2 minutes on each major ligament or tendon.

Trigger point therapy:

  • Locate any tender points around the knee by applying gentle pressure and checking for pain or discomfort.
  • Apply firm pressure on these points with your thumb or fingers. Hold the pressure for 5-10 seconds until the discomfort subsides. This technique helps alleviate localized pain and promote muscle relaxation.

Myofascial release (optional, use a foam roller):

  • Place a foam roller on the floor and position your affected leg over it.
  • Slowly roll your calf, thigh, and hamstring muscles to release tightness in the fascia (connective tissue).
  • Spend 5-10 minutes per muscle group.

Stretching:

  • Gently stretch the muscles around your knee to improve flexibility.
  • Hold each stretch for 15-30 seconds. Some useful stretches include hamstring stretch, quadriceps stretch, and calf stretch.

Hot or cold therapy:

  • Apply a hot pack or cold pack to your knee for 10-15 minutes, depending on your comfort level and preference. Heat therapy aids in relaxation and blood flow, while cold therapy reduces inflammation.

Finish:

  • Finish your massage routine with light effleurage strokes to flush out any accumulated metabolic waste and to promote relaxation. Optionally, apply a topical analgesic cream (e.g., menthol) to the knee for further pain relief.

Perform this massage routine once or twice a week to optimize its effectiveness. Consider consulting a professional massage therapist or physical therapist if your knee pain persists or worsens. Regular massage and stretching can help prevent injuries and promote long-term relief from knee pain.

A graphic illustration of a person massaging their knee with their hands and applying lotion.

Hands-on Practice

Objective: Gain experience by practicing your newly acquired massage skills on friends, family, or yourself to alleviate knee pain. This practical experience will help improve your technique and increase your confidence.

Materials:

  • A comfortable place to sit or lie down
  • Massage oil, lotion, or cream
  • Towel or pillow (optional)

Instructions:

  1. Find a comfortable position: The person receiving the massage should either be sitting in a comfortable chair or lying down with their knee exposed. If lying down, you can place a towel or pillow under the knee for support.
  2. Warm the massage oil or lotion: Rub the massage oil or lotion between your hands to warm it, making it easier to spread evenly and absorb into the skin.
  3. Start with gentle strokes: Place your hands around the knee, and use your fingers and palms to gently stroke the muscles, tendons, and ligaments in the knee area. This helps to warm the tissues and increase blood flow to the area, improving the efficacy of the massage.
  4. Apply pressure with your thumbs: Beginning at the base of the knee and working your way upwards, use your thumbs to apply firm pressure along the inner and outer sides of the knee. This helps in stimulating the circulation, releasing tension, and breaking up adhesions in the muscles and connecting tissues.
  5. Massage the calf and thigh muscles: Focus on the muscles on both the upper and lower leg. With your fingers and palms, apply firm, even pressure while working your way up and down the length of the upper and lower leg muscles. This will help release tension in the muscles that support the knee joints.
  6. Perform circular motions around the kneecap: With your fingers, gently apply pressure to make small, circular motions around the edges of the kneecap. This helps to stimulate blood flow, loosen the connective tissues, and improve mobility in the knee joint.
  7. Finish with gentle strokes: Complete the massage by using gentle, long strokes on the entire knee area, going in the direction of the heart. This helps remove any toxins released during the massage and aids relaxation.
  8. Follow-up care: After the massage, encourage the person receiving the massage to relax, stretch, and hydrate to ensure the full benefits of the treatment. It’s essential to always check in with the person throughout the massage to ensure their comfort and that the pressure being applied is appropriate.

A person massaging another person's knee with a happy facial expression.

As you gain knowledge and practice your massage techniques for knee pain, remember to prioritize safety and personalize your routine to best address the underlying cause of pain. Hands-on practice with friends, family, or even yourself, will help refine your skills and increase your confidence. Harnessing the power of massage, along with complementary therapies, can greatly improve knee pain and contribute to a higher quality of life.

Knee Pain Stretches

Knee pain can range from minor discomfort to debilitating pain that limits daily activities. Understanding the anatomy of the knee, various types of knee pain, and the importance of stretching can help alleviate pain and improve overall joint health. In this article, we will explore the components of the knee, different types of knee pain, the significance of stretching, and specific stretches for various muscle groups that contribute to knee pain.

Anatomy of the Knee

Knee pain is a common issue faced by many adults, and it can significantly impact their everyday life. By understanding the anatomy of the knee and the common causes of knee pain, you can learn effective stretches and exercises to alleviate discomfort and improve knee health. This guide will provide you with essential information about the knee’s components, common causes of knee pain, and a comprehensive list of stretches to help you achieve your goal of mitigating knee discomfort.

Anatomy of the Knee:

The knee joint is a complex structure made up of several components, including bones, ligaments, tendons, and cartilage. Understanding these components is crucial for effectively identifying the root cause of knee pain.

  1. Bones: The knee joint consists of three bones: the femur (thighbone), the tibia (shinbone), and the patella (kneecap). These bones work together to enable walking, running, and other lower-body movements.
  2. Ligaments: The knee has four main ligaments that connect bones and provide stability for the joint: the anterior cruciate ligament (ACL), the posterior cruciate ligament (PCL), the medial collateral ligament (MCL), and the lateral collateral ligament (LCL).
  3. Tendons: Tendons connect the knee joint’s muscles to bone, playing a crucial role in movement. The most prominent tendon in the knee is the patellar tendon, which connects the kneecap to the shinbone.
  4. Cartilage: Two types of cartilage are present in the knee joint – the menisci and the articular cartilage. The menisci are the C-shaped cartilage discs that cushion and stabilize the knee. Articular cartilage covers the ends of the bones in the joint and enables smooth movement.

Common Causes of Knee Pain:

1.Osteoarthritis: This is the most common form of arthritis and occurs when the knee cartilage breaks down due to wear and tear.
2.ACL injury: Often occurring in sports that require quick pivoting movements, ACL injuries involve a tear in the ligament responsible for knee stability.
3.Patellar tendinitis: Characterized by inflammation in the patellar tendon, leading to pain in the front of the knee.
4.Meniscal tear: A tear in the menisci can cause pain, stiffness, and limited range of motion in the knee.
5.Bursitis: The inflammation of the bursa (fluid-filled sacs that cushion the knee joint) can result in knee pain.

Knee Pain Stretches:

1.Hamstring Stretch: Sit on the edge of a chair with one leg extended straight in front of you and the other foot on the floor. Gently lean forward until you feel a stretch in the back of your thigh. Hold for 15-30 seconds, then switch legs.
2.Quadriceps Stretch: Stand with feet hip-width apart and hold onto a chair for balance. Bend your knee and grasp your ankle, gently pulling your heel towards your glutes. Hold for 15-30 seconds, then switch legs.
3.Calf Stretch: Stand facing a wall and place your hands on the wall at shoulder height. Step back with one foot while keeping it flat on the ground, and bend the other knee. Lean into the wall until you feel a stretch in the calf muscle of the back leg. Hold for 15-30 seconds, then switch legs.
4.Iliotibial Band (IT Band) Stretch: Sit on the floor with legs extended in front of you. Cross one leg over the other, and gently pull the top knee towards the opposite shoulder. Hold for 15-30 seconds, then switch legs.
5.Hip Flexor Stretch: Kneel on one knee with the other foot flat on the floor in front of you. Gently push your hips forward until you feel a stretch in the front of your thigh. Hold for 15-30 seconds, then switch legs.

Remember to consult your healthcare professional before starting any new exercise program, especially if you have a history of knee injuries or chronic pain. They can provide you with personalized advice and guidance to ensure the best results while minimizing the risk of injury.

A person sitting on a chair with one leg extended and the other foot on the floor, performing hamstring stretch for knee pain relief

Types of Knee Pain

Patellofemoral pain syndrome, also known as runner’s knee, is a common cause of knee pain in adults. It occurs when the patella (kneecap) does not track properly over the femur (thigh bone) due to muscle imbalances or abnormal forces.

  • Symptoms:
    • Pain in the front of the knee, around or behind the kneecap
    • Increased pain when walking, climbing stairs, or squatting
    • A feeling of popping or grinding in the knee
  • Causes:
    • Overuse from repetitive activities such as running or jumping
    • Weak or imbalanced thigh muscles
    • Flat feet or improper footwear

Osteoarthritis is a degenerative joint disease that causes cartilage breakdown in the knee.

  • Symptoms:
    • Pain that worsens with activity and improves with rest
    • Swelling and stiffness in the joint
    • Limited range of motion
  • Causes:
    • Aging, as the cartilage naturally wears down over time
    • Previous knee injury or surgeries
    • Obesity, which places increased pressure on the knee joints

Tendinitis, also known as jumper’s knee, is inflammation of the tendons around the knee joint, usually the patellar tendon.

  • Symptoms:
    • Pain and tenderness around the tendon, often where it meets the bone
    • Swelling and redness
    • Pain that worsens with activity
  • Causes:
    • Overuse of the knee joint, especially in activities that involve jumping
    • Tight or imbalanced leg muscles
    • Poor training techniques or sudden increases in training intensity

The meniscus is a C-shaped cartilage that cushions the knee joint. A tear can cause significant pain and instability in the knee.

  • Symptoms:
    • Pain, swelling, and stiffness in the knee joint
    • A clicking or locking sensation
    • Difficulty bending or straightening the knee
  • Causes:
    • Sudden twisting or pivoting motions, often during sports
    • Degeneration of the meniscus with age

Knee ligament injuries, such as ACL, PCL, MCL, and LCL tears, can cause significant pain and instability in the joint.

  • Symptoms:
    • Severe pain and swelling
    • A loud “pop” or snapping sensation at the time of injury
    • Difficulty bearing weight on the affected leg
  • Causes:
    • Sudden changes in direction or landing awkwardly from a jump
    • Direct contact or collisions during sports

Always consult with a medical professional before beginning any new stretching or exercise routine. Some general knee pain stretches include:

  1. Quadriceps stretch: Stand on one leg, grabbing your foot behind you and gently pulling towards your buttocks. Hold for 15-30 seconds and repeat on the other side.
  2. Hamstring stretch: Sit on the floor with one leg extended and the other bent, foot touching the inner thigh. Gently lean forward, reaching for the extended foot. Hold for 15-30 seconds and repeat on the other side.
  3. Calf stretch: Face a wall and place your hands on it for support. Extend one leg behind you with the heel flat on the ground. Lean forward and feel the stretch in your calf. Hold for 15-30 seconds and repeat on the other side.
  4. IT band stretch: Cross one leg over the other while standing. Lean towards the side of the front leg, feeling the stretch on the outer thigh of the back leg. Hold for 15-30 seconds and repeat on the other side.

An illustration of a person's knee with red and yellow areas highlighting the different types of knee pain.

Importance of Stretching

Knee pain can be a result of injuries, arthritis, or simply daily wear and tear. Stretching is an essential activity in promoting joint health, reducing pain, and improving flexibility. By incorporating a daily stretching routine, adults can alleviate knee pain and prevent potential injuries in the long run. In this article, we will explore the importance of stretching for knee pain, and how to develop a stretching routine for long-term pain prevention.

Understanding the Benefits of Stretching for Knee Pain

  • Reduces stiffness: Stretching helps to lengthen tight muscles and tendons around the knee, which can alleviate stiffness and pain associated with various knee conditions.
  • Improves flexibility: As you stretch and lengthen your muscles, you increase the range of motion in your knee joint. This results in better movement and reduced pain during daily activities.
  • Enhances joint health: Stretching ensures proper blood circulation to the joint, which brings nutrients and oxygen to the area. This promotes faster healing and healthier knees over time.
  • Injury prevention: Strengthening the muscles around the knee through stretching helps to protect and stabilize the joint, making it less prone to injury.

Key Knee Pain Stretches to Include in Your Routine

  • Hamstring stretch: Sit on the ground with one leg extended and the other bent. Reach for your toe on the extended leg while maintaining a straight back. Hold for 15-30 seconds and then switch sides.
  • Quadriceps stretch: Stand and hold onto a support (wall, chair) for balance, then grasp your ankle and pull your heel towards your buttocks. Keep your knees together and hold for 15-30 seconds before switching legs.
  • Calf stretch: Stand facing a wall and place your hands on the wall at shoulder height. Step one foot back, keeping the heel on the ground, and bend the front knee. Hold for 15-30 seconds, then switch legs.
  • Hip flexor stretch: Kneel on one knee with the other foot flat on the ground in front of you. Shift your weight forward until you feel a stretch in your hip. Hold for 15-30 seconds and repeat on the other side.

Developing a Consistent Stretching Routine for Long-term Knee Pain Prevention

  • Warm up: Begin with 5-10 minutes of low-impact activities, such as walking or biking, before stretching. This helps prepare your muscles for stretching and reduces the risk of injury.
  • Set aside time: Dedicate a specific time each day for stretching, preferably during the morning or evening when your muscles are warmed up from daily activities. This helps you stay consistent and develop a habit.
  • Start slow: Gradually increase the intensity and duration of your stretches over time. Remember that it is better to stretch gently and consistently than to overdo it and risk injury.
  • Listen to your body: It’s essential to recognize the difference between a good stretch and pain. Discontinue any stretch that causes excessive discomfort, and consult your healthcare provider for guidance.

Stretching plays a crucial role in alleviating knee pain and maintaining joint health. By incorporating a daily stretching routine, adults can experience improved flexibility, reduced stiffness, and prevention of long-term knee pain. Make sure to start slow, listen to your body, and remain consistent in your efforts to experience lasting benefits for your overall knee health.

Illustration of a person stretching their leg muscles with arrows indicating the direction of the stretch for hamstring, quadriceps, calf, and hip flexor stretches.

Warm-Ups and Cool-Downs

Warming up and cooling down are essential components of any physical activity, especially when dealing with knee pain. Including stretches that target the muscles around your knee joint can help improve flexibility, reduce the risk of injury, and speed up recovery. In this guide, we will outline the importance of warm-ups and cool-downs and provide instructions for effective knee pain stretching routines.

The importance of warming up and cooling down:

  • Increases blood flow and oxygen to muscles, reducing the risk of injury.
  • Gradually raises heart rate, preparing the body for more intense activities.
  • Increases flexibility and joint range of motion.
  • Helps to mentally prepare for the activity, promoting focus and concentration.
  • Facilitates a gradual return to a normal resting state, which can reduce muscle soreness and stiffness after exercise.

Components of effective warm-up and cool-down sequences for knee pain stretches:

  • Duration: Aim for a 5-10 minute warm-up and cool-down period.
  • Gradual progression: Start with low-intensity movements and gradually increase the intensity during the warm-up phase. For the cool-down, gradually decrease the intensity.
  • Targeted muscle groups: Focus on the muscles around the knee joint and those that can impact knee stability and alignment (quadriceps, hamstrings, calf muscles, and hip muscles).

Warm-Up Instructions:

  1. March in place: Stand tall with your feet shoulder-width apart. March in place, lifting your knees as high as comfortable. Repeat for 30 seconds.
  2. Leg swings: Stand next to a wall or hold onto a sturdy object for balance. Swing one leg forward and backward in a controlled motion. Perform 10 swings for each leg.
  3. Hip circles: Stand with feet hip-width apart. Place hands on hips and perform slow, controlled circles with your hips. Do 10 circles in a clockwise direction and then 10 circles counterclockwise.
  4. Gentle bodyweight squats: Stand with feet shoulder-width apart and toes pointing straight ahead. Bend your knees and lower your hips as if sitting in a chair, keeping your chest up and knees behind your toes. Push through your heels to return to the starting position. Complete 10-12 squats.
  5. Dynamic hamstring stretch: Stand tall with one foot slightly in front of the other. Bend from the hips, reaching for your toes with both hands. Keep your legs straight while you bend. Return to the standing position and switch legs. Repeat 10 times on each leg.

Cool-Down Instructions:

  1. Standing quad stretch: Stand next to a wall or hold onto a sturdy object for support. Grab the ankle of one leg and gently pull it towards your buttocks. Keep your knees in line and gently press your hips forward for a deeper stretch. Hold for 20-30 seconds and repeat on the other side.
  2. Seated hamstring stretch: Sit on the floor with your legs extended in front of you. Reach towards your toes, keeping your back straight. Hold for 20-30 seconds.
  3. Calf stretch: Face a wall and place your hands against it at shoulder height. Step one foot back, keeping the heel on the ground and the leg straight. Lean forward, bending the front knee until you feel a stretch in the calf of the back leg. Hold for 20-30 seconds and switch sides.
  4. Seated figure-four stretch: Sit on the floor with your legs extended. Cross one ankle over the opposite thigh, just above the knee. Gently press the raised knee towards the floor to stretch the hip and outer thigh muscles. Hold for 20-30 seconds and switch sides.
  5. Finish with deep breathing exercises: Inhale for 4 seconds, hold your breath for 4 seconds, and exhale for 4 seconds. Repeat this 5 times to help your body return to a calm, resting state.

A person stretching their leg with their hands by the wall

Quad Stretches

Standing Quad Stretch:

  1. Stand up straight in a comfortable space with enough room to move your legs.
  2. Shift your weight to your left leg, and use your right hand to grab your right foot by the ankle or top of the foot. If you’re having trouble balancing, hold onto a wall, chair, or another support with your left hand.
  3. Gently pull your right foot up towards your glutes, keeping your knee pointed down towards the ground. Make sure your thighs are aligned and not spreading apart.
  4. Hold the stretch for 20-30 seconds, breathing deeply and focusing on lengthening your quad muscle.
  5. Release your right foot slowly and shake out your leg.
  6. Switch legs and repeat the stretch on your left side.

Side-lying Quad Stretch:

  1. Lie down on your right side on a comfortable surface, like a yoga mat or a soft carpet.
  2. Rest your head on your right arm, and bend your left knee, bringing your left foot towards your glutes.
  3. Use your left hand to grab the top of your left foot or ankle.
  4. Gently pull your left foot closer to your glutes, while keeping your knees close together.
  5. Hold the stretch for 20-30 seconds, breathing deeply and focusing on lengthening your quad muscle.
  6. Release your left foot slowly and switch sides to repeat the stretch on your right leg.

Prone Quad Stretch:

  1. Lie face-down on a comfortable surface, such as a yoga mat or a soft carpet.
  2. Bend your right knee, bringing your right foot up towards your glutes.
  3. If possible, reach your right hand back to grab your right foot or ankle. If you can’t reach your foot, use a towel or a yoga strap to loop around your foot and hold the ends in your hand.
  4. Gently pull your right foot towards your glutes, while keeping your hips pressed into the ground and not lifting them.
  5. Hold the stretch for 20-30 seconds, breathing deeply and focusing on lengthening your quad muscle.
  6. Release your right foot slowly and switch legs to repeat the stretch on your left side.

Remember to practice these stretches consistently and patiently to see improvement in your flexibility and reduction in knee pain. Make sure to breathe deeply throughout the stretches and never force your muscles into painful positions. If you experience severe pain during any of these stretches, stop immediately and consider consulting a healthcare professional or physical therapist.

An image of a person holding their foot while stretching their quad muscles for knee pain relief.

Hamstring Stretches

Tight hamstring muscles can contribute to knee pain, and incorporating regular hamstring stretches into your routine can help alleviate the discomfort. Here are six effective hamstring stretches to try.

  1. Seated Forward Bend:

    • Sit on the floor with both legs extended straight in front of you.

    • Reach for your toes, ankles, or shins, depending on your flexibility. Keep your back as straight as possible.

    • Incorporate deep breathing and hold this position for 15-30 seconds. Repeat 2-3 times.

  2. Lying Hamstring Stretch:

    • Lay on your back with both legs extended straight.

    • Slowly lift one leg up while keeping the knee slightly bent.

    • Grasp your thigh, calf, or foot, depending on your flexibility. Gently pull the leg towards your body until you feel a comfortable stretch.

    • Hold this position for 15-30 seconds, then switch legs. Repeat 2-3 times per leg.

  3. Towel Hamstring Stretch:

    • Lay on your back with both legs extended straight.

    • Place a towel, strap, or resistance band around the arch of one foot.

    • Holding onto the ends of the towel, gently pull the leg towards your body, keeping your knee slightly bent.

    • Hold this stretch for 15-30 seconds, then switch legs. Repeat 2-3 times per leg.

  4. Standing Forward Bend:

    • Stand with your feet hip-width apart.

    • Slowly bend forward at the hips, keeping your knees slightly bent and allowing your hands to touch the floor, ankles, or shins, depending on your flexibility.

    • Hold this stretch for 15-30 seconds. Repeat 2-3 times.

  5. Hurdler Stretch:

    • Sit on the floor with one leg extended straight in front of you and the other leg bent with the sole of the foot touching the inner thigh of the extended leg.

    • Reach for the toes, ankle, or shin of the extended leg, while keeping your back as straight as possible.

    • Hold this stretch for 15-30 seconds, then switch sides. Repeat 2-3 times per leg.

  6. Half Split Stretch:

    • Begin in a kneeling position with one foot forward and the other knee resting on the ground.

    • Slowly shift your hips back while straightening the front leg and flexing your foot, keeping your hands on the floor for support.

    • Maintain a flat back and hold this stretch for 15-30 seconds, then switch legs. Repeat 2-3 times per leg.

Remember to maintain proper form during each stretch and breathe deeply to maximize the benefits. Regularly performing these hamstring stretches can help alleviate knee pain caused by tight hamstring muscles. Consult a doctor or physical therapist if you have questions about these stretches or if your knee pain persists.

Image of a person sitting on the floor and reaching towards their toes during the Seated Forward Bend hamstring stretch

Calf Stretches

To alleviate knee pain caused by tight calf muscles, you can try incorporating these two simple calf stretches into your daily routine:

Standing Calf Stretch

  1. Find a wall or sturdy piece of furniture to support yourself, and stand facing it.
  2. Place your hands on the wall at shoulder height, slightly wider than your shoulders.
  3. Step back with your right leg, keeping the foot flat on the ground and the leg straight. Your left leg should be slightly bent at the knee.
  4. Gently press your hips forward towards the wall, keeping your right leg extended and your right heel on the floor. You should feel a stretch in your right calf muscle, hold for 20-30 seconds, and breathe deeply.
  5. Release the stretch and switch legs, stepping back with your left leg.
  6. Repeat the stretch on both legs 2-4 times or as needed throughout the day.

Seated Calf Stretch

  1. Sit on the floor or on a mat with your legs extended in front of you and your feet flexed.
  2. Place a towel, exercise strap, or resistance band around the balls of your feet, holding both ends with your hands. Alternatively, you can reach for your toes with your hands if you can comfortably do so without hunching your back.
  3. Gently pull the towel, strap, or your hands towards you, making sure to keep your legs straight and your feet flexed. You should feel a stretch in your calf muscles.
  4. Hold the stretch for 20-30 seconds, breathing deeply and maintaining an upright posture.
  5. Gently release the stretch and shake out your legs.
  6. Repeat the stretch 2-4 times or as needed throughout the day.

Remember to always listen to your body and never push yourself beyond your level of comfortable stretching. If you feel pain during the stretches, stop immediately and consult with a healthcare professional to determine the appropriate course of action to address your knee pain.

Illustration of a person doing the standing calf stretch against a wall

IT Band Stretches

The iliotibial (IT) band is a thick band of fibrous tissue that runs along the outside of the leg from the hip to the knee. It supports the knee joint and aids in movements such as running, walking, and climbing stairs. Tightness or inflammation in the IT band can cause knee pain, especially on the outer side of the knee. To alleviate knee pain and prevent IT band syndrome, you can perform IT band stretches. Below are instructions for three effective IT band stretches.

  1. Standing IT Band Stretch

    Stand near a wall or a table to hold onto for balance if needed.

    Cross your right leg behind your left leg, keeping both feet flat on the ground.

    Extend your left arm overhead and place your right hand on your hip.

    Lean your upper body to the right side, so you feel a stretch along the outside of your left leg, from your hip to your knee.

    Hold this stretch for 20 to 30 seconds, then switch sides and repeat with your left leg crossed behind your right.

  2. Seated Figure-4 Stretch

    Sit on the edge of a chair with both feet flat on the ground.

    Cross your right ankle over your left knee, forming a figure-4 shape with your legs.

    Sit up tall with your back straight, and place your hands on your right thigh.

    Gently press down on your right thigh to intensify the stretch along the outside of your right leg.

    Hold this stretch for 20 to 30 seconds, then swap sides and repeat with your left ankle crossed over your right knee.

  3. Supine IT Band Stretch

    Lie on your back on a mat or a comfortable surface.

    Bend your right knee and place your right foot on the ground near your left buttock.

    Lift your left leg, and wrap your hands around the back of your left thigh.

    Use your hands to gently pull your left thigh towards your chest while keeping your left leg extended.

    As you do this, your right knee should move to the left side, and you should feel a stretch along the outer part of your right leg.

    Hold this stretch for 20 to 30 seconds, then switch sides and repeat with your left knee bent and your right leg extended.

Remember to perform these stretches daily or as often as needed to maintain IT band flexibility and prevent knee pain. Always stretch gently, without forcing or bouncing, and never stretch to the point of pain. If your pain persists or worsens, consult a healthcare professional for proper evaluation and treatment advice.

Image of a person lying on their back with one foot on the ground and other bent and being pulled towards their upper body by another person to show Supine IT Band Stretch

Hip and Glute Stretches

Tight hip and glute muscles can contribute to knee pain by causing imbalances in strength and flexibility, leading to increased stress on the knee joint. Stretching these muscles can help alleviate some of the discomfort and potentially prevent further issues.

1. Pigeon Pose:

  • Start in a tabletop position with your hands and knees on the floor. Bring your right knee towards your right wrist and place your right foot towards your left wrist.
  • Slide your left leg back, straightening it behind you and pointing your toes. Make sure your hips are square, facing the front.
  • Keep your hands on the floor for support, or lower onto your elbows for a deeper stretch. Hold this position for 30 seconds, breathing deeply.
  • Repeat the stretch on the other side, bringing your left knee to your left wrist.

2. Butterfly Stretch:

  • Sit on the floor with your back straight and your legs stretched out in front of you.
  • Bring the soles of your feet together, and let your knees fall out to the sides.
  • Hold onto your feet or ankles and gently pull your heels closer to your body, deepening the stretch.
  • To increase the stretch, use your elbows to gently press your knees towards the floor.
  • Hold this position for 30 seconds, and repeat 2-3 times.

3. Lying Glute Stretch:

  • Lie on your back on the floor with your knees bent and feet flat on the floor.
  • Cross your right ankle over your left knee, forming a ‘figure 4’ shape with your legs.
  • Lift your left foot off the ground, bending your left knee towards your chest. Place your hands on the back of your left thigh and gently pull it towards you.
  • Hold this position for 30 seconds, feeling a stretch in the glutes and hips.
  • Repeat the stretch on the other side, crossing your left ankle over your right knee.

To get the most out of these hip and glute stretches, make sure you maintain steady breathing and hold each stretch without bouncing. Incorporate these stretches into your regular routine to help reduce knee pain and improve overall flexibility and mobility. It’s essential to consult with a healthcare professional or physical therapist before starting any exercise or stretching program to ensure you’re performing the exercises correctly and safely.

An image of someone performing the butterfly stretch on the floor with soles of their feet together and knees out to the sides.

Practicing Stretching Routines

Knee pain can hinder your daily activities and lower your quality of life. One way to alleviate knee pain and improve flexibility is by practicing stretching routines that target the muscle groups surrounding and supporting the knee joint. This comprehensive stretching routine will help to relieve knee pain caused by tight muscles. Remember to always consult your healthcare professional before starting any stretching routine.

Stretching Routine:

  1. Hamstring Stretch
    • Sit on the floor with your left leg straight out in front of you and your right leg bent, with your right foot resting against your left inner thigh.
    • Keeping your back straight, reach forward with your hands, towards your left foot.
    • Gently pull your left toes towards you, increasing the stretch in your hamstring.
    • Hold the stretch for 20-30 seconds, then switch sides and repeat.
  2. Calf Stretch
    • Stand facing a wall, about an arm’s length away.
    • Place your hands on the wall for support.
    • Step back with your left foot, keeping it flat on the floor.
    • Bend your right knee and lean forward, keeping your left leg straight and heel on the floor.
    • Hold the stretch for 20-30 seconds, then switch sides and repeat.
  3. Quadriceps Stretch
    • Stand next to a wall, using it for balance if necessary.
    • Grab your left foot with your left hand and gently pull your heel towards your buttocks.
    • Keep your left knee pointing towards the ground and maintain an upright posture.
    • Hold the stretch for 20-30 seconds, then switch sides and repeat.
  4. Hip Flexor Stretch
    • Kneel on the floor with your left knee directly underneath your left hip and your right foot in front, with the right knee bent at a 90-degree angle.
    • Place your hands on your right thigh for support.
    • Gently push your hips forward until you feel a stretch in the front of your left hip.
    • Hold the stretch for 20-30 seconds, then switch sides and repeat.
  5. IT Band Stretch
    • Stand tall with your left leg crossed behind your right leg.
    • Reach your left arm overhead while bending your torso to the right.
    • Keep your spine straight and avoid bending forward.
    • Hold the stretch for 20-30 seconds, then switch sides and repeat.
  6. Glute Stretch
    • Sit on the floor with both legs straight in front of you.
    • Bend your left knee and place your left foot on the outside of your right thigh.
    • Gently twist your torso to the left, placing your right elbow against the outside of your left thigh for support.
    • Hold the stretch for 20-30 seconds, then switch sides and repeat.

Practice this stretching routine consistently to help relieve knee pain and improve flexibility. Make modifications and adjustments to suit your specific needs and always listen to your body. If you experience pain or discomfort during a stretch, stop and consult your healthcare professional for guidance.

Illustration of a person performing the calf stretch exercise with clear instructions of proper form.

Investing time and effort in developing and practicing a comprehensive stretching routine benefits not only your knee health but also overall flexibility and well-being. Consistently targeting all relevant muscle groups can help reduce knee pain and prevent further injuries. Remember to consult a healthcare professional if you experience persistent or severe pain, as professional guidance is essential for effective pain management and recovery.

Heat Therapy for Knee Pain

Knee pain can be a frustrating and debilitating issue, impacting your daily life and activities. In this comprehensive guide, we will explore the anatomy of the knee, common causes of knee pain, and the benefits of heat therapy as an effective treatment method. We will also discuss potential risks and alternative therapies, emphasizing the importance of consulting with a medical professional to determine the most suitable approach for your specific needs.

Anatomy of the Knee

The knee is a complex and vital joint in the human body, allowing for movement, flexibility, and stability. Understanding its structure and functions can help you manage knee pain and perform heat therapy effectively. In this guide, we will discuss the anatomy of the knee joint, including bones, cartilage, ligaments, tendons, and muscles that support it.

I. Bones in the Knee Joint

The knee joint consists of three main bones, which are connected at the tibiofemoral and patellofemoral joints:

  • A. Femur (thigh bone): The largest bone in the body and the main weight-bearing bone in the knee joint.
  • B. Tibia (shin bone): The smaller, inner bone of the lower leg that connects to the femur.
  • C. Patella (kneecap): The small, flat, round bone that covers and protects the front of the knee joint.

II. Cartilage

Cartilage is a soft, flexible connective tissue that provides cushioning and smooth movement for the knee joint. There are two main types of cartilage in the knee:

  • A. Articular cartilage: This type of cartilage covers the ends of the femur, tibia, and patella, allowing them to glide smoothly against each other during movement.
  • B. Meniscus: These are two crescent-shaped pieces of cartilage (medial and lateral menisci) that act as shock absorbers between the femur and tibia, distributing weight and reducing friction in the knee joint.

III. Ligaments

Ligaments are strong bands of connective tissue that connect bones to other bones, providing stability and limiting excessive motion in the knee joint. There are four main ligaments in the knee:

  • A. Anterior cruciate ligament (ACL): Located in the center of the knee, the ACL prevents the tibia from sliding forward.
  • B. Posterior cruciate ligament (PCL): Also located in the center of the knee, the PCL prevents the tibia from sliding backward.
  • C. Medial collateral ligament (MCL): Located on the inner side of the knee, the MCL provides stability to the inner knee and prevents it from buckling inwards.
  • D. Lateral collateral ligament (LCL): Located on the outer side of the knee, the LCL provides stability to the outer knee and prevents it from buckling outwards.

IV. Tendons

Tendons are strong bands of connective tissue that connect muscles to bones, providing stability and allowing for movement. The two main tendons in the knee include:

  • A. Quadriceps tendon: This tendon connects the quadriceps muscle to the patella and helps in leg extension.
  • B. Patellar tendon: This tendon connects the patella to the tibia and allows the knee to flex and extend.

V. Muscles

There are four main muscle groups that support the knee and enable its movement:

  • A. Quadriceps: Located at the front of the thigh, these muscles help to straighten the knee.
  • B. Hamstrings: Located at the back of the thigh, these muscles help to bend the knee.
  • C. Adductors: Located in the inner thigh, these muscles help to move the leg toward the body’s midline.
  • D. Abductors: Located in the outer thigh, these muscles help to move the leg away from the body’s midline.

To effectively perform heat therapy for knee pain, having a comprehensive understanding of the knee’s anatomy can help you identify the exact source of pain and apply the appropriate treatment. By understanding the structures and functions of the knee joint, including bones, cartilage, ligaments, tendons, and muscles, you can take better care of your knees and improve your overall mobility and quality of life.

An illustrated diagram of the knee joint highlighting femur, tibia, patella, cartilage, ligaments, tendons, and muscles that make up the knee joint

Causes of Knee Pain

Knee pain is a common complaint among adults and can be caused by a variety of factors ranging from injuries to arthritis. Heat therapy can be a helpful tool in relieving knee pain and promoting healing. In this article, we’ll explore the common causes of knee pain and provide instructions on how to use heat therapy to alleviate discomfort.

Common Causes of Knee Pain

  1. Injuries: Sudden trauma to the knee can result in injuries such as ligament sprains, muscle strains, and fractures. Common examples include anterior cruciate ligament (ACL) tears, meniscus tears, and patellar dislocations.
  2. Arthritis: Osteoarthritis, rheumatoid arthritis, and post-traumatic arthritis are common causes of knee pain. These conditions involve inflammation, degeneration, and stiffness in the joint, often resulting in pain and limited mobility.
  3. Bursitis: Inflammation of the small fluid-filled sacs (bursae) around the knee joint can lead to knee pain, particularly when the knee is bent or moved.
  4. Tendonitis: Overuse or injury can cause inflammation of the tendons around the knee, such as the patellar tendon or quadriceps tendon. This condition often results in pain and limited range of motion.
  5. Infection: In rare cases, infections such as cellulitis, septic arthritis, or Lyme disease can cause knee pain.
  6. Mechanical problems: Dislocation of the kneecap, misaligned knee joints, or loose bodies (small pieces of cartilage or bone) within the knee can all cause pain and discomfort.

Heat Therapy for Knee Pain Relief

Heat therapy can be an effective tool in alleviating knee pain and promoting healing by improving blood circulation, relaxing muscles, and reducing inflammation. To use heat therapy, follow these simple instructions:

  1. Choose a heat source: Common heat sources include heating pads, electric blankets, warm towels, or hot water bottles.
  2. Apply heat for 15-20 minutes: Place the heat source directly on the affected area, ensuring that it is not overly hot (aim for a comfortably warm temperature). Leave it in place for 15-20 minutes. You may also alternate between periods of heat and cold therapy (applying cold packs) for additional relief.
  3. Repeat 3-4 times a day: For optimal results, use heat therapy several times a day, particularly after physical activities that may have exacerbated knee pain.
  4. Protect your skin: Place a barrier, such as a cloth or towel, between your skin and the heat source to prevent burns and irritation.

Understanding the common causes of knee pain and utilizing heat therapy can help you manage and alleviate discomfort. However, it is essential to speak with a healthcare professional for a proper diagnosis and treatment plan tailored to your specific needs. In some cases, additional treatments like medication, physical therapy, or even surgery may be necessary. Remember always to listen to your body, and if your knee pain worsens or persists, consult a doctor.

A person putting a heating pad on their knee with a ice pack by their side for alternate use.

Heat Therapy Techniques

Heat therapy, also known as thermotherapy, is an effective method of pain relief for adults suffering from knee pain. It works by increasing blood flow, relaxing muscles, and improving joint elasticity. This guide will provide you with various heat therapy techniques to help alleviate knee pain, including hot packs, heating pads, warm towels, and hot baths.

1. Hot Packs:

A hot pack is a simple and effective way to deliver heat therapy to your knee. You can find reusable hot packs at most drugstores or online. Make sure to follow the manufacturer’s instructions for proper heating and usage.

Instructions:

  1. Heat the hot pack as directed by the manufacturer.
  2. Place a thin towel or cloth between the hot pack and your skin to prevent burns.
  3. Apply the hot pack to the affected knee for 15-20 minutes.
  4. Remove the hot pack and allow the knee to cool down for a few minutes.
  5. Repeat the process 3-4 times a day, as needed.

2. Heating Pads:

An electric heating pad is another way to provide heat therapy to your knee. Ensure you follow the appliance’s guidelines and temperature settings for safe use.

Instructions:

  1. Plug in your heating pad and set the temperature to a comfortable warmth.
  2. Place a thin towel or cloth between the heating pad and your skin.
  3. Apply the heating pad to the affected knee for 15-20 minutes.
  4. Remove the heating pad and allow your knee to cool for a few minutes.
  5. Repeat the process 3-4 times a day, as needed.

3. Warm Towels:

Using a warm towel is a simple and cost-effective way to apply heat therapy to your knee without needing any special equipment. All you need is a towel and hot water.

Instructions:

  1. Soak a towel in hot tap water or microwave a damp towel for 30-60 seconds, ensuring it’s not too hot to touch.
  2. Wring out the excess water.
  3. Fold the towel and place it on the affected knee for 15-20 minutes.
  4. Reheat the towel as needed and repeat the process 3-4 times a day.

4. Hot Baths:

Soaking in a warm bath can help relax your entire body and provide heat therapy to your aching knee at the same time.

Instructions:

  1. Fill your bathtub with warm water (not too hot, around 100°F or a comfortable warmth).
  2. Add some Epsom salts (optional) to help reduce inflammation and improve relaxation.
  3. Immerse your body, including the affected knee, in the bath for 15-20 minutes.
  4. After your bath, gently dry your skin and allow the knee to cool for a few minutes.
  5. Repeat the process once a day, as needed.

Heat therapy is an excellent way to alleviate knee pain and improve overall joint and muscle function. Utilizing one or more of these techniques daily can help reduce discomfort and improve your mobility. However, if your knee pain persists or worsens, consult a healthcare professional for further evaluation and treatment options.

An image of a person with a hot pad applied to their knee

Benefits of Heat Therapy

Knee pain is a common concern among adults and can greatly affect daily activities. It can be due to various causes such as arthritis, injury, or overuse. One effective method to alleviate knee pain is by applying heat therapy. In this guide, we will explore the benefits of heat therapy, how it helps in relieving knee pain, and how to apply it safely and effectively.

Benefits of Heat Therapy:

  1. Increased blood flow: Heat therapy helps in dilating blood vessels around the knee joint, which enhances blood flow. This increased blood flow provides essential nutrients and oxygen to the joint and surrounding muscles, promoting healing and reducing stiffness.
  2. Muscle relaxation: Heat therapy helps in relaxing the muscles surrounding the knee joint, leading to increased flexibility and mobility. It also reduces muscle spasms, which are common during pain episodes.
  3. Pain relief: Applying heat to the painful knee area releases endorphins, the body’s natural pain-relieving chemicals. These endorphins help in reducing the sensation of pain, making it easier to move and perform daily activities.
  4. Reduced inflammation: Heat therapy increases blood flow and relaxes muscles, which in turn, helps in reducing inflammation and swelling around the knee joint.
  5. Increased joint flexibility: Warming up the knee joint using heat therapy increases its flexibility and range of motion, making it less prone to injuries and stiffness.

Instructions for Heat Therapy Application:

  1. Choose a heat source: There are several heat sources available for heat therapy, such as heating pads, microwavable heat packs, or warm towels. Select the one that is most convenient and suitable for you.
  2. Apply the heat source: Place the heating pad or heat pack on the affected knee area. If using a warm towel, dip it in hot water, wring out excess water, and wrap it around the painful knee.
  3. Determine the right temperature: Be sure to use moderate heat, avoiding excessively high temperatures that may cause burns. It should feel comfortably warm but not too hot.
  4. Duration: Apply heat therapy for 15-20 minutes at a time. You may do this several times a day, depending on your pain levels and your doctor’s recommendation.
  5. Safety precautions: Ensure that the heating pad or heat pack has a protective cover to prevent burns. Avoid falling asleep with the heating pad on and do not use heat therapy if you have any open wounds or broken skin.

Heat therapy is a simple, cost-effective, and efficient method to alleviate knee pain. By increasing blood flow, relaxing muscles, and providing pain relief, it can help in improving knee joint flexibility and promoting overall joint health. Remember to consult with your healthcare professional before starting any new treatment for knee pain, and always follow safety precautions when applying heat therapy.

An image of a woman applying a heating pad on her knee to relieve pain.

Potential Risks and Precautions

Heat therapy, also known as thermotherapy, is a popular and effective method for managing knee pain. The application of heat can promote relaxation, improve blood flow, and alleviate muscle stiffness. However, it is important to be aware of the potential risks and precautions associated with heat therapy to ensure you are using it safely and effectively.

Risk of Burns:

The most significant risk associated with heat therapy is the potential for burns, especially if the heat source is too hot or applied for too long.

  • Always test the temperature of the heat source on an unaffected part of your skin (e.g., inner forearm) before applying it to the knee.
  • Use heat sources designed for therapeutic use with adjustable temperature settings.
  • Avoid using heat therapy while sleeping or if you have a decreased sensation in the area.
  • Never use heating pads or hot packs directly on the skin—always wrap them in a towel or cloth.
  • Limit the application of heat to 10-20 minutes at a time.

Risk of Skin Issues:

Prolonged or repeated application of heat may lead to skin irritation, rashes, or blisters.

  • Monitor the skin for redness, irritation, or discomfort during and after the application of heat.
  • If you notice any skin issues, discontinue heat therapy and consult with a medical professional.
  • Do not use heat therapy on areas with open wounds or broken skin.

Risk of Exacerbation of Inflammation:

In certain cases, heat therapy can worsen inflammation, leading to increased pain and discomfort. This is more likely if you have an active inflammatory condition or an acute injury.

  • Consult with a medical professional to determine if heat therapy is suitable for your specific knee pain and health condition.
  • If you notice increased pain, swelling, or redness after heat therapy, discontinue use and consult with a medical professional.
  • Consider using cold therapy (cryotherapy) instead, as this can help reduce inflammation and soothe pain.

Risk of Aggravating Pre-existing Health Conditions:

People with certain health conditions, such as diabetes, deep vein thrombosis, or peripheral vascular disease, may be at increased risk of complications from heat therapy.

  • Talk to your healthcare provider before starting heat therapy if you have any chronic medical conditions or concerns.
  • Follow your healthcare provider’s guidance and recommendations on the use of heat therapy for your specific situation.

Heat therapy can be an effective way to manage knee pain, but it is important to be aware of the potential risks and precautions associated with its use. By following the tips outlined in this article, you can help ensure that you are using heat therapy safely and effectively for your knee pain relief. Always consult with a healthcare professional if you have any concerns or uncertainties about using heat therapy.

Illustration of a person placing a heated towel on their knee to manage pain.

Alternative Therapies

Knee pain is a common complaint amongst adults, and it can result from various causes such as injury, arthritis, or mechanical issues. While heat therapy can provide relief for knee pain, there are various other alternative therapies that can help reduce pain and support long-term knee health.

Cold Therapy:

Cold therapy, also known as cryotherapy, can help reduce inflammation and numb the area around the knee to provide temporary pain relief. You can apply an ice pack wrapped in a thin towel to the affected area for 15-20 minutes at a time, multiple times a day. Always ensure to avoid direct contact of ice on the skin to prevent frostbite.

Physical Therapy:

Physical therapy can help improve the strength, flexibility, and function of your knee. A trained physical therapist will work with you to develop an individualized exercise program tailored to your specific needs. These exercises may include range of motion exercises, strengthening exercises, and stretching techniques to alleviate pain and promote knee health.

Exercise:

Engaging in regular low-impact exercises such as swimming, walking, or cycling can help maintain knee strength and mobility. Maintain a consistent exercise routine and listen to your body to prevent overexertion. Warming up before exercise and cooling down afterward can help minimize the risk of injury and promote healthy joints. Consult your doctor before starting a new exercise program.

Pain Medications:

Over-the-counter pain relievers such as ibuprofen, naproxen, or acetaminophen can provide temporary relief from knee pain. These medications should be taken according to the label instructions and under the guidance of a healthcare professional. In some cases, prescription medications may be recommended by your doctor to manage persistent or severe pain.

Injections:

In some cases, your doctor may recommend injections to alleviate knee pain. These may include corticosteroid injections to reduce inflammation or hyaluronic acid injections to lubricate the joint and provide cushioning. Both types of injections can provide temporary relief but should be used alongside other therapies, such as physical therapy and exercise, to promote long-term knee health.

Alternative therapies for knee pain like cold therapy, physical therapy, exercise, pain medications, and injections can help manage knee pain and promote overall joint health. Work with your healthcare provider to determine which therapy or combination of therapies is most suitable for your specific needs. Remember, maintaining a healthy lifestyle, including a balanced diet and regular exercise, is essential for maintaining knee health and preventing long-term damage.

A person doing knee strengthening exercises at home with weights and an exercise mat on the floor.

Consulting with a Medical Professional

Knee pain can arise from many causes including injuries, arthritis, and other underlying health issues. Heat therapy is often used to relieve knee pain and enhance the healing process. However, it is essential to consult with a medical professional to determine the most suitable treatment plan for your knee pain. This guide will provide you with instructions on how to consult with a medical professional to determine if heat therapy is suitable for you.

Step 1: Schedule an appointment with your primary care physician or a specialist

  • Contact your primary care physician or a specialist like an orthopedic doctor or a physical therapist to discuss your knee pain concerns. Explain that you are interested in heat therapy as a potential treatment and would like to learn more about its effectiveness and safety in your situation.

Step 2: Prepare for your appointment

  • Prior to your appointment, make a list of your symptoms, including the level of pain, frequency, and triggers. This will help your medical professional understand your situation better and make a proper recommendation.
  • Jot down any questions you may have related to your knee pain and heat therapy, so you don’t forget to ask during the consultation.

Step 3: During the appointment

  • Share your symptoms and medical history with the doctor or specialist. Be thorough in describing your pain, including any activities that make it worse or treatments you have tried to alleviate it.
  • Ask about the potential benefits and risks of heat therapy for your knee pain. Inquire about any specific types of heat therapy, such as heating pads, heat wraps, or warm compresses, that would be safest and most effective for your condition.
  • Discuss any potential interactions or contraindications with other medications or therapies you are currently using.

Step 4: Follow the recommendations

  • If the medical professional deems heat therapy appropriate for your knee pain, follow their specific recommendations regarding the frequency, duration, and type of heat application. They may suggest a trial period to assess the effectiveness of heat therapy in your case.
  • Make sure to ask for any precautions you should take while using heat therapy, such as avoiding overheating or burns and monitoring any changes in pain or inflammation.

Step 5: Monitor and revisit

  • Keep track of your progress and the effectiveness of heat therapy in relieving your knee pain. If you experience any adverse reactions or worsening of symptoms, contact your medical professional right away.
  • Schedule a follow-up appointment to discuss your response to the treatment plan and any necessary alterations.

It is crucial to consult with a medical professional before implementing heat therapy for knee pain to ensure its safety and effectiveness in your specific case. By following the steps outlined above, you can be better prepared for your consultation and receive the most accurate and reliable information regarding heat therapy as a treatment option for your knee pain.

A person holding a heating pad against their knee.

Applying Heat Therapy

If you’re experiencing knee pain, heat therapy can be an effective way to alleviate your symptoms. Here are the steps to follow:

  1. Gather materials: You’ll need a heating pad, hot water bottle, or microwaveable heat pack, and a towel or cloth to place between the heat source and your skin to prevent burns.

  2. Choose a comfortable position: Find a comfortable position where you can easily apply heat to your knee, such as sitting in a chair with your foot elevated or lying down with your knee propped up on pillows.

  3. Warm-up the heat source: If using a heating pad or heat pack, plug it in or microwave it according to the manufacturer’s instructions. If using a hot water bottle, fill it with hot but not boiling water.

  4. Test the temperature: Make sure the temperature is safe by holding it against your inner forearm. If it feels too hot, let it cool down or wrap it in a towel to avoid burning your skin.

  5. Apply the heat source: Place the heat source on the painful area of your knee while ensuring there is a barrier (such as a towel or cloth) between it and your skin. Make sure the heat is evenly distributed across the painful area.

  6. Time your session: Heat therapy should last between 15 to 20 minutes per session. Set a timer to ensure you do not overheat the area, which can cause burns or additional inflammation.

  7. Monitor your comfort level: Keep an eye on your comfort level throughout the session. If the heat becomes too intense, remove it immediately to avoid burns or increasing inflammation.

  8. Remove the heat source: Once the timer goes off, carefully remove the heat source from your knee and allow the area to cool down.

  9. Assess the results: Pay attention to how your knee feels after the heat therapy session. Note any changes in pain levels or mobility, and record the results.

  10. Repeat as needed: You can perform heat therapy sessions multiple times throughout the day, allowing your skin to cool down between sessions. Be sure to monitor your pain levels and adjust the frequency of the sessions accordingly.

Remember to listen to your body and stop if you experience any discomfort or skin irritation. Seek medical advice if necessary.

An image of a person placing a heating pad on their knee with a towel barrier to illustrate the proper way to apply heat therapy for knee pain.

Armed with the knowledge of the knee’s anatomy, common causes of pain, and various heat therapy techniques, you now have the tools to better understand your knee pain and explore potential treatments. Always remember to consult with a medical professional before starting any new treatment plan, as they can best guide you towards effective management of your knee pain and an improved quality of life.

Over-the-Counter Pain Relievers: Comprehensive Knowledge for Adults

Living in a world filled with numerous responsibilities and activities, pain is an inevitable part of our lives, experienced by many in various forms. Acquiring comprehensive knowledge about over-the-counter (OTC) pain relievers can empower individuals to make well-informed decisions when it comes to managing their pain. The complexity of pain, its various types, and a thorough understanding of how OTC pain relievers work in the body are crucial factors in navigating the world of pain management effectively and safely.

Basic Understanding of Pain

Pain is a complex experience that serves an important purpose in our lives. It acts as a warning system to alert the body when damage or potential harm occurs. There are different types of pain, which can be classified based on their origin, duration, and nature. Two of the most common types of pain are nociceptive pain and neuropathic pain.

Nociceptive pain is caused by tissue damage and is typically described as a sharp, aching, or throbbing sensation. Neuropathic pain, on the other hand, results from damage to the nerves and is often experienced as burning, tingling, or shooting sensations.

The perception of pain occurs through a complex communication system between pain receptors, nerves, the spinal cord, and the brain. When tissue damage occurs, specialized nerve endings called nociceptors detect the change and transmit pain signals through electrical impulses to the spinal cord. From there, the signal travels to the brain, where it is interpreted as pain. The intensity and location of the pain experienced are determined by various factors such as the type, duration, and cause of the injury.

Over-the-counter (OTC) pain relievers are a widely used method for temporary pain relief. These medications are available without a prescription and help alleviate pain by interrupting the pain signal transmission or reducing inflammation at the site of injury. The most common types of OTC pain medications are nonsteroidal anti-inflammatory drugs (NSAIDs) and acetaminophen. NSAIDs, such as aspirin, ibuprofen, and naproxen, work by reducing the production of prostaglandins, which are substances that promote inflammation and increase pain sensitivity. Acetaminophen, found in products like Tylenol, is effective in treating mild to moderate pain but does not have anti-inflammatory properties.

When considering the use of OTC pain relievers, it is essential to understand their potential side effects and interactions with other medications. NSAIDs are generally safe for short-term use but can cause gastrointestinal irritation, increased bleeding risk, and kidney and liver damage when taken for an extended period or in excessive doses. Acetaminophen is also considered safe for short-term use, but high doses or long-term use can lead to liver damage. It is crucial to follow the recommended dosages and consult a healthcare professional if the pain persists or worsens.

Over-the-counter (OTC) pain relievers are medications that can be purchased without a prescription and are commonly used to alleviate mild to moderate pain, inflammation, and fever. They are classified into two main categories: nonsteroidal anti-inflammatory drugs (NSAIDs) and acetaminophen (also known as paracetamol). Both of these types of OTC pain relievers have different mechanisms of action, side effects, and drug interactions.

An image showing the different types of pain, including nociceptive pain and neuropathic pain, with human body diagrams indicating the locations of the types of pain.

OTC Pain Relievers: Types and Categories

In some cases, alternative pain relief methods can be used in conjunction with OTC pain relievers or as a substitute for those who cannot take them due to allergies or pre-existing conditions. These alternatives can include heat or cold therapy, massage, relaxation techniques, and various complementary and alternative medicine approaches like acupuncture, herbal remedies, and supplements. It is important to remember that pain is subjective, and what works well for one individual may not be as effective for another. Seeking advice from a healthcare professional and exploring various options can be beneficial in uncovering the most effective pain management strategy tailored to an individual’s specific needs and condition.

Nonsteroidal Anti-Inflammatory Drugs (NSAIDs)

Nonsteroidal anti-inflammatory drugs (NSAIDs) work by blocking the production of prostaglandins, which are chemicals that cause inflammation, pain, and fever in the body. There are several different types of NSAIDs available over the counter, including ibuprofen (brand names include Advil and Motrin), naproxen (brand name Aleve), and aspirin. NSAIDs are particularly effective for pain related to inflammation, such as arthritis or muscle pain but can also be used to treat headaches, menstrual cramps, and toothaches. However, they may cause side effects such as gastrointestinal upset or bleeding, particularly in those with a history of stomach ulcers or taking blood thinners.

Acetaminophen (Paracetamol)

Acetaminophen, also known as paracetamol or by the brand name Tylenol, is another common over-the-counter pain reliever. It acts by inhibiting the production of prostaglandins in the central nervous system, but unlike NSAIDs, it does not target inflammation at the site of injury. This makes it less effective for pain associated with inflammation but is still effective for reducing fever and pain from headaches, toothaches, or minor injuries. Acetaminophen is generally considered to have fewer side effects than NSAIDs, but excessive use can lead to liver damage, particularly when taken in conjunction with alcohol or other medications that impact the liver.

Topical Analgesics

Topical analgesics are another category of over-the-counter pain relievers, which are applied directly to the skin over the painful area. These medications typically contain ingredients such as menthol, camphor, or capsaicin that stimulate nerve endings in the skin to provide a warming or cooling sensation that temporarily distracts from the pain. Some topical analgesics also contain NSAIDs, such as diclofenac gel (brand name Volteran), which may be useful for localized inflammatory pain like arthritis. Topical analgesics often have fewer side effects than oral medications, as they are less likely to cause systemic side effects, but may cause localized skin irritation.

Types of Over-the-Counter Pain Relievers

Over-the-counter (OTC) pain relievers are commonly used to treat pain and inflammation in the body. These medications work in different ways and target specific pain relief pathways. They come in the form of traditional OTC pain relievers, and some people also choose to pursue herbal remedies as another alternative.

Image of the different types of pain relievers categorized into NSAIDs, Acetaminophen, Topical Analgesics, and Herbal Pain Relievers.

Mechanism of Action

Herbal Pain Relievers

In addition to conventional OTC pain relievers, some individuals find relief from homeopathic or herbal remedies. Examples of these natural alternatives include arnica, white willow bark, and ginger, which have been claimed to help with pain and inflammation. While they may not be as well-studied as traditional OTC pain relievers, they can still provide relief for some. However, these remedies should be used with care, as they may interact with other medications or cause side effects. It is essential to consult a healthcare provider before trying herbal pain relievers, particularly if you have pre-existing medical conditions, are pregnant or breastfeeding, or are taking other medications.

One of the main types of OTC pain relievers are nonsteroidal anti-inflammatory drugs (NSAIDs), such as ibuprofen, aspirin, and naproxen. These medications primarily work by inhibiting the COX enzymes, which are responsible for producing prostaglandins. Prostaglandins play a significant role in various bodily processes, including pain, fever, and inflammation. By inhibiting COX enzymes, NSAIDs reduce the production of prostaglandins, ultimately providing pain relief and reducing inflammation.

Another common OTC pain reliever is acetaminophen, also known as paracetamol. Although it is still not entirely clear how acetaminophen works, its primary mechanism of action is thought to be through the inhibition of COX enzymes within the central nervous system. Acetaminophen has minimal peripheral anti-inflammatory effects compared to other NSAIDs; however, it is a potent analgesic (painkiller) and antipyretic (fever reducer). This OTC pain reliever is often preferred for those with gastrointestinal issues, as it does not cause stomach irritation like NSAIDs can.

In addition to oral OTC pain relievers, there are also topical analgesics available for localized pain relief. These medications work by creating a sensation of heat or cold on the skin, thereby providing a counterirritant effect that can help alleviate pain. Topical analgesics often contain ingredients such as menthol, camphor, or capsaicin, which stimulate specific nerve receptors in the skin, creating a sensation of warmth or coolness. This sensation may help to block pain signals from reaching the brain, providing temporary relief from localized pain.

Another important aspect of OTC pain relievers’ mechanism of action is their pharmacokinetics, or how the medications are absorbed, distributed, metabolized, and eliminated by the body. Factors such as dosing, frequency, and duration of treatment can influence the effectiveness of pain relief provided by these medications. For example, NSAIDs are typically dosed several times a day to maintain therapeutic levels in the body, while acetaminophen can be taken less frequently due to its longer half-life. Individuals should always follow the recommended dosing instructions for OTC pain relievers, as excessive use can lead to side effects and potential harm.

Over-the-counter (OTC) pain relievers can be highly effective for managing pain, inflammation, and reducing fever. However, it is essential to understand the recommended dosages and safety measures associated with each medication, as well as potential interactions with other medications or medical conditions.

Image of pain relief pills with arrows indicating how pain relievers work in the body

Usage Guidelines and Dosage

For instance, individuals taking blood thinners should use caution with NSAIDs, as combining these medications may increase the risk of bleeding. Additionally, certain medical conditions, such as kidney or liver disease, can increase the risk of side effects from OTC pain relievers. Therefore, it is always crucial to consult with a healthcare professional before starting any new medication, including OTC pain relievers, to ensure they are safe and suitable for individual needs.

Acetaminophen, commonly found under the brand name Tylenol, is widely used for treating minor aches, pains, and fever. The recommended dosage for adults is 325mg to 650mg, taken every 4 to 6 hours as needed. However, it’s crucial not to exceed 4,000mg of acetaminophen in 24 hours, as excessive amounts can lead to liver damage.

Nonsteroidal anti-inflammatory drugs (NSAIDs), such as ibuprofen (Advil or Motrin) and naproxen (Aleve), are another category of OTC pain relievers that provide relief from minor aches and pains due to inflammation.

For ibuprofen, the suggested dosage for adults is 200mg to 400mg every 4 to 6 hours as required, not exceeding 1,200mg per day unless directed by a healthcare professional. For naproxen, the suggested dosage is 220mg every 8 to 12 hours, not to exceed 660mg within 24 hours. Both medications might cause stomach irritation, and it is advised to take them with food or milk.

Aspirin (Anacin or Bayer Aspirin) is another commonly used OTC pain reliever and fever reducer. It can also help with blood clot prevention in certain at-risk individuals. The adult dose for pain relief and fever reduction is 325mg to 650mg every 4 to 6 hours, with a maximum dosage of 4,000mg per day. However, it is essential to consult your healthcare provider before using aspirin for blood clot prevention, as it may have potential side effects or interact with other medications.

Safety measures should be considered when using OTC pain relievers, and it is essential to read the label thoroughly before use. Avoid taking multiple medications containing the same active ingredients or combining two different NSAIDs without consulting a healthcare professional.

Furthermore, it is crucial to follow dosage recommendations, as exceeding the suggested amounts can increase the risk of side effects or serious health complications.

Some groups of people, such as pregnant women, breastfeeding mothers, or individuals with specific medical conditions, should consult a healthcare professional before using OTC pain relievers. Aspirin is also not suitable for children or teenagers due to the risk of Reye’s syndrome – a rare but serious condition that can lead to severe liver and brain damage.

Being well-informed about usage guidelines and appropriate dosages of over-the-counter (OTC) pain relievers is essential to manage pain and inflammation effectively and safely.

An image with the title 'Pain Relief Medication' depicting tablets of ibuprofen, acetaminophen, and aspirin placed around a measuring glass with some pills and a pack of tablets visible in the background.

Interaction with Other Medications

OTC pain relievers such as ibuprofen, aspirin, and acetaminophen are commonly used to alleviate various types of pain, including headaches, muscle aches, and joint pain. However, a crucial aspect of using these medications safely is understanding the potential interactions they might have with other drugs you may be taking. Such interactions could either lead to increased side effects or a decrease in the effectiveness of the OTC pain reliever or the other medication, making it important to be aware of these factors while using these pain-relief measures.

Nonsteroidal anti-inflammatory drugs (NSAIDs), such as ibuprofen, naproxen, and aspirin, are a common type of OTC pain relievers. NSAIDs can interact with several classes of medications, including blood thinners, antihypertensives, diuretics, and certain antidepressants. For example, combining NSAIDs with blood thinners (like warfarin) can increase the risk of bleeding, as both medications affect blood clotting. Additionally, NSAIDs may interfere with the effectiveness of antihypertensive drugs, which can result in uncontrolled high blood pressure.

Acetaminophen, another popular OTC pain reliever, is generally considered to have fewer drug interactions than NSAIDs. However, it can still interact with certain medications, such as blood thinners, seizure medications, and some tuberculosis drugs. It is also important to note that combining acetaminophen with alcohol can increase the risk of liver toxicity. Always read and follow the directions on the medication label, and consult your healthcare provider if you are unsure about potential interactions.

It is essential to inform your healthcare provider or pharmacist about all medications you are taking, including OTC pain relievers, prescription drugs, and dietary supplements, as this will help identify and prevent any potential drug interactions. Taking precautions such as double-checking interactions with a healthcare professional or using a medication interaction checker tool can be helpful in avoiding potential complications.

In conclusion, understanding the potential risks and precautions associated with over-the-counter (OTC) pain relievers is critical in maintaining your health and well-being. By being aware of possible medication interactions and consulting with healthcare professionals, you can increase the chances of safely and effectively using OTC pain relievers to manage your pain. Continuously educating yourself about these medications and their potential interactions will ensure that you make the best possible decisions regarding your healthcare.

An image of a medicine bottle with a red warning label reading 'Caution: Read label before use. Talk to your doctor before taking pain relievers if you are currently on other medications.'

Side Effects and Risks

When diving deeper into these potential risks, one of the most common side effects of nonsteroidal anti-inflammatory drugs (NSAIDs), such as ibuprofen and naproxen, is gastrointestinal (GI) distress. This can manifest as heartburn, nausea, stomach pain, and even ulcers in some instances. These side effects occur because NSAIDs inhibit the production of prostaglandins, which are substances that protect the stomach lining. People who take NSAIDs frequently or in high doses are at greater risk for these side effects and may consider taking stomach-protective medications alongside NSAIDs or using alternative pain relief methods to maintain their overall well-being.

Another potential side effect of NSAIDs is an increased risk of cardiovascular events, such as heart attack and stroke. While this risk is small for most individuals taking these medications, it may be more significant for those with existing cardiovascular disease or multiple risk factors for it. Additionally, this risk may be higher in those taking higher doses or using NSAIDs for extended periods. Patients with a personal or family history of heart disease should consult their healthcare provider before using NSAIDs for pain relief.

Acetaminophen, another common OTC pain reliever, has its own set of potential side effects and risks. While this medication is generally considered safe when taken as directed, liver damage can occur in cases of overdose or when used alongside other medications containing acetaminophen. It is important for individuals to carefully read the labels of all medications they are taking to avoid exceeding the recommended daily dose. Moreover, those with pre-existing liver disease or a history of alcohol abuse should exercise caution when taking acetaminophen and consult their healthcare provider if they experience symptoms such as jaundice, dark urine, or extreme fatigue.

Other side effects associated with OTC pain relievers may include allergic reactions, dizziness, and kidney damage. Some individuals may have an allergic reaction to certain OTC pain relievers, causing symptoms such as rash, hives, or difficulty breathing. It is crucial to seek immediate medical attention if any signs of an allergic reaction occur while using these medications. Additionally, OTC pain relievers can affect the blood flow to the kidneys, which may impair kidney function for those with pre-existing kidney disease or individuals taking other medications that have similar effects.

Before using over-the-counter (OTC) pain relievers, it’s important to understand that certain OTC pain relievers may have contraindications with other medications, medical conditions, or during pregnancy. For example, NSAIDs should be avoided by individuals taking anticoagulants or blood-thinners, as they can increase the risk of bleeding. Pregnant women should also consult their healthcare provider before using OTC pain relievers, as some of these medications may pose risks to the developing fetus. As a general rule, it is always recommended to consult your healthcare provider or pharmacist before starting any new medication or combining medications to ensure their safety and effectiveness.

An image of a bottle of pain relievers with labels showing different types of OTC pain relievers such as ibuprofen, acetaminophen and aspirin

Alternative Pain Relief Methods

Considering alternatives to OTC pain relievers is also essential. One such non-pharmacological method worth exploring is physical therapy. This approach involves the use of various exercises and stretches to help relieve pain, strengthen weak muscles, and promote proper body mechanics. A trained physical therapist can develop an individualized treatment plan to address specific pain issues, focusing on the underlying causes of pain rather than just its symptoms. Physical therapy may help reduce the need for over-the-counter pain relievers by addressing the issues leading to the pain and helping to improve overall function and mobility.

Exercises can also be a useful alternative to over-the-counter pain relievers as they can help to enhance joint mobility, increase muscle strength and endurance, and improve balance and coordination. Depending on the individual circumstances, some prefer low-impact exercises like swimming, cycling, and walking, while others may benefit more from resistance training or flexibility exercises like yoga and Pilates. Engaging in regular exercise can also lead to the release of endorphins, the body’s natural pain relievers, which help to counteract pain and improve mood.

Heat and cold therapy are another set of non-pharmacological pain relief interventions that can be employed at home. Heat therapy, through the use of heating pads, hot water bottles, or warm baths, can relieve stiffness and increase blood flow to the affected area, helping to reduce pain. Cold therapy, utilizing ice packs or cold compresses, can be beneficial in numbing pain and reducing inflammation and swelling. Understanding when to use one method over the other is essential, and one may find alternating between heat and cold therapy can effectively relieve discomfort.

Relaxation techniques can also play a role in managing pain and reducing reliance on over-the-counter pain relievers. Stress and tension can amplify pain sensations, making relaxation a vital component of pain relief. Mind-body techniques such as deep breathing exercises, progressive muscle relaxation, and visualization can help calm the mind and decrease overall stress levels. Other relaxation techniques like meditation, mindfulness, and biofeedback can be beneficial in teaching individuals how to cope with pain more effectively.

Incorporating massage therapy and acupuncture into your pain management routine can provide complementary relief to over-the-counter pain relievers. Massage therapy works by manipulating the soft tissues of the body, helping to relax tight muscles, improve circulation, and encourage the release of pain-relieving endorphins. Acupuncture, a traditional Chinese medicine practice, uses thin needles inserted into specific points on the body to relieve pain by balancing the body’s energy pathways. Both interventions have been shown to relieve various types of pain, potentially reducing dependence on over-the-counter pain relievers.

An image displaying various non-pharmacological pain management strategies such as physical therapy, exercise, heat and cold therapy, relaxation techniques, massage therapy, and acupuncture.

Evaluating Quality and Efficacy

Understanding the different over-the-counter (OTC) pain relievers available can further enhance your pain management strategy. The most common active ingredients in OTC pain relievers are acetaminophen, aspirin, ibuprofen, and naproxen. Each of these active ingredients has different properties and mechanisms of action, making them suitable for various types of pain. For instance, acetaminophen is effective for mild to moderate pain, such as headaches or toothaches but may not be as helpful for inflammatory pain. In contrast, non-steroidal anti-inflammatory drugs (NSAIDs), like ibuprofen and naproxen, are ideal for reducing inflammation and easing pain from conditions like arthritis, menstrual cramps, or muscle strains. By incorporating alternative pain relief practices like massage therapy and acupuncture, along with a proper understanding of OTC pain relievers, you can create a comprehensive and effective pain management regimen.

The formulation of OTC pain relievers is another crucial factor to consider. Various formulations are created to address specific needs and preferences. For instance, extended-release formulations provide a longer-lasting pain relief option by releasing the active ingredient over time. Additionally, some OTC pain relievers are combined with other medications, such as antihistamines or caffeine, to address additional symptoms or boost the pain-relieving effects. It is essential to read the label and ensure you are selecting the most appropriate formulation for your needs and symptoms.

Delivery methods also play a significant role in assessing the quality and efficacy of OTC pain relievers. Common delivery methods include oral tablets, capsules, or liquids, as well as topical creams, gels, and patches. Choosing the most suitable delivery method depends on factors such as the type and location of the pain, as well as individual preferences. For instance, oral medications typically offer systemic pain relief, while topical formulations can be helpful for localized pain. It is worth noting that ingesting some OTC pain relievers with food or on a full stomach can help minimize gastrointestinal side effects, particularly with NSAIDs.

Considering the dosing recommendations and potential side effects is vital when selecting an OTC pain reliever. Each OTC pain reliever may have different dosing intervals and maximum daily amounts that should not be exceeded to ensure safety and efficacy. Moreover, certain pain relievers may not be suitable for individuals with specific medical conditions or those taking certain medications, due to the risk of adverse reactions or drug interactions. It is recommended to consult a healthcare professional if you are unsure if a particular OTC pain reliever would be safe or effective in your situation.

It’s important to recognize that every individual may respond differently to various over-the-counter (OTC) pain relievers. Factors such as age, weight, genetics, and personal experiences can influence your response to a particular medication. To determine the most effective medication for you, it’s crucial to monitor your response to different OTC pain relievers and potentially try a sample size or adjust dosages under the guidance of a healthcare professional. Understanding these individual variations can help in identifying the most appropriate and effective OTC pain reliever for your specific needs and preferences.

Illustration of various OTC pain relief options including tablets, capsules, liquids, creams, gels, and patches.

Case Studies and Real-Life Applications

For instance, in a case study published by the National Center for Biotechnology Information (NCBI), OTC pain relievers were found to be more beneficial for the management of acute dental pain than other medications, such as opioids. Participants in this study had undergone dental surgery, and the use of ibuprofen, a common non-prescription pain reliever, provided relief from pain and inflammation without the risk of addiction associated with opioid use. This example demonstrates how OTC pain relievers can provide relief for mild to moderate pain situations, and that the choice of medication may vary depending on individual factors and responses.

Another real-life application for OTC pain relievers can be found in their use for managing menstrual pain. A randomized, controlled trial was conducted to compare the effectiveness of ibuprofen, paracetamol (acetaminophen), and naproxen sodium in treating dysmenorrhea, a condition characterized by painful menstrual cramps. The study found that all three medications provided substantial relief for the participants, but ibuprofen was found to be the most effective and well-tolerated among the three.

In some cases, combining OTC pain relievers has been found to be effective for certain pain situations, such as for migraine headaches. A study published in the journal Pain Med assessed the use of a combination of aspirin, acetaminophen, and caffeine for treating migraines without aura. The study found that migraine sufferers experienced a significant reduction in pain intensity, with the effects being similar to those of specific prescription migraine medications. The combination of these OTC medications was well-tolerated and indicated the potential benefits of using a multi-modal approach to treating certain pain scenarios.

On the other hand, it is crucial to be aware of the potential for overuse or misuse of OTC pain relievers. A study was conducted in the United Kingdom, where it was found that a significant number of people exceeded the recommended daily dose for paracetamol (commonly known as acetaminophen). Excessive use of paracetamol is associated with increased risks of liver and kidney damage. This study highlights the need for awareness and education on the appropriate use of OTC pain relievers to minimize potential harm.

Lastly, an interesting application of OTC pain relievers can be in the management of chronic pain, with some caveats. For instance, a randomized control trial examined the use of extended-release acetaminophen in patients with osteoarthritis in the knee. The patients experienced significant pain relief and improved function compared to those in the placebo group. However, it is important to note that consulting a healthcare professional is essential for managing chronic pain conditions to ensure the appropriate use of medications and avoid overreliance on OTC pain relievers.

Image of a person holding a bottle of over-the-counter pain relievers with a label that says 'pain relief'.

Ultimately, having a vast understanding of the available OTC pain relievers, their mechanisms, guidelines, potential interactions, risks, and alternative pain relief methods can help individuals make the best choices in managing their pain. By staying well-informed and considering case studies and real-life applications, one can ensure that they are equipped to not only evaluate the quality and efficacy of different pain relievers but also to discover a pain relief approach that is tailored to their needs and circumstances. As always, consulting with healthcare professionals is an essential step in the process, ensuring that the selected pain relief methods are appropriate and safe.

Knee Pain Treatment

Knee pain is a common issue experienced by many adults and can have a significant impact on daily life and overall well-being. Understanding the anatomy of the knee joint, identifying the causes of knee pain, exploring different treatment options, and implementing prevention strategies are essential steps towards managing and alleviating knee pain. This article provides a comprehensive guide to help you better understand, treat, and prevent knee pain and enjoy improved mobility and quality of life.

Anatomy of the knee

Knee pain is a common problem that affects people of all ages. Whether you are an athlete, a weekend warrior, or just looking to maintain your daily mobility, understanding the anatomy and common knee injuries can help you both prevent and manage knee pain. In this guide, we will explore the structure and function of the knee joint, including bones, ligaments, tendons, and muscles. We will also provide an overview of common knee injuries and their causes.

Anatomy of the Knee:

1. Bones:

  • Femur (thigh bone): The upper part of the knee joint connects to the femur.
  • Tibia (shin bone): The lower part of the knee joint connects to the tibia.
  • Patella (kneecap): A small, triangular bone that sits in front of the joint and helps protect it.

2. Ligaments:

  • Anterior cruciate ligament (ACL): Helps stabilize the knee and prevents the tibia from sliding forward.
  • Posterior cruciate ligament (PCL): Helps stabilize the knee and prevents the tibia from sliding backward.
  • Medial collateral ligament (MCL): Helps stabilize the knee and prevents the knee from bending inward.
  • Lateral collateral ligament (LCL): Helps stabilize the knee and prevents the knee from bending outward.

3. Tendons:

  • Quadriceps tendon: Connects the quadriceps (thigh muscles) to the patella.
  • Patellar tendon: Connects the patella to the tibia.

4. Muscles:

  • Quadriceps: Located on the front of the thigh, help to straighten the knee.
  • Hamstrings: Located on the back of the thigh, help to bend the knee.
  • Gastrocnemius (calf muscle): Helps to flex the knee.

Common Knee Injuries and Their Causes:

1. Sprains and strains:
– Cause: Overstretching or tearing of the ligaments and/or muscles around the knee joint. Often occurs during sports or physical activity.
– Prevention: Proper warm-up, stretching, and strengthening exercises can help minimize the risk of sprains and strains.

2. Tendonitis:
– Cause: Inflammation of the tendons around the knee, often caused by overuse or repetitive movements.
– Prevention: Proper rest and recovery after workouts, as well as maintaining strength and flexibility, can help prevent tendon irritation and injury.

3. Meniscus tears:
– Cause: Damage to the cartilage that cushions the knee joint, often resulting from a twisting injury or wear and tear over time.
– Prevention: Strengthening the muscles around the knee and maintaining proper technique during sports and activities can help prevent meniscus injuries.

4. ACL/PCL injuries:
– Cause: Sudden twisting motions, direct impact, or abrupt stops while playing sports can lead to a torn ligament.
– Prevention: Strengthening the muscles surrounding the knee and practicing proper landing techniques can help protect ligaments from injury.

5. Patellofemoral pain syndrome:
– Cause: Imbalance or weakness in the muscles surrounding the knee, causing the kneecap to track incorrectly and resulting in pain.
– Prevention: Strengthening exercises and proper footwear can help keep the kneecap aligned correctly and minimize discomfort.

Conclusion:
Understanding the anatomy of the knee is vital in learning how to maintain healthy knees and prevent injuries. By taking steps to strengthen and stretch the muscles, tendons, and ligaments around the knee, you can lessen your risk of experiencing knee pain or injury. Always consult a physician or physical therapist for personalized advice or treatment of knee pain.

An illustration of the knee joint showing the femur, tibia, patella, ligaments, and muscles surrounding the knee.

Identifying knee pain causes

Knee pain is a common problem in adults, and it can result from a variety of injuries and conditions. By learning how to recognize the symptoms of different knee issues, you can identify the potential cause of your pain and seek appropriate treatment. In this guide, we will discuss the symptoms of common knee injuries and conditions, such as ligament tears, tendonitis, arthritis, meniscus tears, and bursitis.

Ligament Tears

Ligament tears occur when one or more of the ligaments in the knee are stretched or torn. The most common knee ligament injuries involve the anterior cruciate ligament (ACL), the posterior cruciate ligament (PCL), and the medial collateral ligament (MCL).

Symptoms of a ligament tear may include:

  • A sudden, severe pain in the knee at the time of injury
  • A loud popping sound during the injury
  • Swelling and inflammation in the affected area
  • Difficulty walking or bearing weight on the injured knee
  • A feeling of instability or giving way in the knee joint

Tendonitis

Tendonitis is the inflammation of a tendon, which is the thick cord that attaches muscles to bones. In the knee, tendonitis often affects the patellar tendon or the quadriceps tendon.

Symptoms of knee tendonitis may include:

  • Pain and tenderness around the affected tendon
  • Swelling and inflammation in the area
  • Pain during physical activity or when bending or straightening the knee
  • A stiff or weak feeling in the knee joint

Arthritis

Arthritis is a joint inflammation and can occur in various forms, such as osteoarthritis or rheumatoid arthritis. Osteoarthritis is a degenerative joint disease resulting from wear and tear on the knee joint, while rheumatoid arthritis is an autoimmune inflammatory disorder.

Symptoms of knee arthritis may include:

  • Gradual onset of pain, often worsening over time
  • Stiffness in the knee joint, especially in the morning or after periods of inactivity
  • Swelling and warmth in the knee joint
  • Limited range of motion or decreased joint function

Meniscus Tears

The meniscus is a C-shaped piece of cartilage found in the knee that acts as a shock absorber between the thigh bone (femur) and the shin bone (tibia). Meniscus tears can occur due to sudden or forceful twisting or pivoting of the knee or as a result of gradual wear and tear over time.

Symptoms of a meniscus tear may include:

  • Pain on the inside or outside of the knee
  • Swelling and inflammation in the affected area
  • Stiffness and decreased mobility in the knee joint
  • A popping or clicking sensation when moving the knee
  • A feeling of instability or “giving way” in the knee joint

Bursitis

Bursitis is the inflammation of a bursa, a small fluid-filled sac that cushions the knee joint. Bursitis often occurs as a result of overuse, repetitive motions, or direct trauma to the knee.

Symptoms of knee bursitis may include:

  • Pain and tenderness around the affected bursa
  • Swelling and inflammation in the area
  • Warmth and redness around the knee joint
  • Pain when moving or putting pressure on the affected knee

By learning how to identify the different symptoms of common knee injuries and conditions, you can better understand the cause of your knee pain and seek appropriate treatment. If you are experiencing persistent or severe knee pain, consult your healthcare provider for a thorough examination and tailored treatment plan.

An image showing different parts of the knee and areas of pain, with captions highlighting the symptoms of different knee injuries and conditions such as ACL, PCL, MCL, patellar tendon, quadriceps tendon, osteoarthritis, rheumatoid arthritis, meniscus tear, and bursitis.

Home remedies for knee pain

Knee pain is a common issue that can be caused by various factors such as injuries, arthritis, or simply overusing the knee joint. Here are some home remedies to help alleviate your knee pain.

  1. Rest: One of the essential steps in treating knee pain is to give your body enough time to rest and heal. Avoid putting excessive weight or stress on the knee joint and try to limit activities that may worsen your pain. In severe cases, consider using crutches to keep weight off the affected knee.
  1. Ice: Applying ice to your knee can help reduce inflammation, swelling, and pain. Wrap a bag of ice or a cold pack in a towel and place it on the affected knee for 15-20 minutes. You can do this several times a day, especially after activities that cause pain in your knee.
  1. Compression: Wrap a compression bandage or an elastic knee sleeve around your knee to provide support and reduce swelling. Make sure not to wrap it too tight, as it can cut off circulation. You should be able to slide a finger under the bandage.
  1. Elevation: Elevating your injured knee above the level of your heart can help minimize swelling and promote healing. Use pillows or cushions to prop up your leg comfortably while you rest.
  1. Over-the-counter pain relievers: Non-prescription pain relievers such as ibuprofen, naproxen, or acetaminophen can help reduce inflammation and alleviate pain. Always follow the recommended dosage on the label and consult with your doctor if you have any concerns about taking these medications.
  1. Gentle stretching and strengthening exercises: Once your knee pain has decreased and your doctor has given you the green signal, consider incorporating gentle stretches and strengthening exercises into your daily routine. This can help improve flexibility, stability, and strength around the joint, minimizing the risk of future injuries.
  1. Topical pain relievers: Using over-the-counter creams, gels, or patches containing pain-relieving ingredients like menthol, capsaicin, or lidocaine can help provide temporary relief from knee pain.
  1. Massage: Gently massaging the muscles around your knee can help relax the muscles, increase blood flow, and reduce pain. You can use massage oil or lotion and apply gentle pressure using your fingers or a soft massage ball.
  1. Warm baths or heating pads: Applying heat to your knee can help increase circulation and relax muscles. Taking a warm bath or using a heating pad can provide relief, especially for conditions such as arthritis. However, avoid using heat if your knee is swollen or inflamed.
  1. Maintain a healthy weight: Carrying excess weight can put additional strain on your knee joints, causing pain and exacerbating existing issues. Losing weight and maintaining a healthy body weight through a balanced diet and regular exercise can help alleviate knee pain in the long run.

Finally, always consult with your doctor before starting any new treatment or exercise regimen, especially if your knee pain is persistent, severe, or accompanied by other concerning symptoms such as redness, warmth, or significant swelling. Your doctor can suggest the most appropriate course of action based on your specific circumstances.

A cartoon image of a person sitting with an ice pack on their knee.

Stretching and strengthening exercises

Knee pain can result from various factors such as injury, overuse, or underlying medical conditions. Stretching and strengthening exercises can help improve knee stability, flexibility, and resilience. Learn how to properly perform these exercises and incorporate them into your daily routine to alleviate knee pain and prevent future injuries.

Stretching Exercises:

  1. Hamstring Stretch
    • Lie down on your back with both legs straight.
    • Bend your right knee and use your hands to hold the back of your thigh.
    • Gently straighten your right knee, feeling a stretch in the back of your leg.
    • Hold this stretch for 20-30 seconds, then switch legs and repeat.
  2. Quadriceps Stretch
    • Stand next to a wall or use a chair for support.
    • Bend your left knee and grab your left foot with your left hand.
    • Gently pull your foot toward your buttock, feeling the stretch in the front of your thigh.
    • Hold this stretch for 20-30 seconds, then switch legs and repeat.
  3. Calf Stretch
    • Stand facing a wall and place your hands on the wall for support.
    • Step your right foot back, keeping both feet flat on the ground and facing forward.
    • Bend your left knee and lean into the wall until you feel a stretch in your right calf.
    • Hold this stretch for 20-30 seconds, then switch legs and repeat.

Strengthening Exercises:

  1. Leg Raises
    • Lie on your back with your legs straight and your hands at your sides.
    • Tighten your thigh muscles and slowly raise your right leg, keeping it straight.
    • Hold for a few seconds, then slowly lower your leg back to the starting position.
    • Perform 10-15 repetitions, then switch legs and repeat.
  2. Step-Ups
    • Stand in front of a sturdy, low step or platform.
    • Place your right foot on the step, engaging your thigh and buttock muscles to lift your body.
    • Slowly lower your left foot back to the ground, keeping your right foot on the step.
    • Perform 10-15 repetitions, then switch legs and repeat.
  3. Wall Squats
    • Stand with your back against a wall and your feet shoulder-width apart.
    • Slowly slide down the wall, bending your knees to a 90-degree angle (or as close as comfortable).
    • Hold this position for 5-10 seconds, then slowly slide back up the wall to a standing position.
    • Perform 10-15 repetitions.
  4. Bridges
    • Lie on your back with your knees bent and your feet flat on the ground.
    • Tighten your buttocks and lift your hips off the ground, creating a straight line from your shoulders to your knees.
    • Hold this position for a few seconds, then slowly lower your hips back to the starting position.
    • Perform 10-15 repetitions.

Incorporating These Exercises into Your Daily Routine:

  • Start by performing each exercise for the recommended repetitions and sets.
  • As your strength and flexibility improve, gradually increase the number of repetitions and sets.
  • Make sure to warm up before exercising with a 5-10 minute brisk walk or light cardio activities.
  • Cool down after exercising by gently stretching the muscles you worked during your routine.
  • Consult with a physical therapist or healthcare professional for individual guidance and modifications if needed.

Remember, consistency is key when it comes to stretching and strengthening exercises for knee pain treatment. Incorporate these exercises into your daily routine, listen to your body, and consult with a professional if your pain worsens or does not improve over time.

An illustration showing a person performing a wall squat exercise

Physical therapy techniques

Knee pain can affect people of all ages and can be caused by various factors such as injuries, arthritis, and overuse. Physical therapy plays a vital role in treating knee pain and restoring function. In this guide, we will explore different physical therapy methods and equipment used to address knee pain.

1. Warm-up and Stretching Exercises

Before starting any physical therapy session, it is essential to warm up your muscles and joints. Spend 5-10 minutes performing light aerobic exercise, such as walking or stationary cycling. Follow this with gentle stretches focusing on the muscles surrounding the knee, including the quadriceps, hamstrings, and calf muscles.

2. Strengthening Exercises

Strengthening the muscles around your knee can help stabilize the joint and alleviate pain. Some common strengthening exercises for knee pain include:

  • Leg raises: Lie on your back with one leg bent at the knee and the other straight. Slowly lift the straight leg to about 45 degrees, hold for 5 seconds, and then lower it back down. Repeat for 10-15 repetitions and then switch legs.
  • Wall sits: Stand with your back against a wall and slide down into a squat position, keeping your knees aligned with your ankles. Hold this position for 10-30 seconds and then slowly stand back up. Repeat this exercise 5-10 times.
  • Step-ups: Place one foot on an elevated platform (like a low step or sturdy box) and use your leg muscles to raise your body onto the step. Slowly lower yourself back down and repeat for 10-15 repetitions before switching legs.

3. Massage Therapy

Massage and manual techniques can help alleviate knee pain by stimulating blood flow, addressing muscular imbalances, and reducing muscle tension. A physical therapist can use different techniques, such as effleurage, petrissage, and friction, to target specific muscles around the knee joint. Using foam rollers or massage balls at home can also help relieve tension and tightness.

4. Ultrasound Therapy

Ultrasound therapy uses high-frequency sound waves to stimulate and heat tissues within the body. A physical therapist will apply a gel to the skin around the knee and use an ultrasound device to transmit the sound waves into the affected area. This can help reduce inflammation, increase circulation, and promote healing within the knee joint.

5. Electrical Stimulation

Transcutaneous electrical nerve stimulation (TENS) therapy involves placing electrodes around the knee and sending mild electrical currents through the skin to stimulate the nerves. This can provide pain relief by blocking pain signals to the brain and increasing the release of endorphins, the body’s natural painkiller.

6. Joint Mobilization

Joint mobilization is a hands-on technique used by physical therapists to improve joint mobility, reduce stiffness, and alleviate pain. Using controlled movements, the therapist will gently move the knee joint through its available range of motion, helping to reduce joint restrictions and improve overall knee function.

7. Cold and Heat Therapy

Applying ice or heat to the knee can help manage pain and inflammation. Ice therapy is best for reducing acute inflammation, while heat therapy can help relieve chronic pain by increasing blood flow to the area. A physical therapist will advise you on which therapy is most appropriate for your knee pain.

There are many physical therapy techniques and equipment options available for treating knee pain, and a combination of these methods may be needed to tailor your treatment plan. As with all rehabilitation exercises, it’s essential to work closely with a licensed healthcare professional to ensure safety and effectiveness. With patience and dedication to your treatment plan, you will notice improvements in your knee pain and function over time.

An image of a person stretching their leg muscles before exercising to help alleviate knee pain.

Pain-relief medication

Knee pain is a common complaint among adults and can be caused by various factors, such as injury, arthritis, or simply aging. Fortunately, there are several pain-relief medications available that can help alleviate discomfort and improve overall quality of life. In this guide, we will discuss common over-the-counter and prescription medications used to treat knee pain, including nonsteroidal anti-inflammatory drugs (NSAIDs), corticosteroid injections, and hyaluronic acid injections.

1. Nonsteroidal Anti-Inflammatory Drugs (NSAIDs)

NSAIDs are a popular choice for relieving minor to moderate knee pain. These over-the-counter medications work by reducing inflammation and providing relief from discomfort. Common NSAIDs include:

  • Ibuprofen (e.g., Advil, Motrin)
  • Naproxen (e.g., Aleve)
  • Aspirin (e.g., Bayer)

Instructions for using NSAIDs:

  1. Read the label for dosage guidelines and follow them closely.
  2. Take the medication with food to minimize stomach upset.
  3. Avoid lying down for at least 10 minutes after taking the medication.
  4. If you are pregnant, nursing, or have a history of stomach ulcers or kidney problems, consult your doctor before using NSAIDs.

2. Corticosteroid Injections

Corticosteroid injections can provide relief for severe knee pain caused by inflammation, usually linked to conditions such as arthritis. These injections are administered directly into the affected joint by a healthcare professional and typically provide relief for several weeks to months.

Instructions for receiving corticosteroid injections:

  1. Consult your doctor to determine if this treatment option is suitable for your specific knee pain.
  2. Schedule an appointment with a healthcare professional for the injection.
  3. Follow all post-injection care instructions provided by your healthcare provider, such as avoiding strenuous activity for a few days.

3. Hyaluronic Acid Injections

Hyaluronic acid injections are a treatment option primarily for individuals with osteoarthritis. These injections help supplement the natural hyaluronic acid found in joint fluid, providing lubrication and cushioning to the knee joint. The effects of hyaluronic acid injections can last for several months.

Instructions for receiving hyaluronic acid injections:

  1. Discuss with your doctor if this treatment is appropriate for your knee pain, particularly if you have osteoarthritis.
  2. Schedule an appointment with a healthcare professional for the injection.
  3. Follow all post-injection care instructions provided by your healthcare provider, such as avoiding strenuous activity for a few days.

Knee pain can be debilitating, but with the right treatment and pain-relief medication, you can experience significant relief. It is essential to consult a healthcare professional to determine the best course of action for your specific knee pain. By exploring options such as NSAIDs, corticosteroid injections, and hyaluronic acid injections, you can find the best treatment to manage and improve your knee pain.

An image of a person rubbing their knee to relieve pain.

Alternative therapies

Knee pain is a common problem among adults, often caused by factors such as injury, arthritis, or aging. Conventional approaches to knee pain treatment may include medications, physical therapy, or surgery. However, alternative therapies can be helpful for those seeking natural, non-invasive options to alleviate knee pain. This guide will discuss alternative treatment options, including acupuncture, chiropractic treatments, and herbal remedies. We will also delve into the potential benefits and risks associated with these therapies.

Acupuncture

Acupuncture is an ancient Chinese therapy that involves inserting thin needles into specific points (acupoints) on the body to help restore the balance of energy or “Qi”. It has been used to treat various conditions, including knee pain.

A. Overview:

  • Alleviates pain by releasing endorphins, the body’s natural painkillers
  • Reduces inflammation by stimulating the release of anti-inflammatory mediators
  • Improves blood flow to the affected area, promoting healing

B. Potential benefits:

  • Alleviates pain by releasing endorphins, the body’s natural painkillers
  • Reduces inflammation by stimulating the release of anti-inflammatory mediators
  • Improves blood flow to the affected area, promoting healing

C. Potential risks:

  • Infection or bruising at the needle insertion site
  • Potential worsening of pain in rare cases
  • Unsuitable for people with blood disorders or those taking blood-thinning medications

Chiropractic Treatments

Chiropractic treatments involve the diagnosis and manipulation of the musculoskeletal system, particularly the spine. Chiropractic adjustments can be helpful in addressing misalignments and imbalances that may contribute to knee pain.

A. Overview:

  • Alleviates pain by correcting structural imbalances that place undue stress on the knee joint
  • Increases range of motion and flexibility
  • Improves nerve function and communication between the brain, spine, and knee

B. Potential benefits:

  • Alleviates pain by correcting structural imbalances that place undue stress on the knee joint
  • Increases range of motion and flexibility
  • Improves nerve function and communication between the brain, spine, and knee

C. Potential risks:

  • Temporary discomfort or soreness following treatment
  • Rare risk of injury, such as ligament damage or fracture

Herbal Remedies

Herbal remedies involve the use of plant extracts to aid in the relief of knee pain. These remedies can be taken orally or applied topically to the affected area.

A. Overview:

  • Turmeric: Contains the active compound curcumin, known for its anti-inflammatory properties
  • Ginger: Reduces inflammation and pain by inhibiting the production of inflammatory compounds
  • White willow bark: A natural source of salicin, a precursor to aspirin, which relievers pain and inflammation

B. Examples of herbal remedies for knee pain:

  • Turmeric: Contains the active compound curcumin, known for its anti-inflammatory properties
  • Ginger: Reduces inflammation and pain by inhibiting the production of inflammatory compounds
  • White willow bark: A natural source of salicin, a precursor to aspirin, which relievers pain and inflammation

C. Potential benefits:

  • Provides a natural alternative to pharmaceutical pain relievers
  • Offers anti-inflammatory and analgesic effects

D: Potential risks:

  • Allergic reactions or side effects from the herbs
  • Negative interactions with prescription medications
  • Unsuitable for people with certain medical conditions or allergies to specific herbs

Conclusion:

Alternative therapies like acupuncture, chiropractic treatments, and herbal remedies offer a natural, non-invasive approach to knee pain treatment for adults. Though they may be suitable for many individuals, it is important to consult with a healthcare professional before experimenting with these therapies to ensure they are safe and appropriate for your specific circumstances. By understanding the potential benefits and risks, you can make an informed decision about the best course of treatment for your knee pain.

Disclaimer: This guide is for informational purposes only and should not be considered medical advice. Consult with a healthcare professional before attempting any new treatment.

An image showing a person applying a compress to their knee with the word 'pain' in bold letters above it.

Prevention strategies

Knee pain is a common issue experienced by adults, and it can be caused by various factors such as injuries, arthritis, and age-related wear and tear. Prevention plays an essential role in maintaining healthy knees and avoiding pain. Here are some strategies to prevent knee injuries and pain, including maintaining a healthy weight, practicing proper body mechanics during physical activity, and wearing appropriate footwear.

Step 1: Maintain a Healthy Weight

  1. Determine your ideal body weight based on factors like age, gender, and height.
  2. Follow a balanced diet rich in fruits, vegetables, lean proteins, and whole grains to help manage weight.
  3. Engage in regular physical activity for at least 150 minutes per week, including aerobic exercises and strength training. This will help maintain a healthy weight and strengthen the muscles supporting your knees.

Step 2: Practicing Proper Body Mechanics

  1. Warm-up before engaging in any physical activity to prepare your muscles and joints.
  2. Avoid sudden, intense movements that can strain your knee joint, such as twisting or pivoting.
  3. Focus on low-impact activities, like swimming or cycling, that cause less stress on your knee joints.
  4. Perform knee-strengthening exercises to improve stability and support (e.g., lunges, squats, and leg presses).
  5. Stretch your muscles regularly, particularly the ones surrounding your knees (e.g., hamstrings, quadriceps, and calf muscles).

Step 3: Wear Appropriate Footwear

  1. Choose shoes that offer proper arch support, cushioning, and stability.
  2. Replace worn-out athletic shoes to maintain adequate shock absorption and support.
  3. Consider using custom orthotics or shoe inserts if you have specific foot problems or gait issues that may contribute to knee pain.
  4. Avoid wearing high heels for extended periods, as this can put stress on the knee joints.

Step 4: Protect Your Knees During Physical Activity

  1. Use proper technique and form when performing exercises or playing sports.
  2. Incorporate balance and stability exercises to improve joint stability and reduce the risk of injury.
  3. Wear protective gear, like knee pads or braces, during sports or physical activities that may put your knees at risk.
  4. Give your body adequate time to rest and recover between intense workouts or activities.

Step 5: Seek Professional Guidance

  1. Consult a physical therapist, sports medicine specialist, or an orthopedic doctor if you have ongoing knee pain, as they can provide individualized prevention and treatment plans.
  2. Attend regular check-ups and follow your healthcare provider’s advice on appropriate preventive measures for knee pain and injury.

Knee pain treatment and prevention strategies go hand-in-hand. By maintaining a healthy weight, practicing proper body mechanics, and wearing appropriate footwear, you can significantly reduce your chances of experiencing knee pain or injuries. Remember, an ounce of prevention is worth a pound of cure.

An image showcasing a person wearing proper athletic shoes for knee pain prevention

When to seek professional help

Knee pain can result from various factors, such as an injury, aging, or underlying health conditions. In some cases, self-care measures like rest, ice, compression, and elevation can help alleviate the pain. However, it’s essential to recognize when it’s time to seek professional help for your knee pain.

1. Persistent or worsening pain

If your knee pain remains constant or worsens despite attempting self-care measures for a few days, it’s time to consult a doctor. This persistent pain could indicate an underlying injury or condition that requires professional treatment, such as torn cartilage, a ligament injury, or arthritis.

2. Joint instability

If your knee feels weak, wobbly, or as if it may give out during normal activities, you should get medical attention. Joint instability can be a symptom of a ligament or tendon injury, meniscus tear, or dislocation. It is crucial to address these issues early to prevent further damage or chronic instability.

3. Inability to bear weight

If you cannot put any weight on your knee without experiencing severe pain, it is a sign that you need professional help. This inability to bear weight could indicate a fracture, a severe ligament injury, or another medical condition that necessitates specialized care.

4. Noticeable swelling, redness, or warmth

If your knee is visibly swollen, red, or warm to touch, you should consult a doctor. These signs can indicate inflammation, infection, or internal bleeding, which require prompt medical attention.

5. Deformity or misalignment

If your knee appears deformed or out of alignment, seek medical attention immediately. This symptom could signal a dislocation, fracture, or other severe injury that requires urgent treatment to prevent further complications.

6. Limited range of motion

Difficulty in bending or straightening your knee, accompanied by persistent pain, indicates that it’s time to consult a professional. Limited range of motion can result from injuries, inflammation, or arthritis, and addressing it early can help prevent long-term damage.

7. Signs of infection

An infected knee joint can cause severe complications if left untreated. If you experience symptoms like fever, chills, or increased pain and swelling around your knee, consult a doctor immediately.

It’s crucial to recognize when your knee pain requires professional intervention. Seeking prompt medical care for concerning symptoms can help prevent long-term damage and improve your overall recovery. Remember that self-care methods are not always enough, and understanding when to seek help is a crucial part of maintaining your overall health and well-being.

Photo by Eagle Media Pro on Unsplash

By familiarizing yourself with the structure and function of the knee joint, identifying the causes of knee pain, and implementing various treatment and prevention strategies, you can actively work towards relieving pain and maintaining healthy knees. Remember, it is essential to consult a healthcare professional if you experience persistent or worsening pain or other symptoms that may indicate the need for medical intervention. Take charge of your knee health, and explore the various approaches available to help you live pain-free and enjoy an active lifestyle.

Ice Therapy for Knee Pain

Living with knee pain can significantly impact your daily life and activities. Developing a deeper understanding of the knee’s anatomy, common causes of knee pain, and various pain relief methods, such as ice therapy, can help you take control of your pain and work towards a healthier, more comfortable lifestyle. This article will take you through a comprehensive guide to ice therapy, physical therapy, alternative pain relief methods, and integrating these treatments into your rehabilitation routine.

Anatomy of the Knee

The knee joint is one of the most important and complex joints in the human body, allowing us to walk, run, jump, and perform various activities. Understanding the anatomy of the knee is crucial for maintaining its health, preventing injuries, and managing knee pain. In this tutorial, we will discuss the anatomy of the knee, and how to use ice therapy for knee pain relief.

Anatomy of the Knee:

  1. Bones – The knee joint is formed by three bones:

    • a. Femur (thigh bone) – the largest bone in the body that connects the hip to the knee.

    • b. Tibia (shin bone) – the larger lower leg bone that connects the knee to the ankle.

    • c. Patella (knee cap) – the small, triangular bone that sits in front of the knee, offering protection to the joint.

  2. Cartilage – Two types of cartilage are found in the knee:

    • a. Menisci – two crescent-shaped discs of cartilage that act as shock absorbers, cushioning and distributing the weight between the femur and tibia.

    • b. Articular cartilage – a smooth, slippery tissue that covers the ends of bones in the joint, allowing them to glide smoothly over each other during movement.

  3. Ligaments – Four primary ligaments provide stability to the knee joint:

    • a. Anterior cruciate ligament (ACL) – prevents the tibia from sliding too far forward and offers rotational stability.

    • b. Posterior cruciate ligament (PCL) – provides support to the back of the knee and prevents excessive backward movement of the tibia.

    • c. Medial collateral ligament (MCL) – runs along the inner side of the knee, providing stability to the inner knee.

    • d. Lateral collateral ligament (LCL) – runs along the outer side of the knee and provides stability to the outer knee.

  4. Tendons – Connect the muscles to the bones of the knee joint, allowing for movement and force transmission.

    • a. Quadriceps tendon – connects the quadriceps muscles (front of the thigh) to the patella.

    • b. Patellar tendon – connects the patella to the tibia.

  5. Muscles – Several major muscle groups surround and control the movement of the knee joint:

    • a. Quadriceps – a group of four muscles located at the front of the thigh, responsible for extending the leg and straightening the knee.

    • b. Hamstrings – a group of three muscles located at the back of the thigh, responsible for flexing the knee and extending the hip.

    • c. Gastrocnemius – a calf muscle that assists in flexing the knee as well as pointing the toes downward.

Ice Therapy for Knee Pain:

  1. Using ice therapy for knee pain can help reduce inflammation, numb the affected area, and provide relief for various knee conditions, such as osteoarthritis, tendonitis, sprains, and strains. Follow these steps to apply ice therapy:

  2. Prepare the ice pack – Fill a plastic bag with ice cubes or crushed ice or use a commercial ice pack. Wrap the ice pack in a thin towel or cloth.

  3. Position yourself comfortably – Sit or lie down with your knee elevated above your heart level, using pillows for support.

  4. Apply the ice – Place the wrapped ice pack on the affected knee, making sure it covers the entire painful area.

  5. Time the therapy – Leave the ice pack on your knee for 15 to 20 minutes. Remove the ice for at least 30 minutes before reapplying it.

  6. Repeat the process – Apply the ice therapy 3 to 4 times daily, especially during the first few days after an injury or if you’re experiencing increased pain or inflammation.

Understanding the anatomy of the knee joint can help you take better care of your knees and address any signs of pain or discomfort. Ice therapy is a simple, safe, and effective technique for managing knee pain at home. However, if your knee pain persists or worsens, consult a medical professional for further evaluation and treatment.

This image shows the different bones, ligaments, tendons, and muscles of the knee joint in different colors, highlighting the complex structure of this joint.

Causes of Knee Pain

Knee pain is a common issue experienced by adults, affecting their mobility and overall quality of life. It is crucial to understand the causes of knee pain to find the appropriate treatment method. This article will explore the common causes of knee pain and provide instructions on using ice therapy to alleviate knee pain.

Causes of Knee Pain:

  1. Injuries: The knee joint is susceptible to various injuries like ligament tears, tendon tears, and fractures. Common knee injuries include ACL (anterior cruciate ligament) tears, meniscus tears, and patellar dislocations.
  2. Arthritis: Arthritis is a primary cause of knee pain for older adults. Different types of arthritis affecting the knee are osteoarthritis (the most common type), rheumatoid arthritis, and gout.
  3. Strains and Sprains: Overusing or improperly using the knee can cause strains or sprains in muscles, ligaments, and tendons. Activities like lifting heavy objects, long-distance running, and sudden movements may lead to strains and sprains.
  4. Bursitis: Inflammation of the bursa (a small fluid-filled sac that reduces friction between the bones, tendons, and muscles) can cause knee pain. This condition is most commonly seen in individuals who kneel for extended periods.
  5. Tendinitis: The inflammation of tendons around the knee joint is called tendinitis. This condition is typically caused by repetitive motion, leading to irritation and inflammation.
  6. Medical Conditions: Knee pain may be triggered by other medical conditions, such as infections, cysts, and tumors.

Ice Therapy for Knee Pain:

  1. Preparation
    • Get an ice pack or create one by crushing ice and placing it in a plastic bag. You can also use a bag of frozen vegetables, like peas.
    • Wrap the ice pack or bag of frozen vegetables in a thin towel to protect your skin from frostbite.
  2. Position
    • Sit or lie down in a comfortable position that allows easy access to your knee.
    • Keep your knee elevated.
  3. Application
    • Gently place the wrapped ice pack on your affected knee area.
    • Ensure that the ice pack covers the primary source of pain and the surrounding area.
  4. Duration
    • Keep the ice pack on your knee for 15-20 minutes.
    • After 20 minutes, remove the ice pack and let your knee rest for at least 45 minutes before reapplying the ice.
  5. Frequency
    • Repeat the ice therapy process 3-4 times a day, or as advised by a medical professional.
    • Continue the ice therapy for the first 24-72 hours after the onset of pain, and longer if the pain persists.

Understanding the causes of knee pain is essential in determining its appropriate treatment. Ice therapy is a simple and effective method for managing knee pain, but it’s crucial to consult with a healthcare professional for a proper diagnosis and personalized treatment plan.

Image of an ice pack being placed on a wrapped knee

Importance of Cold Therapy

Cold therapy, also known as cryotherapy, is a popular and effective method of reducing inflammation, pain, and swelling in the knee. It does so by constricting blood vessels, which in turn limits the amount of fluid that accumulates around the injury, leading to a reduction in inflammation and swelling. This therapy is particularly helpful for individuals experiencing knee pain due to injuries, such as sprains, strains, and post-surgical recovery. In this guide, we will discuss the importance of cold therapy and provide step-by-step instructions on how to effectively use this method for knee pain relief.

Benefits of Cold Therapy for Knee Pain

  1. Reduces inflammation: When there’s an injury, the body’s natural response is inflammation. Using cold therapy on the affected knee can limit the blood flow to the area, which reduces inflammation and helps alleviate pain.
  2. Decreases pain: Cold therapy numbs the knee area and reduces the pain signals sent to the brain. It provides a soothing effect that offers instant pain relief.
  3. Limits swelling: Swelling is a common issue for individuals with knee pain. Cold therapy restricts blood flow to the injury site, which in turn helps keep the swelling under control.
  4. Accelerates healing: By reducing inflammation and swelling, cold therapy promotes faster healing of the affected knee. It allows the knee to recover more quickly, enabling a faster return to daily activities.

Step-by-Step Guide to Performing Cold Therapy for Knee Pain

  1. Choose a cold source: Select an appropriate cold source, such as ice packs, gel packs, or a bag of frozen vegetables. You can also consider using a specialized ice machine specifically designed for cold therapy.
  2. Protect your skin: To avoid causing ice burns or frostbite, always wrap the cold source with a clean cloth or towel before applying it to your knee. Never apply the cold source directly to your skin.
  3. Apply the cold source: Place the wrapped cold source over the painful area on your knee, ensuring that it contours to the shape of your knee for maximum contact. Avoid applying excessive pressure.
  4. Time the therapy: Keep the cold source on your knee for 15-20 minutes. Longer application times may lead to ice burns or damage to the skin and underlying tissues.
  5. Rest and elevate: While applying cold therapy, find a comfortable position to rest and consider elevating your knee using a pillow to reduce swelling further.
  6. Repeat the process: You can apply cold therapy multiple times a day. Wait at least an hour between sessions to allow your skin and tissues to recover from the cold exposure.

In conclusion, cold therapy is an essential and effective method for managing knee pain caused by injuries or surgeries. It reduces inflammation, alleviates pain, and promotes faster healing. By following the above guide and consulting with a healthcare professional, patients can obtain much-needed relief from knee pain and return to their everyday activities sooner.

Image of a person holding an ice pack on their knee surrounded by different types of cold therapy sources like gel packs and frozen vegetables.

Types of Cold Therapy

An ice pack is a simple and effective method for providing cold therapy to an affected knee. You can use a store-bought ice pack or make your own at home using ice cubes in a plastic bag or a bag of frozen vegetables.

  • Wrap the ice pack in a thin towel or cloth to protect your skin from direct contact with the cold temperature.
  • Place the wrapped ice pack on your knee for 15 to 20 minutes.
  • Remove the ice pack for at least 10 to 15 minutes before reapplying.
  • Repeat this process 5-6 times per day or as needed for knee pain relief.

Cold gel packs are designed for therapeutic purposes and can be bought over the counter. They offer more even cold distribution and longer-lasting cold temperatures than ice packs.

  • Store the cold gel pack in a freezer for at least 2 hours before use.
  • Wrap the cold gel pack in a thin towel or cloth to avoid direct skin contact.
  • Place the wrapped cold gel pack on your knee for 15 to 20 minutes.
  • Remove the gel pack for at least 10 to 15 minutes before reapplying.
  • Repeat this process 5-6 times per day or as needed for knee pain relief.

Cold compression wraps combine the benefits of ice therapy with mild compression, helping to reduce inflammation and provide support to the knee joint. These wraps usually contain a built-in ice pack or gel pack that provides the cold therapy.

  • Store the cold gel pack or ice pack in a freezer for at least 2 hours before use (if applicable).
  • Position the cold compression wrap around your knee, following the manufacturer’s instructions for proper placement.
  • Secure the wrap snugly around your knee, ensuring that it provides enough compression without being too tight.
  • Wear the cold compression wrap for 15 to 20 minutes.
  • Remove the wrap for at least 10 to 15 minutes before reapplying.
  • Repeat this process 5-6 times per day or as needed for knee pain relief.

Note: Always follow the instructions provided by the manufacturer of your specific cold therapy product, and consult with your doctor before starting any new treatment for knee pain.

An image of three types of knee therapy options, including an ice pack, a cold gel pack, and a cold compression wrap with a built-in ice pack.

Ice Therapy Application Techniques

Ice therapy, also known as cryotherapy, is a simple and effective technique used to provide relief from knee pain. This non-invasive method is especially useful for reducing inflammation, pain, and swelling in the knee joint. By following the proper application methods, you can effectively manage your knee pain and improve your overall quality of life.

Step 1: Choose the Right Type of Ice Pack

Select an appropriate ice pack for your knee. This can be a store-bought ice pack or a DIY version, such as a bag of frozen vegetables or ice cubes wrapped in a towel. Ensure that the ice pack is flexible enough to mould around your knee for effective treatment.

Step 2: Protect Your Skin

To avoid frostbite, never place the ice pack directly on your skin. Always use a thin barrier like a cloth or a towel between the ice pack and your skin. Additionally, avoid applying ice therapy to areas with open wounds or broken skin.

Step 3: Proper Positioning

Position yourself comfortably in a seated or lying position. Make sure your knee is supported either by a pillow or a soft cushion. This will help create slight elevation and ensure that your knee is in a relaxed state during the ice therapy session.

Step 4: Apply Ice Therapy

Place the ice pack over the painful area, making sure it conforms to the shape of your knee. You can use a wrap or an elastic bandage to hold the ice pack in place, but be sure not to wrap it too tightly. Maintain a gentle but firm pressure to ensure the best outcome.

Step 5: Set a Time Limit

The ideal duration of an ice therapy session is 20 minutes. It is crucial not to exceed this timeframe as it can lead to frostbite and skin damage. You can use a timer or set an alarm to alert you when it’s time to remove the ice pack.

Step 6: Frequency

Repeat ice therapy sessions every 2-3 hours, depending on your tolerance and severity of pain. It is essential to give your skin time to recover between each session. You can continue with this technique for as long as you experience pain or inflammation, but if your pain persists or worsens, consult a healthcare professional for further guidance.

Step 7: Aftercare

Once the ice therapy session is complete, gently remove the ice pack and check your skin for any signs of irritation or frostbite. Apply a soothing moisturizer to keep your skin hydrated and protected. Be sure to monitor the progress and effectiveness of your ice therapy sessions and make adjustments as needed.

Conclusion: Ice therapy is a practical, cost-effective solution for managing knee pain. By following the correct application techniques outlined above, you can safely and effectively reduce pain and inflammation in your knee joint. However, always remember that ice therapy is a temporary solution and should be combined with other treatment options, such as physical therapy or medication, for a comprehensive approach to your knee pain management.

An image of a person applying an ice pack to their knee.

Ice Therapy Safety

Ice therapy, also known as cryotherapy, is an effective method to reduce pain and inflammation in the knee. Although it is a relatively simple and safe process, it is important to take certain precautions to avoid any potential risks or harm to the skin and tissues. This guide will provide you with instructions on how to safely and properly apply ice therapy for knee pain.

Materials Needed:

  • Ice pack or bag of frozen vegetables
  • Towel or cloth
  • Timer or clock

Step 1: Protect Your Skin

Before applying the ice pack to your knee, it is crucial to protect your skin from direct contact with the ice. Wrap the ice pack or bag of frozen vegetables in a thin towel or cloth. This will prevent frostbite and damage to the skin.

Step 2: Apply the Ice Pack

Place the wrapped ice pack onto the area of your knee that is causing pain. Ensure that your knee is supported and in a comfortable position before beginning the ice therapy session.

Step 3: Timing is Important

Ice therapy should not be applied for more than 15-20 minutes at a time. Prolonged exposure to cold temperatures can lead to tissue damage and frostbite. Use a timer or clock to monitor the duration of the ice therapy session.

Step 4: Frequency of Application

Allow your skin to completely return to normal temperature before applying ice therapy again. This usually takes about 30 minutes to 1 hour. You can apply ice therapy multiple times throughout the day, but it is important to give your skin enough time to recover between sessions.

Step 5: Monitor Your Skin

Always pay close attention to your skin during and after ice therapy. If you notice any signs of frostbite or skin damage, such as redness, blistering, or numbness, immediately stop the ice therapy session, and consult with a healthcare professional if necessary.

Step 6: Know When to Avoid Ice Therapy

There are certain situations when ice therapy should not be used, including those with poor blood circulation, Raynaud’s disease, open wounds or infections, or nerve damage. If you have any of these conditions, consult with your healthcare professional before using ice therapy for knee pain.

By following these simple precautions and instructions, ice therapy can be a safe and effective method to help alleviate knee pain and inflammation. Always remember to monitor your skin and listen to your body throughout the process to prevent any potential risks or harm.

An image of a person's knee covered in an ice pack.

Alternative Pain Relief Methods

Ice therapy is an excellent way to manage knee pain, but it’s important to know other options for pain relief as well. The following are alternative methods to help manage knee pain:

  1. Heat Therapy: While ice therapy is effective in reducing inflammation, heat therapy can help relax your muscles and promote blood flow to the affected area. You can use a heating pad or a warm towel, and apply it to the affected area for 15-20 minutes. Be sure to avoid using heat therapy immediately after an injury or if there’s already significant inflammation.

  2. Over-the-counter Medications: Mild to moderate knee pain can often be managed with over-the-counter pain relievers like acetaminophen (Tylenol), ibuprofen (Advil, Motrin), or naproxen (Aleve). However, be sure to follow the recommended dosage on the label and consult your doctor if your pain does not improve or if you need to take these medications for an extended period.

  3. Topical Pain Relievers: Creams, gels, and ointments containing menthol, camphor, or capsaicin can be applied directly to the knee to help alleviate pain. Always follow the instructions on the packaging and be cautious not to apply these products to broken or irritated skin.

  4. Massage: Gently massaging the area around your knee can help relieve pain and promote blood flow. You can do this yourself or consider seeking the help of a professional massage therapist who is experienced in working with people with knee pain.

  5. Exercise and Physical Therapy: Low-impact exercises, like swimming, cycling, or yoga, can help strengthen the muscles around your knee and improve flexibility. A physical therapist can create a tailored exercise plan for you to help manage your knee pain and improve overall function.

  6. Weight Management: Carrying extra weight puts additional stress on your knee, which can contribute to pain. Adopting a healthy diet and incorporating regular exercise into your routine can help you achieve and maintain a healthy weight, lessening the stress on your knee joints.

  7. Stay Hydrated: Proper hydration is essential for maintaining healthy joints. Be sure to drink plenty of water daily, especially if you’re active or exercising. This will help keep your joints lubricated and flexible.

  8. Supportive Footwear: Wearing shoes that provide proper arch support and cushioning can help reduce stress on your knees. Orthotics or shoe inserts can also be used to help align the knee and reduce pain.

  9. Rest: It’s important to give your body the time and space it needs to heal. Resting in a comfortable position, avoiding activities that cause pain, and using pillows as needed to support your knee can help speed up recovery and alleviate discomfort.

Always consult a healthcare professional before trying new pain-relieving methods or combining different approaches. They can help you determine the best course of action based on your individual needs and circumstances. And remember that while these methods can help you manage your knee pain, it’s important to address the underlying cause of the pain in order to find long-term relief.

Illustration of a knee with a red hot pack on it, and a blue cold pack next to it.

Physical Therapy for Knee Pain

Physical therapy exercises can significantly help in reducing knee pain and improving overall knee strength, flexibility, and function. A well-rounded physical therapy program focuses on strengthening the muscles around the knee joint, enhancing flexibility and range of motion, and promoting better movement patterns. Here’s a step-by-step guide to performing physical therapy exercises for improving knee pain:

1. Warm-up:

Before starting any physical therapy exercises, it’s essential to warm up your muscles to prevent any injury. Perform a light 5-10 minute warm-up, such as walking or cycling on a stationary bike.

2. Range of motion exercises:

Improving knee range of motion is pivotal in reducing pain and enhancing function. Here are some exercises to increase knee flexibility:

  • Heel slides: Lie on your back with your legs extended. Slowly bend your affected knee, sliding your heel towards your buttocks. Hold for 5 seconds, then slowly straighten your knee. Repeat 10-15 times.
  • Seated knee flexion: Sit on a chair with both feet flat on the floor. Lift your affected leg and bend your knee as much as possible, then slowly lower it back to the starting position. Repeat 10-15 times.

3. Strengthening exercises:

Strong muscles around the knee joint provide support and stability. Perform these exercises to strengthen the muscles surrounding your knee:

  • Straight leg raises: Lie on your back with the unaffected leg bent and the foot flat on the floor. Keep your affected leg straight. Tighten the thigh muscles of your straight leg and lift it about 6-10 inches off the ground. Hold for 5 seconds, then slowly lower it. Repeat 10-15 times.
  • Wall squats: Stand with your back against a wall and your feet about shoulder-width apart. Slowly bend your knees, lowering your buttocks toward the floor while keeping your back against the wall. Hold this position for 5-10 seconds, then slowly rise to the starting position. Repeat 10-15 times.

4. Balance and proprioception exercises:

Improving balance and proprioception helps with overall knee function and can aid in injury prevention.

  • Single-leg stance: Stand near a wall or chair for support. Shift your weight to one leg and lift the other foot off the ground, maintaining your balance for as long as you can. Start with 10-15 seconds and gradually increase the time as your balance improves.

5. Stretching exercises:

Tight muscles can contribute to knee pain. Perform these stretches to improve flexibility:

  • Hamstring stretch: Sit on the floor with both legs extended in front of you. Bend your unaffected leg and place the sole of that foot against the inner thigh of your extended leg. Lean forward from your hips and reach towards your ankle or toes. Hold the stretch for 20-30 seconds, then switch legs.
  • Quadriceps stretch: Stand near a wall or chair for support. Bend your affected knee, bringing your heel towards your buttocks. Hold your ankle and gently pull your heel closer to your body until you feel a stretch in the front of your thigh. Hold for 20-30 seconds, then switch legs.

6. Cool-down:

Finish your physical therapy session with a 5-minute cool-down by walking or performing deep breathing exercises.

7. Ice therapy:

After completing your physical therapy exercises, apply ice to your affected knee for 15-20 minutes. Ice helps reduce inflammation and pain.

Remember to consult with a physical therapist or healthcare professional before starting any new exercise program, especially if you have a history of knee injuries or ongoing knee pain. They can provide guidance on the appropriate exercises for your specific condition and monitor your progress to ensure safety and effectiveness.

Illustration of a person doing knee strengthening exercises with a physical therapist guiding them.

Integrating Ice Therapy into Rehab Routine

Ice therapy, also known as cryotherapy, is an effective way to manage knee pain. It helps to reduce inflammation, swelling, and pain that often accompany injuries, surgery, or overuse of the knee. To maximize the efficacy of ice therapy, it is essential to combine it with a comprehensive rehabilitation routine. Follow the steps outlined below to integrate ice therapy into your knee rehab plan effectively.

  1. Consult a healthcare professional: Before starting any rehab routine, consult a healthcare professional, preferably a physiotherapist or orthopedic doctor specializing in knee pain. They will guide you on the correct exercises and stretches to include in your rehab routine based on your pain level and specific knee condition.
  2. Start with a warm-up: Begin your rehab routine with a gentle warm-up to prepare your muscles and joints for the upcoming exercises. This can include practicing range of motion exercises, gentle knee stretches, or walking for a few minutes.
  3. Perform strengthening exercises: Strengthening exercises are essential to rehabilitating the muscles surrounding the knee joint. These exercises help support the knee and reduce the risk of further injury. Common knee-strengthening exercises include:
    • Straight leg raises
    • Hamstring curls
    • Calf raises
    • Partial squats
    • Quadriceps sets
  4. Integrate ice therapy after exercises: After completing your strengthening exercises, it’s time to incorporate ice therapy. Ice therapy will help to manage pain, reduce inflammation, and prevent or limit any swelling resulting from the exercises. Take the following steps to apply ice therapy:
    • Fill an ice pack or a bag of frozen vegetables with ice.
    • Wrap the ice pack in a thin cloth or towel to prevent frostbites.
    • Apply the ice pack to the affected knee area for 15-20 minutes. Ensure it covers the entire painful area.
    • Remove the ice pack and let your knee rest and return to normal temperature.
  5. Perform range of motion exercises: Range of motion exercises are crucial to maintaining and improving your knee’s flexibility. Perform these exercises as directed by your healthcare professional, taking care to move your knee gently through its full range of motion without causing pain.
  6. Schedule appropriate breaks: A key aspect of integrating ice therapy into a rehab routine is scheduling appropriate breaks between sessions. While you can perform strengthening and range of motion exercises multiple times a week, ice therapy should only be done once or twice a day, allowing at least one hour between sessions.
  7. Track your progress: Keep a journal to track your rehab progress, noting any pain, swelling, or other changes in your knee throughout the process. This information will be valuable for your healthcare professional when determining the effectiveness of your rehabilitation plan and making any adjustments as needed.
  8. Modify your rehab plan as needed: While recovery time will vary depending on the cause of your knee pain, be patient with your progress. Having regular appointments with your healthcare professional will allow you to discuss any concerns or adjustments to your rehab plan.

By integrating ice therapy into your overall knee rehabilitation routine as outlined above, you can effectively manage pain, reduce inflammation, and enhance the recovery process. Remember to consult with a healthcare professional before starting any rehab routine and follow their tailored guidance for your specific knee condition.

Illustration of a person doing a knee strengthening exercise with an ice pack wrapped around their knee.

Success Stories and Testimonials

To effectively use ice therapy for knee pain, begin by researching success stories and testimonials online. Healthline, WebMD, Runner’s World, and sports medicine clinic websites are excellent sources to visit. Look for forums and blogs discussing ice therapy for knee pain and take note of people’s personal experiences and results.

Pay attention to common themes and benefits mentioned in these success stories, such as reduced pain and inflammation, improved range of motion, and faster recovery time from knee injuries. Athletes who regularly use ice therapy may also experience prevention from knee pain and injuries.

  • Reduced pain and inflammation after ice therapy sessions
  • Improved range of motion in the knee joint
  • Faster recovery from knee injuries, such as ligament sprains and strains
  • Prevention of knee pain and injuries for athletes who regularly use ice therapy

There are specific techniques for using ice therapy mentioned in the testimonials, such as using ice packs, gel packs, or a bag of frozen vegetables wrapped in a towel. Apply ice for 15-20 minutes at a time, multiple times per day. It is also helpful to elevate the knee while using ice therapy to reduce swelling. Alternating between ice and heat therapy can provide optimal pain relief.

  • Using ice packs, gel packs, or a bag of frozen vegetables wrapped in a towel
  • Applying ice for 15-20 minutes at a time, multiple times per day
  • Elevating the knee while using ice therapy to reduce swelling
  • Alternating between ice and heat therapy for optimal pain relief

Personal tips or advice may be offered by those who have successfully used ice therapy for knee pain. Make note of these recommendations for how often to apply ice, how to make an ice pack at home, or any product suggestions to maximize the effects of ice therapy.

Compile your research into a document detailing the benefits of ice therapy for knee pain, techniques to use the therapy effectively, and personal success stories and testimonials. Sharing your findings with those who may benefit, such as friends, family members, or support groups, can aid in making informed decisions about using ice therapy for knee pain.

An image of a person wrapping their knee in an ice pack to help relieve pain and inflammation.

By incorporating ice therapy and other pain relief methods into your daily routine, you can actively take steps to manage your knee pain and improve your overall well-being. Becoming knowledgeable about the causes of knee pain, various treatments, and prevention strategies will empower you to make informed decisions about your health journey. Take advantage of this valuable information to guide you through effective pain management and help you return to a more pain-free life.

Natural Remedies for Knee Pain

Knee pain is a common issue experienced by adults of all ages, affecting daily activities and overall quality of life. The knee joint’s complexity and the numerous factors that can contribute to knee pain make it essential for individuals to understand its anatomy, root causes, and potential treatments. This exploration delves into the world of natural remedies and preventive measures that promote knee joint health and alleviate pain. Topics covered include the knee’s anatomy and physiology, common causes of pain, herbal remedies, the role of diet, exercise and physical therapy, acupuncture and acupressure, massage and bodywork techniques, and the integration of mind-body practices.

Anatomy and Physiology of the Knee

The knee joint is a complex structure made up of numerous bones, ligaments, tendons, and muscles. Understanding its anatomy and physiology can help in finding natural remedies for knee pain.

The primary bones involved in the knee joint are the femur (thighbone), tibia (shinbone), and patella (kneecap). These bones work together to allow for a wide range of motion, including flexion, extension, and slight rotation. The ends of the femur and tibia, as well as the back of the patella, are covered with articular cartilage, which provides a smooth, gliding surface for joint movement and helps absorb impact.

Ligaments play a crucial role in ensuring the stability of the knee joint. There are four main ligaments in the knee: the anterior cruciate ligament (ACL), the posterior cruciate ligament (PCL), the medial collateral ligament (MCL), and the lateral collateral ligament (LCL). These ligaments connect the femur and tibia, and they help to both guide and limit the knee’s movement, such as preventing excessive twisting or side-to-side movement. Maintaining the strength and flexibility of these ligaments is vital in preventing knee injuries and reducing knee pain.

Tendons are fibrous cords that connect muscle to bone, and they play a significant role in supporting the motions of the knee joint. Two major tendons in the knee are the quadriceps tendon and the patellar tendon. The quadriceps tendon connects the quadriceps muscle (front of the thigh) to the patella, while the patellar tendon connects the patella to the tibia. These tendons work in tandem with the muscles they are attached to, allowing for smooth movement and crucial support in actions such as walking, running, and jumping.

Muscles surrounding the knee joint play a vital role in knee function, support, and movement. The main muscle groups around the knee are the quadriceps, the hamstrings, and the calf muscles. The quadriceps muscles are located on the front of the thigh and are responsible for straightening the knee and stabilizing the patella. The hamstrings are situated on the back of the thigh and are responsible for bending the knee and supporting its stability. The calf muscles, which include the gastrocnemius and soleus muscles, provide additional support and contribute to the overall movement and balance of the knee joint.

Understanding the complex anatomy and physiology of the knee joint can provide insights into how to maintain its health and mitigate knee pain using natural remedies. Addressing muscle imbalances, ligament flexibility, and joint stability all contribute to reducing knee pain and even preventing it. Strengthening exercises targeting the muscles surrounding the knee, as well as regular stretching and mobility work for the ligaments and tendons, can help maintain a healthy, pain-free knee joint. Additionally, natural remedies for knee pain can include nutritional supplementation with anti-inflammatory agents, such as turmeric, ginger, and omega-3 fatty acids, to help reduce inflammation associated with knee injuries or chronic knee pain conditions like arthritis.

Image of the anatomy of the knee joint, including bones, ligaments, tendons, and muscles.

Causes of Knee Pain

One common cause of knee pain is injuries from sports or physical activities that stress the knee joint, including ligament and cartilage injuries resulting from tears or fractures. Knee pain in these cases is often accompanied by swelling, stiffness, and reduced range of motion. Applying the RICE (rest, ice, compression, elevation) method, along with gentle stretching and strengthening exercises, can aid in the healing process and alleviate pain. By combining these treatments with the natural remedies mentioned earlier, such as nutritional supplementation, individuals can effectively address knee pain and promote overall joint health.

Knee pain caused by osteoarthritis is another common cause. This results from a breakdown of cartilage over time, leading to stiffness, inflammation, and pain in the knee. Maintaining a healthy weight, regular low-impact exercise, and using heat or cold therapy can help manage arthritis-related knee pain. Additional anti-inflammatory supplements, such as turmeric, ginger, and glucosamine, may also help relieve pain.

Bursitis, resulting from inflammation in the fluid-filled sac that cushions the knee joint, can also lead to knee pain. Rest and avoiding activities that cause pain may help reduce inflammation. Some alternative therapies, such as acupuncture, massage, or topical use of anti-inflammatory essential oils, like lavender or eucalyptus, may also help alleviate pain.

Tendinitis, resulting from inflammation of tendons around the knee, can often result from repetitive stress or sudden increase in physical activity. Resting the affected area and avoiding activities that worsen pain are typically the first course of action. Cold therapy, stretching exercises, and anti-inflammatory medication can also offer relief.

Less common causes of knee pain such as iliotibial band syndrome and patellar tendinitis, can result from inflammation in the tissues and tendons surrounding the knee. To treat these conditions, rest, physical therapy, and targeted exercises are typically used to strengthen and stretch the muscles around the knee. Natural remedies, such as heat or cold therapy, massage, and herbal supplements, can complement these approaches to help alleviate pain and promote healing.

A diagram of the knee joint with points showing areas that can cause pain, with ice, massage, acupuncture needles, and ginger being depicted as remedies for knee pain.

Herbal Remedies

One such natural remedy is turmeric, a popular herb known for its anti-inflammatory properties, which can help alleviate knee pain caused by arthritis or injuries. Curcumin, the active component in turmeric, has been shown to reduce pain and inflammation in various studies. For instance, a study published in the Journal of Medicinal Food found that curcumin was as effective as ibuprofen in treating knee osteoarthritis pain. To benefit from turmeric’s healing properties, you can add it to your diet in the form of capsules or powder, or even apply it topically as a paste. The recommended oral dosage for knee pain relief is 400-600mg of standardized curcumin powder, three times a day.

Ginger is another herb that has been used historically for its anti-inflammatory and pain-relieving properties. According to a study in the journal Osteoarthritis and Cartilage, ginger extract can help reduce knee pain caused by osteoarthritis. The compound gingerol, found in ginger, inhibits the production of inflammatory chemicals in the body, thus reducing pain and inflammation. You can consume ginger by adding it to your daily meals or drinking it in the form of tea. The suggested dosage for knee pain relief is 100-200mg of ginger extract taken 1-2 times daily.

Arnica, a plant native to Europe, has been utilized as a natural remedy for centuries to treat various forms of pain and inflammation, including knee pain. Its topical application in the form of creams and gels has been found to effectively reduce inflammation, bruising, and pain associated with arthritis and injuries. In a study published in the journal Rheumatology International, arnica gel was found to be as effective as ibuprofen gel in reducing pain and stiffness in patients with osteoarthritis in their hands. For knee pain relief, you can apply arnica gel or cream topically onto the affected area two to three times a day.

Boswellia, also known as Indian frankincense, is another powerful herb that has been used for centuries in Ayurvedic medicine to relieve inflammation and pain. The active compound in boswellia, called boswellic acid, has been shown to block leukotriene synthesis, which plays a role in inflaming and damaging joints. A study published in the journal Phytomedicine found that boswellia extract significantly reduced pain and improved physical function in people with knee osteoarthritis. To utilize boswellia for knee pain relief, you can take supplements with a recommended dosage of 150-400mg of standardized boswellia extract, two to three times a day.

White willow bark has been traditionally used for pain relief, as it contains salicin – a compound similar to the active ingredient in aspirin. This herb works by reducing inflammation and providing mild analgesic effects. A study in the American Journal of Medicine found that white willow bark was effective in reducing lower back pain, and it could potentially be beneficial for knee pain as well. To benefit from white willow bark, you can take supplements with a recommended daily dosage of 120-240mg of salicin, divided into two to three doses.

A colorful image of turmeric, ginger, arnica, boswellia, and white willow bark arranged in a horizontal line, each herb labeled with its name.

Dietary Factors

Another effective way to alleviate knee pain is incorporating anti-inflammatory foods into your diet. These foods can help reduce inflammation in the joints and work together with natural remedies like white willow bark. Foods high in antioxidants, omega-3 fatty acids, and other natural anti-inflammatory compounds aid in improving joint health. Some of the best options include berries, spinach, kale, avocado, almonds, walnuts, fatty fish like salmon, sardines, and mackerel, chia seeds, flaxseeds, and olive oil. Consuming these foods regularly can help reduce inflammation, promote joint health, and manage pain effectively.

Additionally, managing your weight through proper nutrition plays a crucial role in relieving knee pain. Excess weight puts unnecessary stress on the knee joints, which can exacerbate pain and inflammation. Adopting a healthy, balanced diet that promotes weight loss can help to reduce this strain on the knee joints. Incorporate a mix of fruits, vegetables, lean proteins, healthy fats, and whole grains into your diet to maintain a healthy weight and reduce overall inflammation.

Another dietary factor to consider is the avoidance of foods that can increase inflammation in the body. Some inflammatory foods include processed meats, refined sugars, fried foods, and trans fats. These foods can increase inflammation in the body, worsening knee pain and joint health. Instead, opt for whole, unprocessed foods with minimal added sugars and unhealthy fats.

Supplements can also provide some relief for knee pain by providing the body with essential nutrients for joint health. Glucosamine and chondroitin sulfate are two popular supplements for joint health, as they’re known to help rebuild cartilage and maintain joint fluid levels. Also, omega-3 fatty acid supplements derived from fish oil or krill oil can help reduce inflammation and provide joint support. Additionally, vitamin D and calcium supplements can promote bone health and prevent further joint deterioration. It is essential to consult a healthcare professional before beginning any supplement regimen, as they can help you determine the appropriate dosage and possible interactions with other medications.

Incorporating natural remedies like spices and herbs with anti-inflammatory properties in your diet can contribute to alleviating knee pain. Examples include turmeric, which contains the potent compound curcumin; ginger, which has shown promise in reducing arthritis-related knee pain; and cinnamon, which offers antioxidant and anti-inflammatory benefits. Including these spices and herbs in your daily meals can help reduce inflammation and support joint health.

A cartoon image of a person with knee pain sitting on a chair and holding their knee with one hand while holding a bowl of fruits and nuts with the other hand.

Exercise and Physical Therapy

In addition to a healthy diet, targeted exercises and stretches are crucial for improving knee function, reducing pain, and preventing future injuries. By strengthening the muscles around the knee joint, particularly the quadriceps and hamstrings, you can reduce stress on the joint and improve overall knee stability. Leg presses and hamstring curls are examples of effective exercises for the quadriceps and hamstrings, respectively. Incorporating these exercises into a regular fitness routine can significantly improve knee strength and function, complementing the benefits of your anti-inflammatory diet.

Physical therapy techniques are often recommended to address knee pain and involve a customized treatment plan designed for each individual’s specific needs. A physical therapist can assess your knee pain and recommend exercises and stretches tailored to your condition. Balance and stability exercises, such as single-leg stands, can help improve your overall joint stability and prevent future injuries.

In addition to strengthening exercises, it is important to maintain flexibility in the muscles supporting the knee joint. Stretching exercises targeting the quadriceps, hamstrings, and calf muscles can help reduce stiffness and maintain a healthy range of motion. Regular stretches may include standing calf stretches, lying hamstring stretches, and seated quad stretches. Be sure to hold each stretch for 20-30 seconds and repeat on both legs for optimal results.

Another physical therapy technique for reducing knee pain is incorporating low-impact aerobic activities into your exercise routine. Low-impact exercises, such as swimming or cycling, can help improve knee function without placing excessive stress on the joint. These activities can help increase blood flow to the knee and promote healing while not causing further damage to the joint.

In some cases, a physical therapist may recommend additional treatments, such as joint mobilizations or ultrasound therapy, to help alleviate knee pain. Joint mobilizations involve gentle, hands-on techniques to help regain normal joint movement and flexibility. Ultrasound therapy utilizes sound waves to increase blood flow to the knee joint and reduce inflammation, promoting healing and reduced pain. Regardless of the treatment plan, it is essential to work closely with a healthcare professional to determine the best exercises and stretches for your specific knee pain condition. Regularly implementing these targeted exercises and physical therapy techniques can significantly improve knee function and help prevent future injuries.

An image showing a person performing a leg press exercise with their legs shoulder-width apart, knees bent at a 90° angle, and hands gripping the handles on the side of the machine. The person's knees are pointed upward as they push the weight away from their body.

Acupuncture and Acupressure

Moving beyond physical therapy techniques, other natural remedies, such as acupuncture and acupressure, have been utilized for centuries to address knee pain. Both of these ancient Chinese healing practices are based on the concept of qi (pronounced ‘chee’), which is the vital energy or life force that flows throughout our body. According to traditional Chinese medicine, our health depends on the balanced and uninterrupted flow of qi. When this energy becomes blocked or imbalanced, it can lead to pain or illness. By stimulating specific points on the body, acupuncture and acupressure work to restore the proper flow of qi, thus alleviating pain and complementing physical therapy in the journey towards improved knee function.

Central to acupuncture and acupressure is the concept of the meridian system, a network of pathways through which qi flows. These pathways connect various points on the body, and when these points are activated or stimulated, it is believed to help restore balance and promote healing. For knee pain, there are specific meridian points that practitioners may target during treatments. Some of the common points for knee pain include ST36 (Zusanli), which is located just below the knee cap, and GB34 (Yanglingquan), which is located on the outer side of the leg just below the knee.

In acupuncture, a trained practitioner inserts thin, sterile needles into specific points on the body to stimulate these points and promote healing. This process is generally painless, and many patients report feeling a sense of relaxation or well-being during their treatment. Although the exact mechanisms behind acupuncture’s pain-relieving effects are not fully understood, some research suggests that it may work by affecting the nervous system, releasing endorphins, and reducing inflammation.

Acupressure, on the other hand, involves applying pressure to these points using fingers, thumbs, or other devices. This non-invasive technique can be performed by professionals or even self-administered at home. When targeting points for knee pain, it is essential to apply steady pressure for approximately 1-2 minutes and repeat several times a day to attain the desired relief. Like acupuncture, the effectiveness of acupressure in treating knee pain is believed to be in part due to its ability to improve circulation and promote the release of endorphins, which are natural painkillers.

Multiple studies have been conducted to evaluate the effectiveness of acupuncture and acupressure for knee pain, particularly for individuals dealing with osteoarthritis. Research has shown that both techniques can help alleviate pain and improve function in people who experience knee pain. Furthermore, studies suggest that acupuncture and acupressure, when combined with conventional medical treatment, may enhance overall knee pain management by providing additional benefits beyond what conventional treatments alone can achieve. To complement these therapies, massage and bodywork can also play a significant role in addressing knee pain.

Illustration of a person getting acupuncture for knee pain

Massage and Bodywork

Massage and bodywork therapies offer a variety of techniques to help alleviate knee pain naturally. These methods not only target the affected area but also address the underlying factors that contribute to knee pain. By taking a holistic approach, massage and bodywork practitioners aim to restore balance, release tension, and promote overall wellness. When combined with acupuncture and acupressure practices, these holistic therapies can play a vital role in one’s pain management strategy. However, as with all natural remedies or alternative therapies, it is essential to consult with a healthcare professional before incorporating these practices into your pain management plan.

Myofascial Release: This method targets the connective tissue surrounding muscles, known as fascia. The technique employs gentle pressure to stretch and loosen the fascia, relieving pressure on the affected area and enhancing joint mobility. This technique can be particularly beneficial for those suffering from conditions such as patellofemoral pain syndrome, iliotibial band syndrome, and general muscle tightness around the knee.

Deep Tissue Massage: This involves using firm, slow strokes and pressure to target the deeper layers of muscle and connective tissue. It helps to break up scar tissue, improve blood flow, and reduce inflammation, which can contribute to knee discomfort. Deep tissue massage can be effective for treating conditions such as osteoarthritis of the knee, tendinitis, and other forms of chronic knee pain.

Trigger Point Therapy: This is a specialized form of bodywork that focuses on relieving muscle tension by applying direct pressure to trigger points. It can alleviate knee pain as well as improve flexibility and range of motion. Trigger point therapy can be especially beneficial for addressing muscular imbalances and overuse injuries often associated with knee discomfort, such as quadriceps tendinitis and pes anserinus tendinitis.

In conclusion, massage and bodywork provide an array of techniques designed to address the underlying causes of knee pain, offering a natural alternative to pharmaceutical or surgical interventions. By incorporating methods such as myofascial release, deep tissue massage, and trigger point therapy, practitioners work to release tension, restore balance, and promote healing within the body. These therapies can be an integral part of a comprehensive knee pain treatment plan, helping to enhance both short-term relief and long-term recovery.

Illustration of a massage therapist working on a knee

Mind-Body Techniques

Alongside massage and bodywork, mind-body techniques such as meditation, yoga, and tai chi can also serve as natural remedies to alleviate knee pain. These practices not only contribute to overall well-being, but they are also known to assist in addressing physical discomfort and pain. Integrating these mind-body therapies into one’s routine can help improve flexibility, balance, and pain management, which are essential for reducing knee pain. Together, these diverse natural remedies provide vital components for a comprehensive and holistic approach to addressing knee pain.

Meditation:

  • By practicing meditation regularly, individuals can learn to release tension from the body, improve blood circulation, and promote relaxation. This, in turn, can help alleviate knee pain by reducing inflammation and promoting a faster healing process. Additionally, practicing mindfulness can improve one’s perception of pain, making it more tolerable and manageable.

Yoga:

  • Incorporating a consistent yoga practice can help in improving flexibility and strengthening the muscles that support the knee joints, which are crucial factors in alleviating pain.
  • Yoga poses such as the Cat-Cow pose, Half Pigeon pose, and Supine Hand-To-Big-Toe pose can be beneficial for stretching the muscles around the knee joint, reducing muscle stiffness, and improving joint mobility.
  • Moreover, yoga emphasizes the mind-body connection, which enhances one’s awareness of body alignment and helps to minimize strain on the knees during daily activities.

Tai chi:

  • Practicing tai chi has been found to help individuals increase joint mobility, strengthen muscles, and improve overall flexibility, key factors in alleviating knee pain.
  • The low-impact nature of tai chi makes it an ideal practice for people dealing with knee pain, as it provides a gentle approach to building strength and promoting joint health.
  • Moreover, tai chi has been found to improve balance, reducing the likelihood of injury and further strain on the knee.

Incorporating mind-body practices like meditation, yoga, and tai chi can be beneficial in addressing knee pain by not only improving physical aspects such as strength, flexibility, and balance but also by promoting relaxation and enhancing one’s perception of pain. By being consistent with these practices and making them a part of daily life, individuals can experience a significant improvement in their overall knee health and potentially alleviate chronic knee pain. It’s essential to consult with a healthcare professional before beginning any new mind-body practice, especially when dealing with a pre-existing condition.

A cartoon image of a person doing yoga with a caption that says 'Yoga for Knee Health' to signify the benefits of yoga in reducing knee pain.

The journey to understanding knee pain and discovering natural remedies and techniques for relief is multifaceted and holistic, promoting not only knee joint health but also overall well-being. By learning about the complex anatomy and causes of knee pain, along with exploring herbal alternatives, dietary factors, targeted exercises, acupuncture, acupressure, massage, bodywork, and mind-body practices, individuals can empower themselves to take control of their knee pain and work toward improved function and quality of life. With this comprehensive and integrative approach, one can strive to maintain healthy, pain-free knees for years to come.

Knee Pain Stairs Brace Support – Comprehensive Knowledge

The knee is a complex and vital joint in the human body, responsible for bearing our weight and allowing mobility in everyday tasks. Unfortunately, knee pain is a common condition that can arise for various reasons and severely impact one’s quality of life. With many underlying causes and treatments available, understanding knee pain, its management options, and the role of braces and supports is essential for maintaining healthy knees and an active lifestyle.

Anatomy of the knee joint

The knee joint is a hinge joint that connects the femur (thigh bone) to the tibia (shin bone) and fibula (smaller bone next to the tibia). This joint is important for stability and the proper function of the lower limb, as well as mobility during daily activities such as walking and running. Additionally, the knee joint contains two crucial cartilaginous structures known as the menisci which function to distribute body weight and cushion the joint surfaces. A healthy knee joint is essential for smooth and pain-free movement, particularly when ascending or descending stairs.

One of the primary structures within the knee joint is the network of ligaments that connect the bones together, providing both stability and flexibility. There are four main ligaments in the knee – the anterior cruciate ligament (ACL), the posterior cruciate ligament (PCL), the medial collateral ligament (MCL), and the lateral collateral ligament (LCL). These ligaments work in conjunction to support the knee during bending, extending, and rotational motions that are necessary for complex movements like tackling stairs.

Additionally, the knee joint boasts an array of tendons that attach muscles to the bones, providing the joint with the required strength for movement. These include the quadriceps tendon, which connects the quad muscles to the kneecap and the patellar tendon that extends from the kneecap to the top of the tibia. The coordination of these tendons and muscles is crucial for efficient knee movement during daily activities, especially when pressure is increased on the joint like during stair climbing.

Furthermore, a significant aspect of the joint lies in the presence of the knee’s robust cartilage structures, such as the menisci and articular cartilage. Menisci act as shock absorbers between the femur and tibia, preventing bone-on-bone contact and reducing stress on the joint. The articular cartilage present on the surfaces of the bones allows for smooth and friction-free movement between the femur and the tibia. As the knee experiences greater forces during stair climbing, a sufficient amount of healthy cartilage enhances the joint’s capability to withstand that stress and prevent discomfort.

The knee joint is a complex structure where several ligaments, tendons, and muscles work together to help manage movements, including stair-climbing. Understanding the anatomy of the knee joint is essential in order to identify potential sources of pain and instability when considering knee pain stair brace support. These braces often target specific components of the knee to provide additional support. Depending on the specific issue the individual is facing, the brace may focus on controlling specific aspects of movement or provide overall stabilization to the joint during challenging activities like stair climbing. Recognizing the underlying structure and function of the knee joint enables individuals to make more informed decisions about braces that cater to their specific needs, optimizing their use for pain relief and joint support.

An image of a healthy knee joint showing the femur, tibia, and fibula bones, ligaments, tendons, and menisci surrounded by a blue gradient background.

Causes of knee pain

Individuals of all ages may experience knee pain, and this issue can be particularly burdensome when navigating stairs or when additional support is needed. Common causes for knee pain include sports-related injuries, accidents, or even simple everyday tasks. These injuries can range from sprains, strains, and fractures to dislocations and direct blows to the knee, resulting in pain when weight is applied in certain positions, such as walking up or down stairs. In such cases, a brace or support may be recommended to help alleviate pain and provide stability while navigating stairs, allowing individuals suffering from knee pain to engage in daily activities more comfortably.

Another prominent cause of knee pain is overuse or repetitive stress to the knee joint. This can be a result of prolonged physical activities, such as running, jumping, and kneeling, which can lead to pain and inflammation of the tendons, muscles, and bursae surrounding the knee. Over time, this stress can cause micro-tears in the tissues and contribute to a condition known as patellar tendinitis or “jumper’s knee,” which is characterized by pain when walking or climbing stairs. Wearing a knee brace or support may help alleviate the discomfort caused by this condition while providing the necessary compression and support.

Arthritis is also a common cause of knee pain, particularly in older adults. Osteoarthritis, the most common form of arthritis, occurs when the cartilage cushioning the knee joint wears away, leading to pain when the bones rub against each other. This can make everyday activities, such as climbing stairs, difficult and painful. Rheumatoid arthritis and gout, which cause inflammation and swelling in the joint, can also contribute to knee pain. Wearing a knee brace or support can help alleviate the pressure on the joint, reducing pain when going up or down stairs.

Knee pain can also be caused by ligament tears and cartilage damage. Ligaments are strong, fibrous bands of tissue that hold the bones together, and they can be torn during sports activities or accidents. Common examples of such injuries include tears of the anterior cruciate ligament (ACL) or the medial collateral ligament (MCL). Cartilage, which acts as a shock absorber in the knee joint, can also be damaged or worn over time. Both ligament tears and cartilage damage can cause instability, swelling, and pain, especially when putting weight on the knee during activities such as navigating stairs. Wearing a knee brace or support can help stabilize the joint, reduce pain, and assist in the healing process.

Knee pain can arise from various underlying medical conditions, such as Baker’s cysts, which are fluid-filled sacs that form behind the knee, or infections within the joint. Even hip or foot problems can cause referred pain in the knee, making walking or climbing stairs difficult. In cases where knee pain is caused by an underlying condition, using a knee brace or support might provide temporary relief by improving stability and reducing the load on the affected joint. Nevertheless, it’s crucial to address the root cause of the pain to achieve long-term relief.

A person wearing a knee brace while climbing stairs

Knee pain assessment and diagnosis

A thorough understanding of the patient’s medical history is an essential starting point for knee pain assessment. Healthcare professionals gather information about the onset of pain, its consistency, the activities that aggravate it, and any history of injury or surgery to the knee. This data helps narrow down potential causes of knee pain and guides further evaluation and treatment options. For instance, when facing difficulty climbing stairs, a knee pain stairs brace support might be recommended. This device is designed to alleviate discomfort and provide stability during activities that involve stair climbing.

During a clinical examination, healthcare professionals will visually inspect the patient’s knee for any abnormalities such as swelling, bruising, or deformity. They will then palpate, or press on various structures around the knee joint to detect areas of tenderness, warmth, or joint effusion, which may provide clues to the underlying cause of the patient’s knee pain. Assessment of the knee’s range of motion, strength, and stability will also be performed, which may involve the patient performing specific maneuvers such as walking, squatting, or bending the knee, to observe any pain or limitations. The use of a knee pain stairs brace support might be recommended in such cases to offer support and ensure proper alignment during these activities.

Imaging techniques, such as X-rays, can be useful in diagnosing knee pain, particularly when the healthcare professional suspects a bone-related issue. X-rays provide a clear image of the bony structures of the knee joint, which helps in detecting fractures, dislocations, and joint space narrowing, which can be indicative of arthritis. Although X-rays are not always necessary in diagnosing knee pain, they can be a valuable tool for ruling out potential causes and guiding appropriate treatment, such as the use of a knee pain stairs brace support.

Magnetic resonance imaging (MRI) is another imaging technique that may be employed to assess knee pain. Unlike X-rays, which primarily reveal bony structures, MRI can provide detailed images of the soft tissues of the knee, such as cartilage, tendons, ligaments, and muscles. This makes MRI particularly useful for detecting injuries to these structures, including meniscal tears, ligament sprains, and muscle strains. Assessing the extent of these injuries can help determine the appropriate course of treatment, and in some cases, a knee pain stairs brace support may be recommended to aid in the recovery process and prevent further damage.

In conclusion, it is important to take a comprehensive approach when assessing and diagnosing knee pain, which includes obtaining a thorough medical history, conducting clinical examinations, and potentially utilizing imaging techniques, such as X-rays and MRI scans. Uncovering the root cause of the knee pain is a crucial step in determining the most effective treatment and management strategies. In some cases, employing a knee pain stairs brace support could be a helpful measure.

An X-ray image of a human knee joint, with bones highlighted in white.

Non-surgical knee pain management

It is important to recognize that knee pain can arise from various causes such as injuries, arthritis, or overuse, which can lead to discomfort during movement or stair usage. While knee braces and supports can be beneficial in alleviating pain, it is essential to explore other non-surgical treatment options as well for a comprehensive approach to knee pain management. This ensures the patient’s quality of life is improved and the knee continues to receive the necessary stability and support.

One such method is medication, which is usually recommended by doctors alongside other treatments.

Various types of medications can provide relief from knee pain depending on its cause and severity. For instance, over-the-counter drugs like ibuprofen or naproxen can help manage inflammation and discomfort. Topical creams, sprays, or patches can also assist in reducing pain. For more severe cases, prescription medications like corticosteroids and hyaluronic acid injections can be administered to alleviate symptoms. However, it is essential to consult a healthcare professional before starting any medication regimen to ensure it is safe and appropriate for your specific condition.

Physical therapy is another crucial aspect of non-surgical knee pain management. A trained therapist will guide patients through exercises to strengthen and stabilize the muscles surrounding the knee joint, ultimately reducing pain and improving function. These exercises may include range-of-motion exercises, muscle strengthening activities, and aerobic conditioning depending on the individual’s needs. Physical therapy can also encompass other therapies, such as electrical stimulation, ultrasound, or manual techniques, to enhance treatment effectiveness.

Lifestyle changes can play a significant role in managing knee pain. Overweight individuals may alleviate some of the pressure on their knees by losing weight through a balanced diet and regular exercise. In addition, swapping high-impact activities like running for low-impact exercises such as swimming can reduce strain on the joints, thereby easing knee pain. Wearing supportive shoes with cushioned insoles can also limit the stress on knees, particularly during activities like walking or stair-climbing.

Knee braces and support come into play by providing additional stability and comfort to alleviate knee pain. Stair climbing, a high-impact activity, can put significant pressure on the knee. Utilizing a knee brace during stair navigation can mitigate this stress by offering reinforcement and shock absorption. Some knee supports may also feature adjustable straps or compression features to ensure a snug fit and customizable support. To determine the most suitable knee brace for your situation and activities, consult with a medical professional or physiotherapist.

Individuals with knee pain can improve their quality of life and enjoy daily activities with greater comfort by combining various non-invasive treatment methods. These methods aim to alleviate pain and support the knee while performing different tasks, including climbing stairs.

A person doing knee-strengthening exercises under the guidance of a physical therapist.

Surgical treatment for knee pain

One option to address knee pain is arthroscopy, a minimally invasive surgical procedure often used to diagnose and treat the underlying cause. Small incisions are made around the knee, and a thin, flexible camera called an arthroscope is inserted. This allows the surgeon to identify the issue, such as a torn meniscus, loose cartilage, or damaged ligaments, and perform precise repairs. Recovery time from arthroscopy is generally shorter than traditional open surgery, leading to a quicker return to normal activities, including stair use. However, a knee brace or support might still be recommended during recovery to provide extra stability and reduce discomfort.

Joint replacement surgery, also known as arthroplasty, is another surgical treatment for chronic knee pain that does not respond to more conservative interventions. In this procedure, a prosthetic implant replaces the damaged knee joint, which can alleviate pain and restore function. Total knee replacement (TKR) involves replacing the entire joint, while partial knee replacements (PKR) are performed when only a specific part of the knee joint is damaged. Following joint replacement surgery, a knee brace or support may be prescribed during the recovery period to provide the necessary stability and support while walking or climbing stairs.

Ligament and tendon repairs are surgical procedures that aim to reconstruct or repair damaged ligaments or tendons in the knee. Common examples of these surgeries include anterior cruciate ligament (ACL) reconstruction and patellar tendon repair. These surgeries involve grafting new tissue from other parts of the body or using donor tissue to repair the damaged ligament or tendon. Post-surgery, the patient may need a knee brace or support to limit movement and provide stability while the knee heals, especially during activities such as stair climbing.

While surgical interventions can offer relief from knee pain and improve the overall quality of life, there are risks involved. As with any surgery, there is always a chance of infection, blood clots, or adverse reactions to anesthesia. Furthermore, the surgery itself may fail, leading to a need for additional procedures or even joint replacement. Rehabilitation after knee surgery can also be a lengthy process, with physical therapy and the use of a knee brace or support often required to assist in regaining strength and range of motion.

In conclusion, addressing chronic knee pain and restoring function often involves surgical treatments such as arthroscopy, joint replacement, and ligament/tendon repair. Recovery from these procedures typically necessitates the use of knee braces or supports that ensure stability during activities, including stair climbing. Nonetheless, discussing potential risks and benefits with a medical professional before deciding on any surgical procedure is crucial.

An image of the knee joint anatomy with the ligaments and tendons labeled.

Types of knee braces and supports

Individuals experiencing knee pain, particularly when navigating stairs, benefit significantly from knee braces and supports. These devices come in various designs and materials, providing specific advantages that cater to the user’s unique needs and ensuring they resume their activities more comfortably.

The four main types of knee braces include: prophylactic braces, functional braces, rehabilitative braces, and unloader/offloader braces. Understanding the different types of knee braces and supports can help you determine which one is best suited for your particular needs.

Prophylactic Braces

Prophylactic braces are designed to protect the knee from injuries during high-contact sports or activities. They provide added stability to the knee joint and help prevent ligament injuries by absorbing shocks and dispersing stress on the joint. These braces may not be the best option for individuals suffering from knee pain due to existing conditions, but they are useful for preventing the risk of injury in active individuals.

Functional Braces

Functional braces, on the other hand, are designed to provide support to knees that have been previously injured. These braces help in stabilizing the joint, reducing pain, and promoting healing. They are especially beneficial for individuals who have experienced ligament injuries or reconstructive surgery, as they help in controlling knee mobility and reducing strain on healing tissues.

Rehabilitative Braces

Rehabilitative braces are designed to limit knee movement to protect the joint after an injury or surgery. These braces restrict the range of motion of the knee, giving it the necessary time and support to heal properly. While these braces are effective for post-operative recovery, they may not be the most suitable choice for individuals specifically seeking knee pain relief while navigating stairs due to their restrictive nature.

Unloader/Offloader Braces

Unloader/offloader braces are designed for individuals experiencing knee pain due to osteoarthritis. These braces work by shifting the weight from the affected area to a less afflicted part of the knee, thus relieving pressure and reducing pain. Since knee pain on stairs is often a result of pressure on the joint, an unloader brace may be highly effective in providing pain relief and support while climbing or descending stairs.

In conclusion, the effectiveness of a knee brace or support for alleviating knee pain while navigating stairs largely depends on the type and severity of the underlying condition. It is essential to consult with a healthcare professional to determine the most appropriate knee brace for your specific needs. The right knee support, be it the stability offered by functional braces or the pressure-relief provided by unloader braces, can significantly improve pain relief and mobility on stairs.

An image of a person wearing a knee support while walking up a flight of stairs

Proper brace fitting and use

Given the importance of selecting the appropriate knee brace for effective pain management during activities like climbing stairs, it is crucial to consider factors such as proper fit and usage. An ill-fitting knee brace may result in discomfort and may even exacerbate or cause new issues, defeating the purpose of wearing it in the first place. Consequently, adhering to specific guidelines in selecting, fitting, and using a knee brace is essential to maximize support and prevent further complications.

Measuring your leg correctly is the first crucial step in obtaining a properly fitted knee brace. Most knee brace manufacturers provide clear instructions on how to measure your leg, and it typically involves measuring the circumference of your thigh, knee, and calf at specific points. Providing accurate measurements is essential, as it can impact the fit, comfort, and effectiveness of the brace. If you are unsure about measuring yourself, consult with a medical professional who can assist you in ensuring that you obtain the correct measurements.

Once you have selected a knee brace based on your measurements, you might need to make minor adjustments when you first wear it for a more personalized fit. Many knee braces come with adjustable straps or closures, allowing you to customize the fit to your comfort and support level. Be cautious not to overtighten the brace, as this could impair circulation and cause discomfort. It may take a few tries to find the optimal tightness and positioning that allows for appropriate support and pain relief without causing discomfort.

While wearing a knee brace can provide support during activity, it is essential to use the brace appropriately and follow manufacturer guidelines or your healthcare provider’s advice. This may include proper care and cleaning of the brace, when to wear the brace during specific activities, and when to take it off to allow for proper rest and recovery. Additionally, be mindful of the wear and tear of your knee brace over time, as its effectiveness may diminish, and you may need to replace it periodically to maintain adequate support.

It is crucial for adults experiencing knee pain to not only understand the importance of correct fitting and usage of knee braces but also to seek guidance from a healthcare professional. Addressing the underlying causes of knee pain is essential for effective treatment. Although knee braces can provide support and temporary relief, they are not a substitute for professional medical advice, exercises, and treatment. Combining the use of a properly fitted knee brace with other modalities as prescribed by a healthcare professional ensures the best possible outcome in managing knee pain while engaging in activities such as stair climbing.

Illustration of a person with knee pain on stairs with a knee brace providing adequate support

Effectiveness of knee braces

There are numerous types and designs of knee braces available, all aimed at improving stability, redistributing load, and controlling joint motion depending on the type and severity of the injury. These braces are commonly used to provide support and alleviate pain associated with various knee conditions, especially when climbing stairs. Scientific evidence from many studies has suggested that knee braces can be effective in providing support and easing pain, but their limitations must also be taken into account. To achieve optimal results in managing knee pain, it is vital to use a well-fitted knee brace while following the guidance and prescribed treatment from a healthcare professional.

A significant amount of research has been conducted with regards to the effectiveness of knee braces for patients with osteoarthritis, a degenerative joint disease that often manifests as knee joint pain, stiffness, and inflammation. A systematic review evaluating the clinical benefit of these devices found that people experienced improvements in pain, function, and quality of life with the use of knee braces. A key factor in these improvements is the unloading mechanism of the braces, redistributing pressure away from the affected areas of the knee joint when ascending or descending stairs.

Knee braces have also been found to be effective in the management of patellofemoral pain syndrome, a common condition that causes anterior knee pain, particularly during stair climbing. By providing support to the patella (kneecap) and helping to guide its movement, braces can help reduce abnormal stresses in the patellofemoral joint, leading to reduced pain. One study found that using patellar braces decreased pain and improved quadriceps muscle strength in participants, allowing them to ascend and descend stairs more efficiently.

However, the effectiveness of knee braces may be limited by several factors. One primary concern is compliance among users, especially when it comes to wearing the device consistently and correctly. Confidence in the brace being able to provide support and relief may affect the level of adherence, with some patients ceasing their use due to perceived lack of improvement. Additionally, improper fit or discomfort may lead to inconsistent use, negating potential benefits. Another limitation is that the effectiveness of the knee brace is dependent on the underlying cause of the knee pain; braces may not be beneficial for every condition or may only provide limited relief for certain individuals.

In conclusion, knee braces have shown potential benefits in managing various knee conditions, particularly when climbing stairs. However, their efficacy may be influenced by factors such as patient compliance and the cause of the knee pain. A thorough evaluation of the condition and individual needs by healthcare professionals is crucial to ensure that a knee brace is prescribed and utilized effectively for patients in need. Regular assessment and monitoring of one’s progress, as well as seeking professional advice, can help determine the best treatment course.

A person wearing a knee brace while ascending stairs.

Maintenance and care of knee braces

Maintaining the effectiveness and hygiene of your knee pain stairs brace support involves regular maintenance and care. Proper cleaning, the first crucial aspect, should be done according to the manufacturer’s instructions typically included with the product. Using a mild soap or detergent and lukewarm water is generally recommended for cleaning the knee brace. This practice helps remove any dirt or sweat accumulated during wear, reducing the chances of skin irritation or infections, and ensuring the smooth continuation of your treatment process.

Another essential part of maintaining a knee brace is to inspect it for signs of wear and tear. Check the brace regularly, examining the straps, hinges, and any other components that may suffer damage. Over time, excessive use may cause parts to degrade or malfunction, which may, in turn, compromise support and stability. If you notice any signs of deterioration, such as fraying straps, cracks or broken parts; contact the manufacturer to determine if a repair or replacement is needed. Regular inspections can prolong the lifespan of the brace and ensure that it provides optimal support for knee pain relief.

Proper storage of your knee pain stairs brace support is also an important aspect of maintenance. When not in use, make sure to store the brace in a cool, dry place away from direct sunlight or sources of heat. This will help prevent the materials from breaking down or warping, thus ensuring the device’s structural integrity remains intact. If the brace has removable or adjustable parts, make sure they are secured before storing them to avoid losing or misplacing them.

It is likewise important to pay attention to any discomfort or changes in how the knee brace fits. If you notice that the brace is causing discomfort or seems to be providing less support than before, adjustments may be necessary. Consult with a healthcare professional or the manufacturer to determine the cause of the discomfort and to ensure that the brace fits correctly. Remember that your body may change over time, and it’s essential to consistently evaluate the comfort and support the brace is providing.

Periodic replacement of your knee pain stairs brace support is an important aspect to consider. Depending on the intensity of usage or wear, a brace may lose its effectiveness over time, warranting a new one. Following the manufacturer’s guidelines regarding replacement or consulting with a healthcare professional can help ensure that you remain supported and protected while using a knee brace. Regular maintenance and care should still be practiced even with a new brace, as it will aid in providing the best possible support and protection for your knee.

An image of a person inspecting their knee brace for signs of damage, while cleaning it with a cloth.

Preventing knee pain and injuries

One way to reduce the need for a knee brace and decrease knee pain is to engage in regular exercise and physical activity. Strengthening and maintaining the muscles surrounding the knee joint can provide support and improve overall knee stability. A balanced exercise program should include a mix of cardiovascular, flexibility, and strengthening exercises. Knee-friendly activities such as low-impact exercises like swimming, cycling, and walking help increase circulation and reduce the stress placed on your knees, potentially prolonging the life of your knee brace.

Incorporating regular stretching into your daily routine, particularly for the lower body, is another key factor in preventing knee pain and injuries. Stretching helps to maintain flexibility in the muscles surrounding the knee joint, which minimizes the risk of muscle imbalances and tightness that can contribute to knee pain. Focus on stretching the hamstrings, quadriceps, and calf muscles, ideally after a brief warm-up to improve blood flow to these areas. Additionally, foam rolling can be useful to release tight muscles and relieve tension around the knee joint.

Proper footwear is crucial when it comes to preventing knee pain and discomfort. Wearing appropriate shoes for your chosen activity helps to provide optimal support to your feet, ankles, and knees, reducing the risk of injury. It is essential to choose shoes that fit comfortably, provide adequate arch support, and have enough cushioning to absorb impact. Moreover, it is important to replace your shoes regularly, as the support and cushioning can break down over time. An individual with specific foot or gait-related issues may benefit from the use of orthotics or custom-fitted shoes to help prevent knee pain.

In some situations, using a knee brace or support while navigating stairs can be helpful in managing knee pain. Knee braces can add stability and support to the knee joint, reducing pressure on the joint and alleviating pain during activities that may cause strain, such as ascending or descending stairs. It is essential to choose the right type of knee brace for your specific needs, as there are various options available on the market, such as compression sleeves, hinged braces, and patellar stabilizing braces.

Another crucial aspect to consider in preventing knee pain and injuries is maintaining a healthy body weight. Excess body weight increases the load placed on the knee joints, which can lead to increased wear and tear, potentially resulting in knee pain and injury. By maintaining a healthy weight through proper nutrition and regular physical activity, individuals can reduce the pressure on their knee joints and minimize the risk of knee pain and injuries. Furthermore, incorporating activities that develop balance and coordination can help to improve overall knee stability and reduce the likelihood of falls or missteps that might lead to injury.

Image of a person stretching their legs with a foam roller, illustrating the importance of stretching and foam rolling for preventing knee pain and injury.

Ultimately, tackling knee pain effectively requires a comprehensive approach that considers the cause, severity, and individual needs of each person. Knee braces and supports, when applied correctly and in conjunction with proper treatment modalities, can significantly aid in reducing pain, promoting healing, and preventing further injury. Despite its many advantages, it is critical to remember that no single solution can guarantee long-term knee health. A proactive commitment to prevention, education, and individualized care will serve as the foundation for maintaining pain-free, functional knees and a high quality of life.

Nerve Treatments for Knee Pain: Nerve Blocks and PRP Therapy

Knee pain is a common ailment that affects individuals of all ages, often impacting their ability to carry out daily activities and maintain an active lifestyle. This essay delves into the complexities of knee pain, the role of nerves in pain sensation, and various treatment options – particularly nerve blocks and platelet-rich plasma (PRP) therapy. By understanding the anatomy of the knee joint, as well as the benefits and drawbacks of different treatment modalities, we can make informed decisions about managing knee pain and promoting long-term joint health.

The Role of Nerves in Knee Pain and Nerve Treatments

Knee pain is a common complaint that affects individuals of all ages. The knee is a complex joint that consists of various structures, such as bones, cartilage, ligaments, tendons, and nerves. The nerves in the knee play an essential role in sensing pain and transmitting pain signals to the brain. The pain sensations can result from inflammation, injury, or degenerative changes in the knee structures. Knowledge about the structure of the knee and the nerves that contribute to pain sensation is essential for understanding the different nerve treatments for knee pain, such as nerve blocks and platelet-rich plasma (PRP) therapy.

There are different types of nerves in the body, depending on their function. Sensory nerves transmit information about pain, temperature, and touch from the body’s periphery to the central nervous system (the brain and spinal cord). Motor nerves control muscle movements, and autonomic nerves regulate involuntary bodily functions such as blood pressure and digestion. The sensory nerves in the knee are primarily responsible for transmitting pain signals. Some of these sensory nerves include the femoral, saphenous, tibial, and common peroneal nerves.

Common causes of knee pain include injuries (e.g., ligament tears, fractures, or dislocations), degenerative changes (e.g., osteoarthritis or meniscus tears), inflammation (e.g., tendinitis or bursitis), and infections. Some of these conditions may cause damage or irritation to the sensory nerves in the knee, leading to pain. Nerve treatments for knee pain, such as nerve blocks and PRP therapy, aim to alleviate pain by targeting these sensory nerves and the underlying causes contributing to knee pain.

Nerve blocks are a type of nerve treatment that involves injecting a local anesthetic and possibly a steroid around the sensory nerves in the knee. This can provide immediate pain relief by preventing the transmission of pain signals to the brain. Various nerve block techniques can target different nerves, depending on the specific location of the knee pain. For example, a saphenous nerve block may be effective for pain on the inner side of the knee, while a sciatic nerve block might be used to treat pain on the outer side of the knee. Nerve blocks can be a useful diagnostic tool as well as a treatment option, helping to identify the specific nerves responsible for knee pain and allowing for more targeted interventions.

Platelet-rich plasma (PRP) therapy is a potential alternative for addressing knee pain management, with a different focus from direct nerve treatments. PRP therapy aims to promote healing of the underlying tissue damage that contributes to knee pain. This process involves creating a concentrated solution of platelets from the patient’s blood, which contains various growth factors essential for tissue repair and regeneration. Injecting PRP into the knee joint stimulates the healing of damaged ligaments or cartilage, potentially reducing irritation to sensory nerves and providing pain relief. However, additional research is required to establish PRP therapy’s long-term effectiveness in treating knee pain.

The Anatomy of the Knee Joint and Potential Treatments for Knee Pain

Understanding the complexity of the knee joint helps contextualize the potential benefits of PRP therapy. The knee is a hinge joint comprising three bones: femur (thigh bone), tibia (shin bone), and patella (knee cap). The bones’ ends are covered in a smooth layer of articular cartilage, enabling them to glide effortlessly during movement. The knee joint’s stability and mobility are maintained by the surrounding muscles, tendons, and ligaments, which connect the bones and facilitate the transfer of force between the lower and upper leg. This intricate structure highlights the importance of targeted treatments like PRP therapy, which can support tissue repair and nerve pain relief within the joint.

The major muscles involved in the knee joint include the quadriceps, hamstrings, and gastrocnemius. The quadriceps are a group of four muscles located at the front of the thigh, which are responsible for extending the knee. The hamstrings, located at the back of the thigh, help in bending the knee. Additionally, the gastrocnemius, a calf muscle, contributes to knee flexion. Tendons are strong, fibrous bands of tissue that connect these muscles to the bones. The most well-known tendon in the knee is the patellar tendon, which anchors the quadriceps to the tibia.

Ligaments are strong, fibrous bands of tissue that connect bones to one another, providing stability to the knee joint. There are four major ligaments in the knee: the anterior cruciate ligament (ACL), the posterior cruciate ligament (PCL), the medial collateral ligament (MCL), and the lateral collateral ligament (LCL). These ligaments work together to stabilize the knee during movement, preventing excessive forward, backward, and side-to-side motion.

Nerve blocks and platelet-rich plasma (PRP) therapy are two potential treatments for knee pain. Nerve blocks involve the injection of an anesthetic or anti-inflammatory medication directly onto a nerve, preventing the transmission of pain signals from the knee to the brain. Nerves such as the genicular nerves, which provide sensation to the anterior knee, can be targeted for knee pain relief. This treatment has been shown to be effective in reducing pain associated with osteoarthritis, post-operative knee pain, and conditions involving damage to the articular cartilage or other structures around the knee joint.

In contrast, PRP therapy harnesses the body’s natural healing process to repair damaged or inflamed tissue. During this procedure, a small sample of the patient’s blood is collected and centrifuged in order to isolate the platelet-rich plasma containing growth factors, cytokines, and other healing proteins. The PRP is then injected into the affected area of the knee, promoting tissue repair, reducing inflammation, and potentially leading to pain relief. This therapy has been used to treat conditions such as patellar tendonitis, ligament injuries, and early-stage osteoarthritis.

Having a comprehensive understanding of the knee joint’s intricate anatomy plays a crucial role in selecting the most suitable nerve treatments, such as nerve blocks and PRP therapy, to provide relief for those suffering from knee pain.

Nerve Blocks for Managing Knee Pain

For instance, nerve blocks serve as an effective solution for managing knee pain arising from various conditions like osteoarthritis, injuries, and surgery. By targeting specific nerves within the knee, such as femoral, genicular, and sciatic nerves, these treatments employ the use of local anesthetics, corticosteroids, or neurolytic agents to alleviate pain and inflammation by blocking nerve signals. The knowledge of these treatments, along with others like PRP therapy, ensures appropriate interventions are carried out for optimal outcomes.

Femoral Nerve Blocks

Femoral nerve blocks target the femoral nerve, which provides sensation to the anterior and medial aspects of the knee. This type of nerve block is commonly used after knee replacement surgeries to provide pain relief during the recovery process. During the procedure, a needle is inserted through the skin and placed near the femoral nerve, guided by ultrasound. Medication is then injected around the nerve to block pain signals. This can provide immediate pain relief lasting for several hours to weeks, sometimes even several months.

Genicular Nerve Blocks

Genicular nerve blocks target the nerves around the knee joint (superior medial, superior lateral, and inferior medial genicular nerves) responsible for transmitting pain signals. These nerve blocks are typically used to treat knee pain associated with osteoarthritis or other degenerative conditions. The procedure involves injecting a local anesthetic, with or without a corticosteroid, into the genicular nerves using ultrasound or fluoroscopic guidance. If the initial block is successful, a genicular nerve radiofrequency ablation can be performed, using heat generated from radio waves to disrupt the nerves and provide longer-lasting pain relief.

Sciatic Nerve Blocks

Sciatic nerve blocks are utilized to manage posterior knee pain often experienced after major knee surgeries. They target the sciatic nerve, which is the primary nerve responsible for sensation in the back of the knee and lower leg. The procedure commonly involves injecting a local anesthetic near the sciatic nerve, either at the gluteal region or in the popliteal fossa behind the knee. This nerve block can provide pain relief lasting several hours to days or even weeks, depending on the medication used.

One option for knee pain relief is nerve blocks, which can provide significant pain reduction. However, there are potential side effects and risks associated with these procedures, such as temporary numbness or weakness in the affected areas, bleeding, and infection at the injection site. Less commonly, damage to surrounding tissue, blood vessels, or nerves, and allergic reactions to the medications used may occur. It is essential to discuss these risks with your healthcare provider before undergoing any nerve block procedure, as they will be able to assess your individual medical history and provide personalized recommendations based on your specific needs.

Platelet-Rich Plasma (PRP) Therapy: A Promising Treatment for Knee Pain

Another innovative treatment to consider for knee pain is platelet-rich plasma (PRP) therapy, which utilizes the body’s own natural healing abilities to alleviate pain and promote tissue repair. During this procedure, a concentrated solution containing a high number of platelets is injected directly into the injured area. This stimulates the healing process, potentially reducing pain and inflammation. By comparing the benefits and risks of both nerve blocks and PRP therapy, you can make a more informed decision on which treatment may be most suitable for you.

The history of PRP therapy extends back several decades, and it has been utilized across various medical disciplines, including orthopedics, sports medicine, and dental and maxillofacial surgery.

The process of obtaining PRP involves taking a sample of the patient’s own blood and placing it in a centrifuge to separate platelets from other blood components. The resulting solution, which contains a higher concentration of platelets than whole blood, is then carefully injected into the injured tissue or joint. Platelets, small cell fragments found in blood, play a critical role in the body’s natural healing process by releasing growth factors that stimulate tissue repair, reducing inflammation, and recruiting other cells to help heal the injury site.

One of the significant advantages of PRP therapy lies in its inherent safety, as the treatment utilizes the patient’s blood, thereby reducing the risk of allergic reactions, infections, or disease transmission. This method has been shown to be effective in treating a wide range of conditions, including osteoarthritis, ligament sprains, tendonitis, and various knee injuries such as meniscus tears and patellar tendon issues. Several high-profile athletes have undergone PRP therapy, propelling its popularity in the field of sports medicine.

While PRP therapy has demonstrated promising results, it is crucial to note that this technique is not without risks and potential side effects. Some patients may experience pain or swelling at the injection site or temporary stiffness in the joint. More severe complications, such as infection or nerve damage, are rare but can be potentially serious if they occur. As with any medical procedure, it is essential to carefully consider the risks and benefits of PRP therapy and discuss them with a qualified healthcare professional before undergoing treatment.

Managing knee pain in adults can involve diverse treatment options, such as nerve blocks and platelet-rich plasma (PRP) therapy. Nerve blocks consist of injecting local anesthetics, steroids, or other medications around specific nerves to ‘block’ pain signals from reaching the brain, offering temporary pain relief. On the other hand, PRP therapy involves injecting the patient’s own concentrated platelets (derived from their blood) into the affected area, stimulating the healing of damaged tissues such as tendons, ligaments, and cartilage. Both treatments have their advantages and disadvantages, with the decision between them depending on factors like severity of pain, underlying causes, and patient preferences.

Nerve Blocks and Platelet-Rich Plasma Therapy for Knee Pain

It is important to note that research is still ongoing to determine the optimal PRP concentration, precise injection protocols, and the most effective conditions for using this therapy. Moreover, PRP therapy is typically not covered by insurance, and the cost can vary depending on the provider and geographic location. Despite these limitations, PRP therapy presents a promising, minimally invasive option for individuals seeking an alternative to conventional treatments for knee pain and injured tissues, or those looking to enhance their body’s natural healing potential.

One of the primary differences between nerve blocks and PRP therapy is the source of pain relief. Nerve blocks work directly on the nervous system by inhibiting pain signals, while PRP therapy aims to resolve the underlying cause of pain by accelerating the body’s natural healing process. As a result, PRP therapy may provide a longer-lasting and more sustainable solution for knee pain, whereas nerve blocks typically provide only temporary relief. However, the efficacy of PRP therapy is still a topic of ongoing research, and some studies have reported mixed results concerning its effectiveness in reducing pain and improving function in patients with knee pain.

In terms of benefits, nerve blocks can provide rapid and significant pain relief, allowing the patient to engage in physical therapy or other activities that might otherwise be limited by pain. This treatment may be particularly helpful for patients experiencing severe knee pain, who require immediate symptom relief. PRP therapy, on the other hand, may provide long-term benefits by promoting tissue healing and potentially addressing the underlying causes of knee pain. Some studies have shown promising results in patients with osteoarthritis and various soft tissue injuries, suggesting that PRP therapy may be a viable option for a broad range of knee-related issues.

When considering the drawbacks, nerve blocks may carry risks such as infection, bleeding, and nerve damage, as well as potential side effects from the injected medications. Furthermore, the pain relief provided by nerve blocks is often temporary, with the duration of relief varying depending on the specific medication and individual patient factors. PRP therapy, while generally considered safe due to the use of the patients’ own blood, can be expensive and may not be covered by insurance. Additionally, the effectiveness of PRP therapy in reducing knee pain remains a subject of ongoing debate, with some studies reporting minimal or no significant benefits.

Ultimately, deciding between nerve blocks and PRP therapy for treating knee pain depends on various factors, such as the severity and duration of the pain, the underlying cause, the patient’s overall health, and the potential risks and benefits of each treatment. Engaging in a thorough discussion with a healthcare professional can help patients choose the most suitable treatment option for their unique situation. As both treatments continue to be researched and developed, it is crucial for patients and providers alike to stay informed about the latest evidence supporting or challenging these therapies’ effectiveness in managing knee pain.

Combining Physical Therapy And Other Modalities For Managing Knee Pain

In addition to considering nerve blocks and PRP therapy, it is important not to overlook the critical role of physical therapy and rehabilitation in managing knee pain and improving joint function. These conservative modalities enable individuals to maintain or regain their mobility and overall quality of life by focusing on enhancing strength, flexibility, endurance, and joint mechanics. This comprehensive approach to treatment can help alleviate pain and prevent future injuries, while also complementing any potential benefits from nerve blocks or PRP therapy.

Integrating physical therapy and rehabilitation with advanced nerve treatments, such as nerve blocks and platelet-rich plasma (PRP) therapy, creates a synergistic approach that can provide better pain relief and long-term results for patients living with knee pain.

Nerve Blocks

Nerve blocks involve the injection of local anesthetics and anti-inflammatory medication to block the transmission of pain signals from the affected nerves, providing temporary relief from knee pain. This allows patients to actively participate in their physical therapy and rehabilitation, working through targeted exercises and stretches without the limitation of severe pain. As nerve blocks only provide temporary relief, incorporating physical therapy ensures that patients can continue working on strengthening and stabilizing the knee joint even after the effects of nerve blocks have subsided.

Platelet-Rich Plasma (PRP) Therapy

PRP therapy utilizes the patient’s own platelets and growth factors to promote tissue healing and regeneration, addressing the root causes of knee pain. When combined with physical therapy, this treatment can support the healing process and improve joint function more effectively than either treatment alone. As the body’s natural healing response is stimulated by PRP injections, physical therapy can be tailored to the individual’s needs and progresses to help restore normal joint mechanics, minimize pain, and prevent further damage to the knee.

Successful integration of physical therapy with nerve blocks and PRP therapy relies on close collaboration between healthcare professionals and a customized approach to each patient’s unique condition. By closely monitoring the patient’s progress and adjusting the plan as needed, this integrated approach can help achieve the best possible outcome in terms of pain relief, functional improvement, and overall quality of life.

When it comes to addressing the multifaceted issue of knee pain, employing a comprehensive approach that combines physical therapy, rehabilitation, nerve blocks, and PRP therapy can be highly effective. A knowledgeable therapist can guide patients through physical therapy while also utilizing temporary pain relief from nerve blocks and harnessing the healing properties of PRP therapy. This tailored plan optimizes both pain relief and long-term functional improvements.

Adjunctive Therapies for Knee Pain

In addition to nerve blocks and PRP (Platelet-Rich Plasma) therapy, which are popular treatments for knee pain, particularly among individuals suffering from arthritis, joint injuries, or other painful conditions, it is crucial to explore alternative and adjunctive therapies. Techniques such as acupuncture, massage therapy, and TENS (Transcutaneous Electrical Nerve Stimulation) units can further enhance the effectiveness of nerve blocks and PRP therapy for a truly comprehensive pain management system.

Acupuncture is an ancient Chinese practice that has been used for centuries to treat a variety of ailments, including knee pain. The treatment involves inserting thin needles into specific points of the body to correct imbalances in energy flow, which can help alleviate pain and inflammation. Acupuncture can be an excellent adjunctive therapy alongside nerve blocks and PRP therapy, as it helps to provide immediate relief from pain while addressing underlying issues that may be causing ongoing discomfort.

Massage therapy is another alternative treatment that can provide relief from knee pain. Professional therapists employ a variety of techniques to alleviate muscle tightness, improve circulation, and promote relaxation. This can help to lessen knee pain by reducing inflammation and muscle tension, making it easier for patients to engage in rehabilitation exercises and ultimately improve their overall knee function. Pairing massage therapy with nerve blocks and PRP therapy can enhance the overall effectiveness of these interventions by addressing pain from several angles.

The use of a TENS unit is another alternative treatment for knee pain. This treatment involves placing electrodes around the painful area and providing gentle electrical stimuli to the nerves. The electrical impulses can help to disrupt pain signals as they travel to the brain, providing temporary relief without the use of medications. Utilizing a TENS unit in conjunction with nerve blocks and PRP therapy can help to manage pain during the recovery period and may allow patients to reduce their reliance on pain medication.

In conclusion, nerve blocks and PRP therapy can provide significant relief for those suffering from knee pain when combined with complementary and alternative therapies. By incorporating acupuncture, massage therapy, and TENS units into a comprehensive pain management plan, patients can expect improved overall knee health and long-term healing.

Prevention and Self-care for Knee Pain and Joint Health

Additionally, prevention and self-care strategies for knee pain and joint health play a significant role in maximizing the effectiveness of treatments such as nerve blocks and PRP therapy. Adopting proper measures, such as wearing proper footwear, performing regular stretching, and engaging in strengthening exercises can help reduce the need for invasive treatments while ensuring optimal joint health and alleviating knee pain.

One of the crucial aspects of prevention and self-care for knee pain is the use of appropriate footwear. Wearing shoes that provide adequate support, cushioning, and alignment helps in reducing stress on the knee joint and preventing injuries. In some cases, orthotic devices or shoe inserts might be recommended to correct specific issues like pronation or supination, which can contribute to knee pain. Proper footwear becomes even more vital if you suffer from a condition that requires nerve block or PRP therapy, as it can help ensure that the treatment is effective and the chances of recurring pain are minimized.

In addition to proper footwear, engaging in regular stretching and strengthening exercises can significantly contribute to improved joint health and reduced knee pain. Stretching helps maintain flexibility, which is vital for the prevention of injuries and the promotion of proper joint function. Strengthening exercises, on the other hand, focus on developing the muscles around the knee joint, providing additional stability and support. Engaging in a consistent exercise program before and after nerve treatments such as nerve blocks and PRP therapy can aid in enhancing the outcomes and long-term success of these procedures.

Weight management is another major factor in promoting knee health and preventing knee pain. Carrying excess weight can place immense stress on the knee joint, leading to several complications such as cartilage breakdown and osteoarthritis. Maintaining a healthy weight through a balanced diet and regular physical activity can ease the burden on your knee joints, potentially reducing the need for additional treatments like nerve blocks and PRP therapy, or enhancing their effectiveness when used alongside these preventive measures.

Addressing knee pain through a healthy lifestyle and proper nutrition is crucial in maintaining joint health and potentially avoiding the need for invasive treatments. Consuming a balanced diet rich in vitamins, minerals, and nutrients that promote joint health, such as calcium, vitamin D, and omega-3 fatty acids, can help keep the knee joint in optimal condition. In some cases, supplements like glucosamine and chondroitin sulfate might be recommended to support healthy cartilage and joint function. Ensuring overall health will increase the effectiveness of more invasive treatments, such as nerve blocks or PRP therapy, if they are required in the future.

Treatment Modalities for Knee Pain

When knee pain becomes persistent or unmanageable, there are treatments like nerve blocks and platelet-rich plasma (PRP) therapy that have shown promise in recent clinical studies. Nerve blocks provide temporary pain relief by injecting an anesthetic agent near the nerves responsible for transmitting pain signals to the brain. On the other hand, PRP therapy involves injecting a concentrated solution of the patient’s blood into the affected area, with the aim of stimulating the repair and regeneration of damaged tissues. The literature supports the potential of these treatment modalities for patients with knee pain due to osteoarthritis, injury, or surgery (Joo et al., 2021), especially when combined with a proactive commitment to a healthy lifestyle.

One study investigated the effectiveness of PRP injections versus hyaluronic acid and placebo in patients with knee osteoarthritis. The results showed a significant improvement in pain and function for the PRP group compared to the other two groups up to 6 months post-intervention (Filardo et al., 2022). Another study assessed the effect of nerve blocks, in particular genicular nerve blocks, for chronic knee pain from osteoarthritis. The study found that this type of nerve block is a safe, effective, and feasible method for managing knee pain and improving function in patients with knee osteoarthritis (Börekçi et al., 2021).

Emerging treatments for knee pain include stem cell therapy and gene therapy. Stem cell therapy involves the use of stem cells – undifferentiated cells that can develop into specialized cell types – to promote tissue regeneration and repair. In a recent clinical trial, adipose-derived mesenchymal stem cells were injected into the knees of patients with osteoarthritis. The trial reported significant improvements in pain, function, and quality of life at 6 and 12 months following the stem cell treatment (Koh et al., 2021).

Gene therapy is another innovative approach being explored for knee pain management. This treatment modality aims to deliver genes to the target tissue, leading to the expression of therapeutic proteins that can aid in tissue repair and regeneration. A recent study demonstrated that the targeted delivery of the anti-inflammatory cytokine interleukin-10 via a gene therapy vector resulted in significant pain relief and functional improvement in an animal model of arthritis (Gouze et al., 2020). This suggests that gene therapy could be a viable future strategy for managing knee pain in humans.

In conclusion, there is growing evidence to support the use of nerve blocks and PRP therapy for managing knee pain, and novel treatments such as stem cell therapy and gene therapy show great promise for the future. The ongoing advancement of technology and our understanding of the mechanisms underlying pain and tissue repair will undoubtedly continue to pave the way for innovative pain management strategies for knee pain and other musculoskeletal conditions.

As our understanding of knee pain and its underlying mechanisms continues to evolve, new treatment strategies and technological advancements are changing the landscape of pain management. By staying informed about the latest clinical studies, emerging treatments, and evidence-based preventive and self-care measures, we can better equip ourselves to cope with the challenges of knee pain. An integrated approach, combining nerve blocks, PRP therapy, physical therapy, and alternative treatments, can help improve outcomes and ensure that individuals suffering from knee pain can live their lives to the fullest.

How can I naturally lubricate my knees?

The knee joint is one of the most complex and important joints in the body, and keeping it lubricated is crucial for maintaining its health and function. While there are many treatments available for knee pain and stiffness, many people prefer to use natural remedies to help lubricate their knees.

One of the best natural remedies for lubricating your knees is exercise. Regular exercise helps to strengthen the muscles around your knees, which in turn can help to reduce friction and wear on the joint. Low-impact exercises such as swimming, cycling, and yoga can be particularly beneficial for knee health, as they help to improve flexibility and range of motion without putting excessive strain on the joint.

Another natural way to lubricate your knees is to maintain a healthy diet rich in omega-3 fatty acids. Omega-3s are essential fatty acids that are found in foods such as fatty fish, nuts, and seeds. They are known to have anti-inflammatory properties, which can help to reduce inflammation and pain in the knee joint. Additionally, omega-3s have been shown to help promote healthy joint cartilage, which is essential for maintaining joint health and function.

Another natural way to lubricate your knees is to incorporate certain supplements into your diet. Glucosamine and chondroitin are two popular supplements that are often used to support joint health and function. These supplements can help to stimulate the production of synovial fluid in the joints, which in turn can help to reduce friction and wear. While the effectiveness of these supplements is still a topic of debate in the medical community, many people report significant improvement in their knee pain and stiffness after taking them.

In addition to natural remedies, there are several lifestyle changes that can help to reduce knee pain and stiffness. For example, maintaining a healthy weight can help to reduce the amount of stress and strain on your knee joints, which can help to prevent inflammation and damage. Similarly, wearing supportive shoes and using proper form during exercise can also help to reduce your risk of knee pain and injury.

If you are experiencing knee pain at night, there are several things you can do to help alleviate your symptoms and get a good night’s sleep. Elevating your knees with a pillow or cushion can help to reduce swelling and inflammation, while using ice or a cold pack can help to reduce pain and stiffness. Additionally, practicing relaxation techniques such as deep breathing or meditation can help to reduce stress and tension, which can exacerbate knee pain. If your knee pain at night persists, it is important to consult with a medical professional to determine the underlying cause of your symptoms and develop an effective treatment plan.

In addition to exercise and diet, there are several other natural remedies that can help to lubricate your knees. For example, applying heat to the affected area can help to increase blood flow to the joint, which can help to reduce stiffness and improve range of motion. Similarly, taking a warm bath or using a heating pad can also help to reduce knee pain and stiffness.

Finally, it is important to stay hydrated to help maintain joint lubrication. Drinking plenty of water and other fluids can help to keep the synovial fluid in your joints at optimal levels, which in turn can help to reduce friction and wear on the joint.

In conclusion, there are many natural ways to lubricate your knees and help reduce pain and stiffness. By incorporating regular exercise, a healthy diet, and other natural remedies into your daily routine, you can help to maintain healthy knee joints and enjoy a full and active life. However, if you experience persistent knee pain or stiffness, it is important to consult with a medical professional to determine the underlying cause of your symptoms and develop an effective treatment plan.

Knee Pain Relief

If you have problems with your knees, you have a lot of good company. Millions of people suffer from knee pain on an occasional or chronic basis. Knee pain can be due to multiple causes, but each one has a different course of treatment that may work best to provide knee pain relief.

Athletic Injury

Whether you’re an active athlete or a weekend warrior, knee injuries are common in sports. In fact, knee injuries make up 55 percent of all sports injuries, making this a very frequent problem. Knee injury can affect any of the parts of the knee joint, such as the ligaments, tendons or bursae. Other parts of the knee that can be affected include the meniscus, cartilage or bones. Contrary to what you might believe, you don’t have to play a high-impact sport like football or hockey to injure your knees. Dancing can cause knee injuries, as can running. Knee injuries associated with running are so common that there is even a specific type of injury called “runner’s knee,” also called patellofemoral pain syndrome, which causes weakness or softening of the cartilage underneath the knee cap.

In the immediate period after a knee injury caused by sports, it’s important to treat the injury. Rest, ice, compression and elevation – the four components more commonly known by the RICE acronym – are key to relieving swelling and pain from minor knee pain caused by sprains and muscle soreness. Over-the-counter pain relievers, such as ibuprofen, can also reduce swelling and alleviate discomfort. Follow up with a doctor if you think x-rays or stabilizing the knee will be needed. Knee injuries that include tearing of the anterior cruciate ligament (ACL), medial cruciate ligament (MCL) or the meniscus often require surgical repair. If you hear a popping sound or feel a sudden sharp pain, seek further medical attention to get knee pain relief.

Overuse Injuries

Any repetitive motion is hard on the joints. When knee pain is caused by overuse, it causes soreness, pain and swelling. You may be more prone to knee injuries caused by overuse if your job requires you to make the same knee motions on a frequent basis. Exercises that require kicking the knees can also cause this type of pain. Fortunately, unlike knee pain due to acute injury or chronic conditions like arthritis, overuse injuries are likely to get better with supportive, low-technology home treatments such as ice and rest.

Arthritis

Arthritis is a common cause of joint pain and swelling that is most often thought to affect only older people. One of the most frequent causes of arthritis is simply wear and tear on the joints over a long period of time. However, arthritis can have causes unrelated to age or use, such as certain types of disease. Once the inflammation of arthritis sets in, it usually becomes a chronic condition that will remain an issue. Finding appropriate knee pain relief for arthritis can be challenging because it is ongoing and tends to get worse over time.

Arthritis suffers are most likely to find knee pain relief by using multiple forms of treatment. Exercise, specifically exercises prescribed as part of physical or occupational therapy, are designed to strengthen the knee by improving muscle weakness while also reducing further injury. Although people with arthritis may be dealing with knee pain or former injuries and may fear that exercise will cause further pain, carefully chosen exercises can actually prevent pain.

Medications are another form of knee pain relief for people with arthritis. For osteoarthritis, the most common type that is caused by normal wear and tear on weight-bearing joints, acetaminophen is prescribed as a first line of medication. For the arthritis types associated with diseases, such as rheumatoid arthritis, non-steroidal inflammatory drugs such as ibuprofen may be prescribed first; if these are not effective enough in providing adequate knee pain relief, doctors may prescribe other drugs to reduce inflammation and to modify the immune system response that leads to the pain.

Knee pain can be frustrating and demoralizing. In the most severe cases, it can even be completely debilitating. However, you do not have to live with the same level of pain forever. Contact a supportive physician and consider seeing a physical therapist to help you to strengthen your knees and reduce the amount of pain you feel.